---
updatedAt: 2026-08-17T10:53:57.000Z
---
Fetch the complete documentation index at: https://docs.akeyless.io/llms.txt. Use this file to discover all available pages before exploring further. Append .md to any documentation page URL to get its markdown version.
# RBAC
Role-Based Access Control
Akeyless Role-Based Access Control (RBAC) follows the least privilege principle to limit access rights for machines/human users to the bare minimum of permissions they need to perform their work.
We associate specific clients with a certain Authentication Method to an Access Role to increase operational flexibility. The user can define any number of roles with permissions per each role.
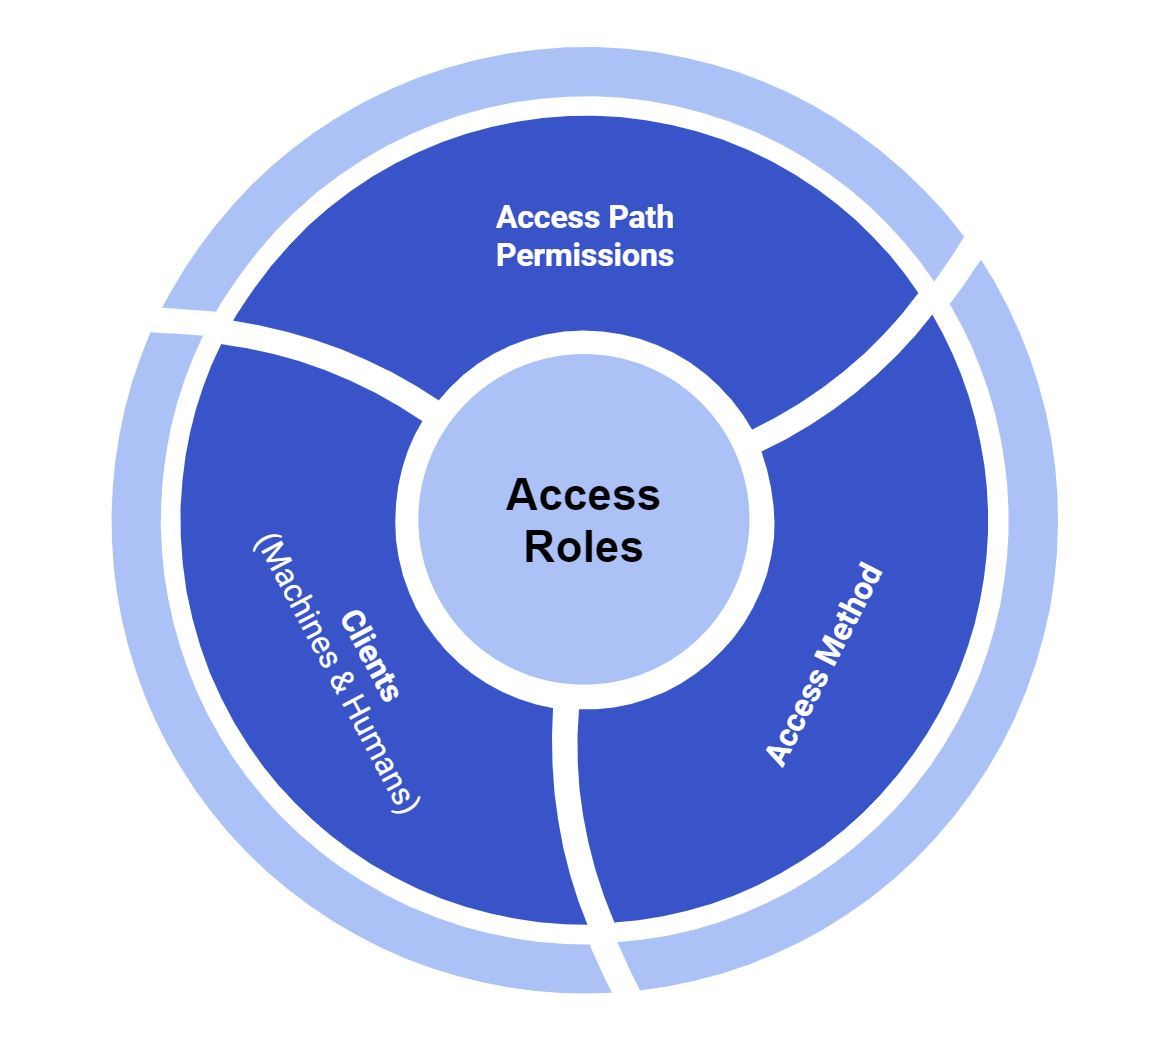
Access Roles can be configured to grant permissions on Secrets, Encryption Keys, Targets, Authentication methods and Access Roles, you can also control user access to Audit Logs, analytics, Gateways settings and Secure Remote Access (SRA) information.
To set permission for a user to work with any item in the Platform, an appropriate Access Role must be assigned to the Authentication Method that represents this user. By default, users don't have any permissions in Akeyless unless explicitly granted.
To associate an [Authentication Method](https://docs.akeyless.io/docs/access-and-authentication-methods) with a role from the Akeyless [Command Line Interface (CLI)](https://docs.akeyless.io/docs/cli), first run the following command to create an [API Key](https://docs.akeyless.io/docs/auth-with-api-key):
```shell
akeyless auth-method create api-key --name client1
```
Create a new access role:
```shell
akeyless create-role --name role1
```
To set all authentication methods associated with a specific role access to all **Items** under **/path/to/folder/** with read, create, and update permissions, use:
```shell
akeyless set-role-rule --role-name role1 --path "/path/to/folder/*" --capability read --capability create --capability update
```
To set the role with access for additional items type like **Targets**, **Auth Methods**, **Access Roles**, **Secure Remote Access **or **Agentic Runtime Authority **, you can simply set the `rule-type` inside the command:
```shell Targets
akeyless set-role-rule --role-name role1 --path "/path/to/folder/*" --rule-type target-rule --capability read --capability create --capability update
```
```shell Auth Methods
akeyless set-role-rule --role-name role1 --path "/path/to/folder/*" --rule-type auth-method-rule --capability read --capability create --capability update
```
```shell Access Roles
akeyless set-role-rule --role-name role1 --path "/path/to/folder/*" --rule-type role-rule --capability read --capability create --capability update
```
```shell Secure Remote Access
akeyless set-role-rule --role-name role1 --path "/path/to/folder/*" --rule-type sra-rule --capability allow_access # other options '--capability justify_access_only' '--capability request_access'
```
```shell Agentic Runtime Authority
akeyless set-role-rule --role-name role1 --path "/path/to/folder/*" --rule-type ara-rule --capability allow_access
```
Despite the fact that users do not have access to items unless granted explicitly, to protect sensitive items from access, you can **deny** all the authentication methods associated with a role to access the relevant item, for example **/path/to/folder/topSecret** (does not include Secure Remote Access):
```shell
akeyless set-role-rule --role-name role1 --path /path/to/folder/topSecret --capability deny
```
Add **client1** to **role1**, so client1 can access all items under **/path/to/folder/** apart from **/path/to/folder/topSecret**:
```shell
akeyless assoc-role-am --role-name role1 --am-name client1
```
## Permission Types
Akeyless has six main permission types for Items, Access Roles, Auth Methods, and Targets that can be assigned to specific items, folders, or entire accounts. For Secure Remote Access only, there are six permission types.
The built-in admin role has full access to all parts of the accounts.
### **Warning:**
It is considered a best practice **not** to use an API Key as the authentication method associated with your Admin role. We highly recommend you select one of the other available [Authentication Methods.](https://docs.akeyless.io/docs/access-and-authentication-methods)
### Permissions for Items, Access Roles, Auth Methods, and Targets
The existing permissions for Items, Access Roles, Auth Methods, and Targets are as follows:
* List: Allows a user to list the items available under an authorized path.
* Read: Allows a user to read the items available in an authorized path.
* Create: Allows a user to create new secrets and items in an authorized path.
* Update: Allows a user to update existing secrets and items in an authorized path.
* Delete: Allows a user to delete existing secrets and items in an authorized path.
* Deny: Allows a user to deny any permission to other users in their authorized path.
### **Note:**
Some Akeyless permissions include others in them. For example, `list` is included under all other permissions, and `deny` has a complete override over any other permission.
#### Privilege Elevation Prevention
Non-admin users cannot create or modify an access role to grant positive capabilities (read, create, update, delete) that exceed their own effective permissions on any given path. This constraint applies to all permission types, ensuring that a user can only delegate what they themselves are authorized to do.
#### Deny Rule Application and Role Management
Deny rules will be automatically added to a role only when the user creating the role has existing deny restrictions (that is non-admin users only). In such cases, all deny rules that apply to the user will also be applied to the newly created role. This is intended to prevent users from creating roles with broader permissions than they are allowed.
After the role is created, it functions independently, and any user with sufficient permissions not affected by those deny rules, can modify or delete the role. Removing a deny rule from a role does not automatically remove it from other roles that were affected. If the rule was applied to multiple roles, it must be removed explicitly from each related role by an authorized user for security reasons.
This design ensures that the RBAC system remains resilient against permission elevation, upholding strict access control and enforcement standards.
### Permissions for Secure Remote Access
The existing permissions for Secure Remote Access are as follows:
* Allow Access: Allows a user full access to login to a remote resource.
* Request Access: Allows a user to request access and requires adding a reason for access. Once the request is sent, an admin or approver receives a notification in the Event Center to approve or deny. If approved, the user can then access the remote resource.
* Justify Access Only: Allows a user to access a remote resource only after entering the reason for access.
* Approval Authority: Allows a user to be part of the eligible approvers for Secure Remote Access Requests of the organization in the specified path. This option cannot be selected if “Request Access” is enabled.
* Upload Files: Allows a user to upload local files for example to a remote Windows machine using a button on the top menu. More information [here](https://docs.akeyless.io/docs/sra-remote-desktop#download--upload-files).
* Download Files: Allows a user to download files for example from a remote Windows machine to their local machine. More information [here](https://docs.akeyless.io/docs/sra-remote-desktop#download--upload-files).
SRA users can request access from the portal and approvers can process the request through the Event Center.
### Permissions for Agentic Runtime Authority
The existing permissions for Agentic Runtime Authority are as follows:
* Allow Access: Allows an Agent access to login to a remote resource without exposing the secret value
## Administrative Rules
With Administrative Rules, you can choose whether users have access only to the resources they own (**Own**), access to items users have `list` permission for (**Scoped**), or access to all resources (**All**).
### **Note:**
The **Own** option is only relevant for **Audit Logs** and **Analytics**.
The following **Administrative Rules** can be set:
* `Audit Log`
* `Analytics`
* `Gateways`
* `Secure Remote Access`
* `Agentic Runtime Authority`
* `Reverse RBAC`
* `Manage Event Forwarders`
* `Usage Reports`
## Reverse RBAC Review
Reverse RBAC can be used to review who has access to object types beyond Items and Targets, including Secure Remote Access and Agentic Runtime Authority paths.
For command syntax and full parameter details, see the [CLI Reference - Access Roles reverse-rbac command](https://docs.akeyless.io/docs/cli-reference-access-roles#reverse-rbac).
Use the CLI `reverse-rbac` command with:
* `--type sra` for Secure Remote Access rules
* `--type ara` for Agentic Runtime Authority rules
## Access Permissions View: Scoped Reverse RBAC Requirements
With Reverse RBAC set to **Scoped**, `read` access to a resource alone isn't enough to load a complete Access Permissions view.
For the view to display all relevant data, the user must have:
* `list` access on the resource.
* `list` access on associated resource types (Auth Methods / Access Roles).
Missing either of these will result in a partial or incomplete view, since the cross-referenced entries can't be looked up without list access to those related types.
## Event Center Rules
You can define which events users are allowed to view based on their account permissions.
Users can either:
* View **All** events in the account
* View only events related to objects for which they have `Read` permissions, by using the **Own** option.
In addition, you can control which Event Forwarders users are allowed to manage.
Users can either:
* Manage **All** Event Forwarders in the account, or
* Be restricted to managing specific forwarders
You can set the allowed Forwarder names in two ways:
* **Explicit name**: Specify an exact Event Forwarders name that users can manage, for example: `Demo-Event-Forwarder`: allows users to create or manage an Event Forwarder with this exact name.
* **Template-based name**: Use templates to define allowed names dynamically, based on user claims. For example: `{{username\}}-*`: uses the value of the username claim. If the claim value is `bob`, the user will be allowed to create or use Event Forwarders with names like `bob-*`.
### **Note:**
Managing Event Forwarders requires both administrative **RBAC** permissions and [Gateway access permissions](https://docs.akeyless.io/docs/gateway-authentication-and-access#/).
## Access Roles Syntax
In general, you can set an Access Role to a specific item only:
In this example we will create a role that grants `read` permission to `mysecret`, which is located under `/foo` folder:
```shell
akeyless set-role-rule --role-name role1 --path "/foo/mysecret" --capability read
```
To provide access to all secrets with a well-defined prefix:
In this example, we will create a role that grants `read` permission to all secrets or any items under a folder that starts with `devops-` prefix, which are located under `/foo` folder:
```shell
akeyless set-role-rule --role-name role1 --path "/foo/devops-*" --capability read
```
In addition, a `+` can be used to denote any number of characters bounded within a single path segment:
```shell
akeyless set-role-rule --role-name role1 --path "foo/+/+/bar/*" --capability read
```
This Access Role will permit reading secrets under those folders path:
`foo/any/folder/bar/*`, `foo/other/folder/bar/*`, and so on.
## Multiple Rules
If you wish to apply multiple rules to your role in one command, you can use a `JSON` file using `-f` or `--file` parameter to the command, that will lead to a JSON file in the following way:
```shell
akeyless set-role-rule --role-name role1 --file-rules path/to/file.json
```
The JSON file structure should be as follows:
```json
{
"secret/foo": [{
"rule-type": "item-rule",
"capabilities": "[read, list]",
"ttl": "30"
},
{
"rule-type": "role-rule",
"capabilities": "[read, list]"
}
],
"secret/bar": [{
"rule-type": "target-rule",
"capabilities": "[delete, list]"
}]
}
```
Where the relevant Akeyless paths, for example, `secret/foo` and `secret/bar` correlate with the `--path` parameter, the rule type with the `rule-type` key, and the capabilities with the `capabilities` key that you would attach to a single rule command as described above.
## View As
To verify the settings of your Access Roles, you can use the **Impersonate As** feature inside the Akeyless Console. Admins can validate and explore what kind of access they grant to clients.
Click your account logo in the top-right corner of your console, and select **Impersonate As**.
In the dialog, choose from the drop-down menu an existing [Authentication Method](https://docs.akeyless.io/docs/access-and-authentication-methods). Where needed, provide the relevant [Sub-Claims](https://docs.akeyless.io/docs/sub-claims) as well to validate the level of access the relevant audience has.
## Tutorial
Check out our tutorial video on [Role-Based Access Control (RBAC)](https://tutorials.akeyless.io/docs/role-based-access-control-with-api-key-authentication).