Custom Action in ServiceNow For Email Auth
Develop a Custom Action in ServiceNow for Akeyless API Requests
Creating a custom action in ServiceNow, particularly for the purpose of making POST API requests to an external system like Akeyless, is a crucial step in automating and integrating workflows. This capability allows ServiceNow to interact with other platforms, enabling a variety of automated processes that enhance efficiency, security, and scalability.
Why Custom Actions for POST API Requests?
Custom actions in ServiceNow are needed for sending POST API requests to external platforms because:
- Automation and Integration: They allow ServiceNow to programmatically interact with external APIs, automating tasks that would otherwise require manual intervention.
- Customization: You can tailor the API request to match the exact requirements of the external system, including specific headers, body content, and authentication details.
- Control and Security: Custom actions provide a controlled environment to securely manage how data is sent out of ServiceNow, including sensitive information that might be required by the external API.
How to Create a Custom Action in ServiceNow
To create a custom action in ServiceNow for sending a POST API request, follow these general steps:
Step 1: Define Your API Requirements
- Understand the API you're calling, including the endpoint URL, required headers, and the JSON body structure for your POST request.
For our use case we will use the following Akeyless API endpoints
https://api.akeyless.io/authhttps://api.akeyless.io/create-auth-method-emailhttps://api.akeyless.io/assoc-role-am
Step 2: Access ServiceNow's Flow Designer
- Navigate to Flow Designer in ServiceNow by searching for it in the navigation filter box.

- Flow Designer is a powerful tool in ServiceNow that allows you to automate processes and create custom actions without writing a lot of code.
Step 3: Create a New Action
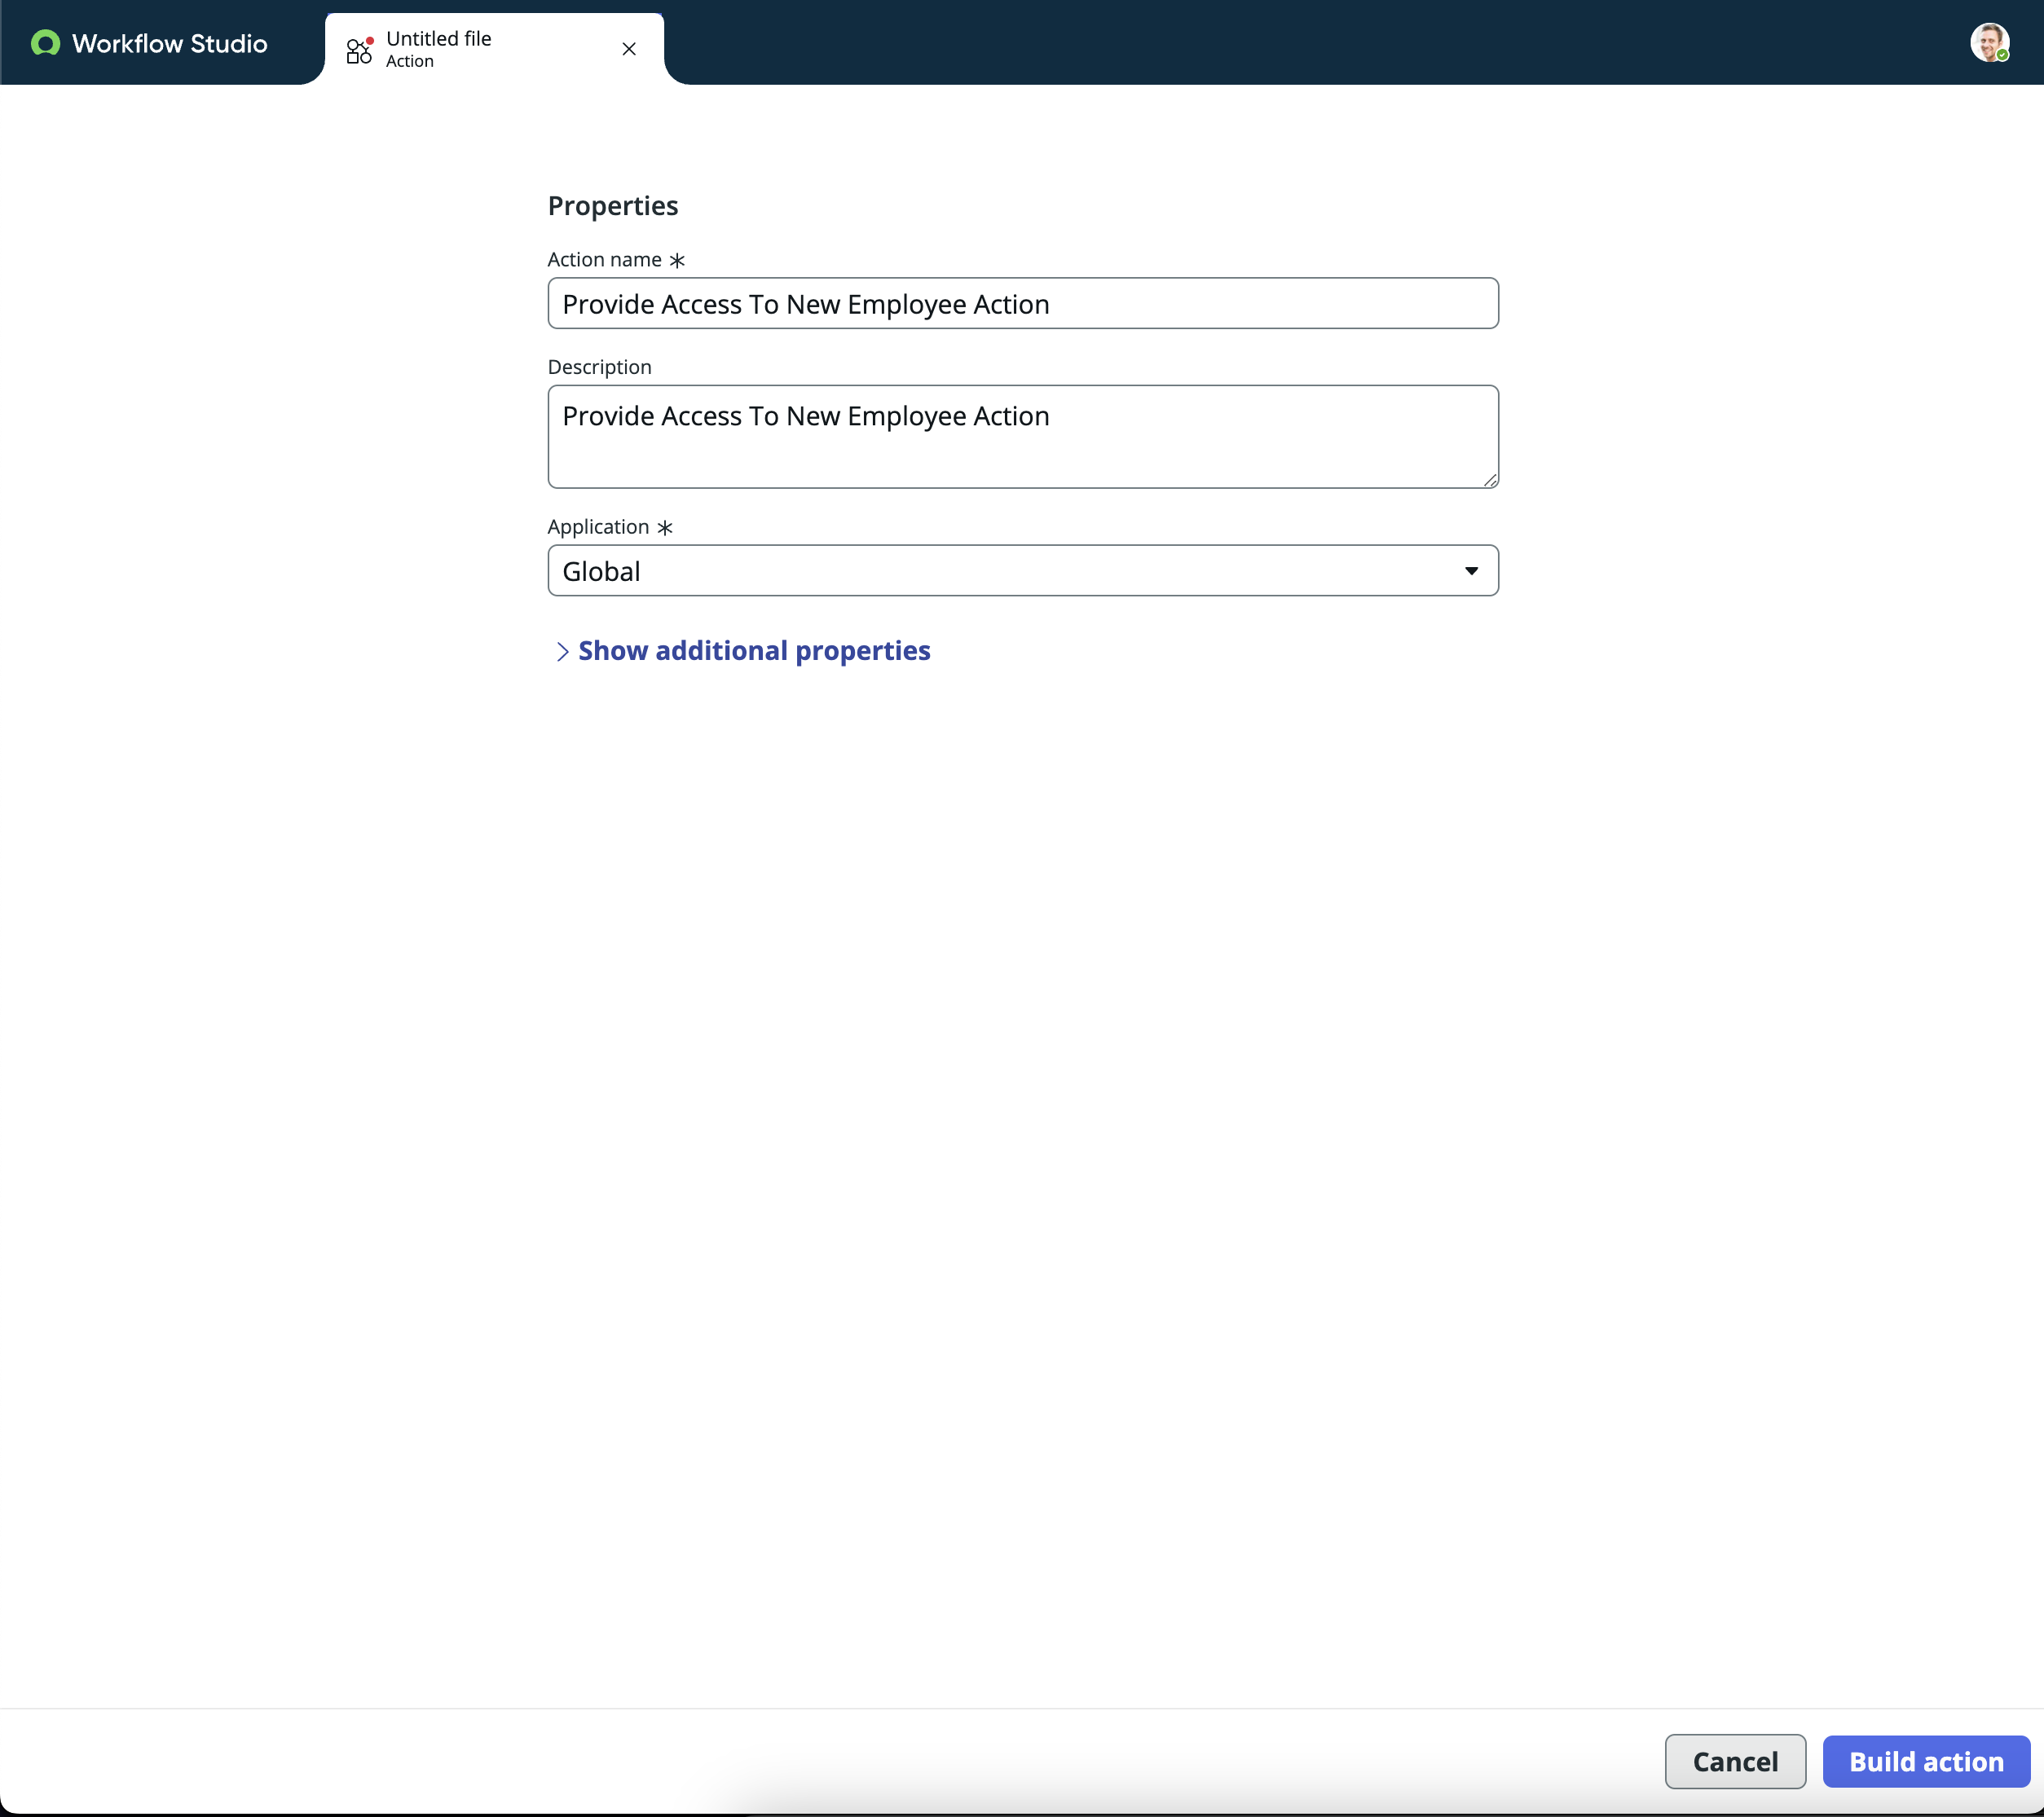
- In Flow Designer, go to the Actions tab and click on New Action.
- Provide a name for your action that clearly describes its purpose.
Step 4: Configure the Action Inputs
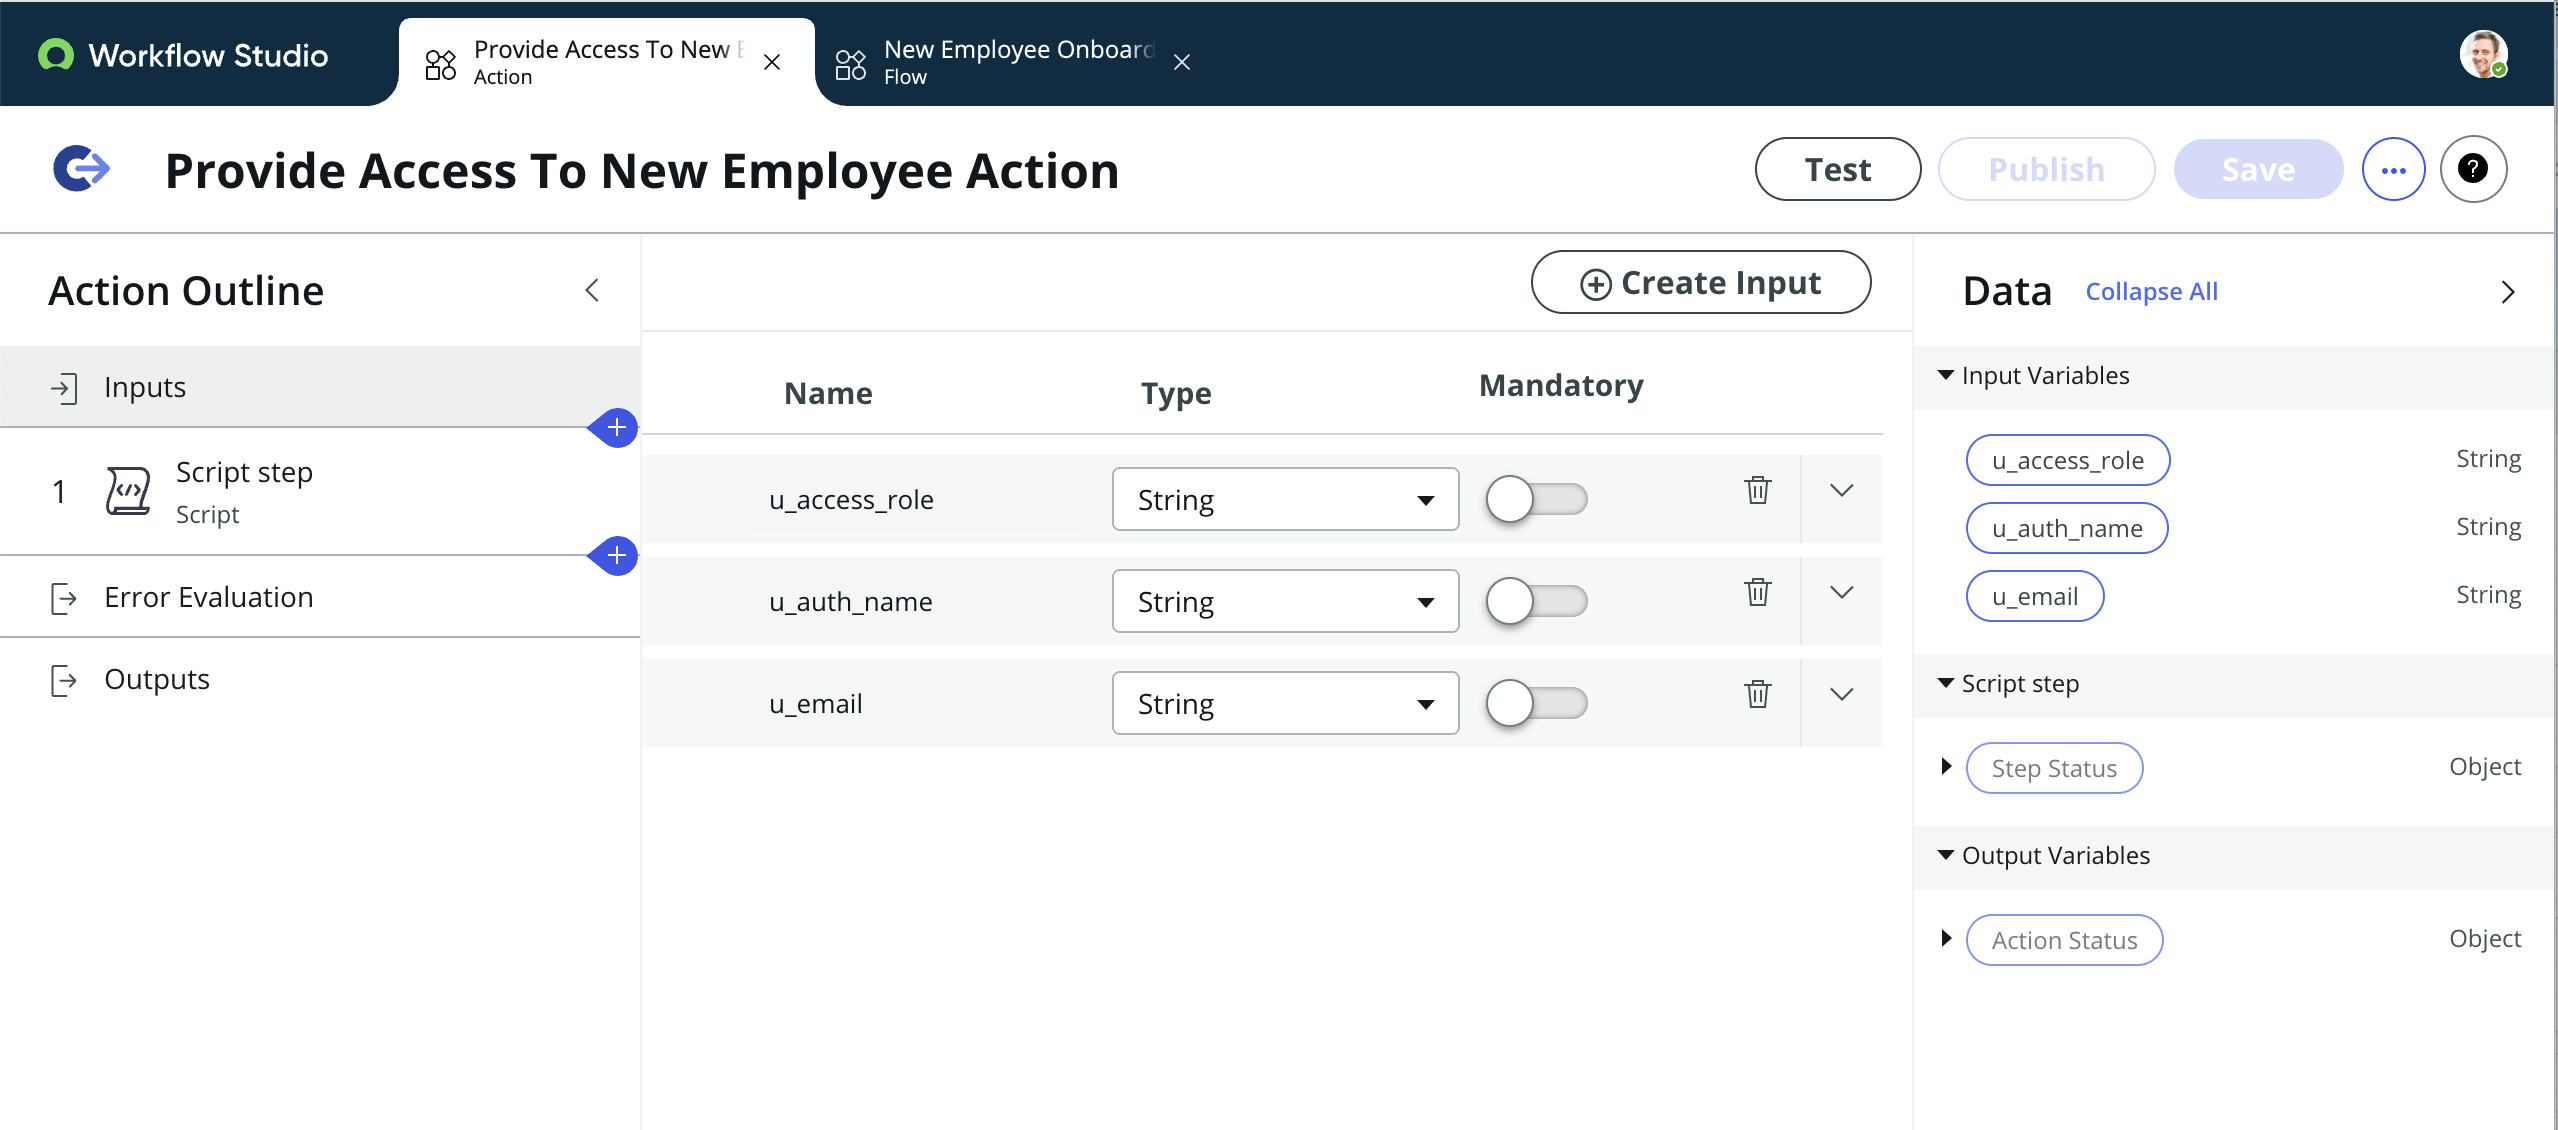
- Define inputs for your action. These are variables that you will use in your POST request, such as API endpoint, any dynamic data that needs to be sent in the request body, or authentication credentials.
Step 5: Add a Script Step for the POST Request
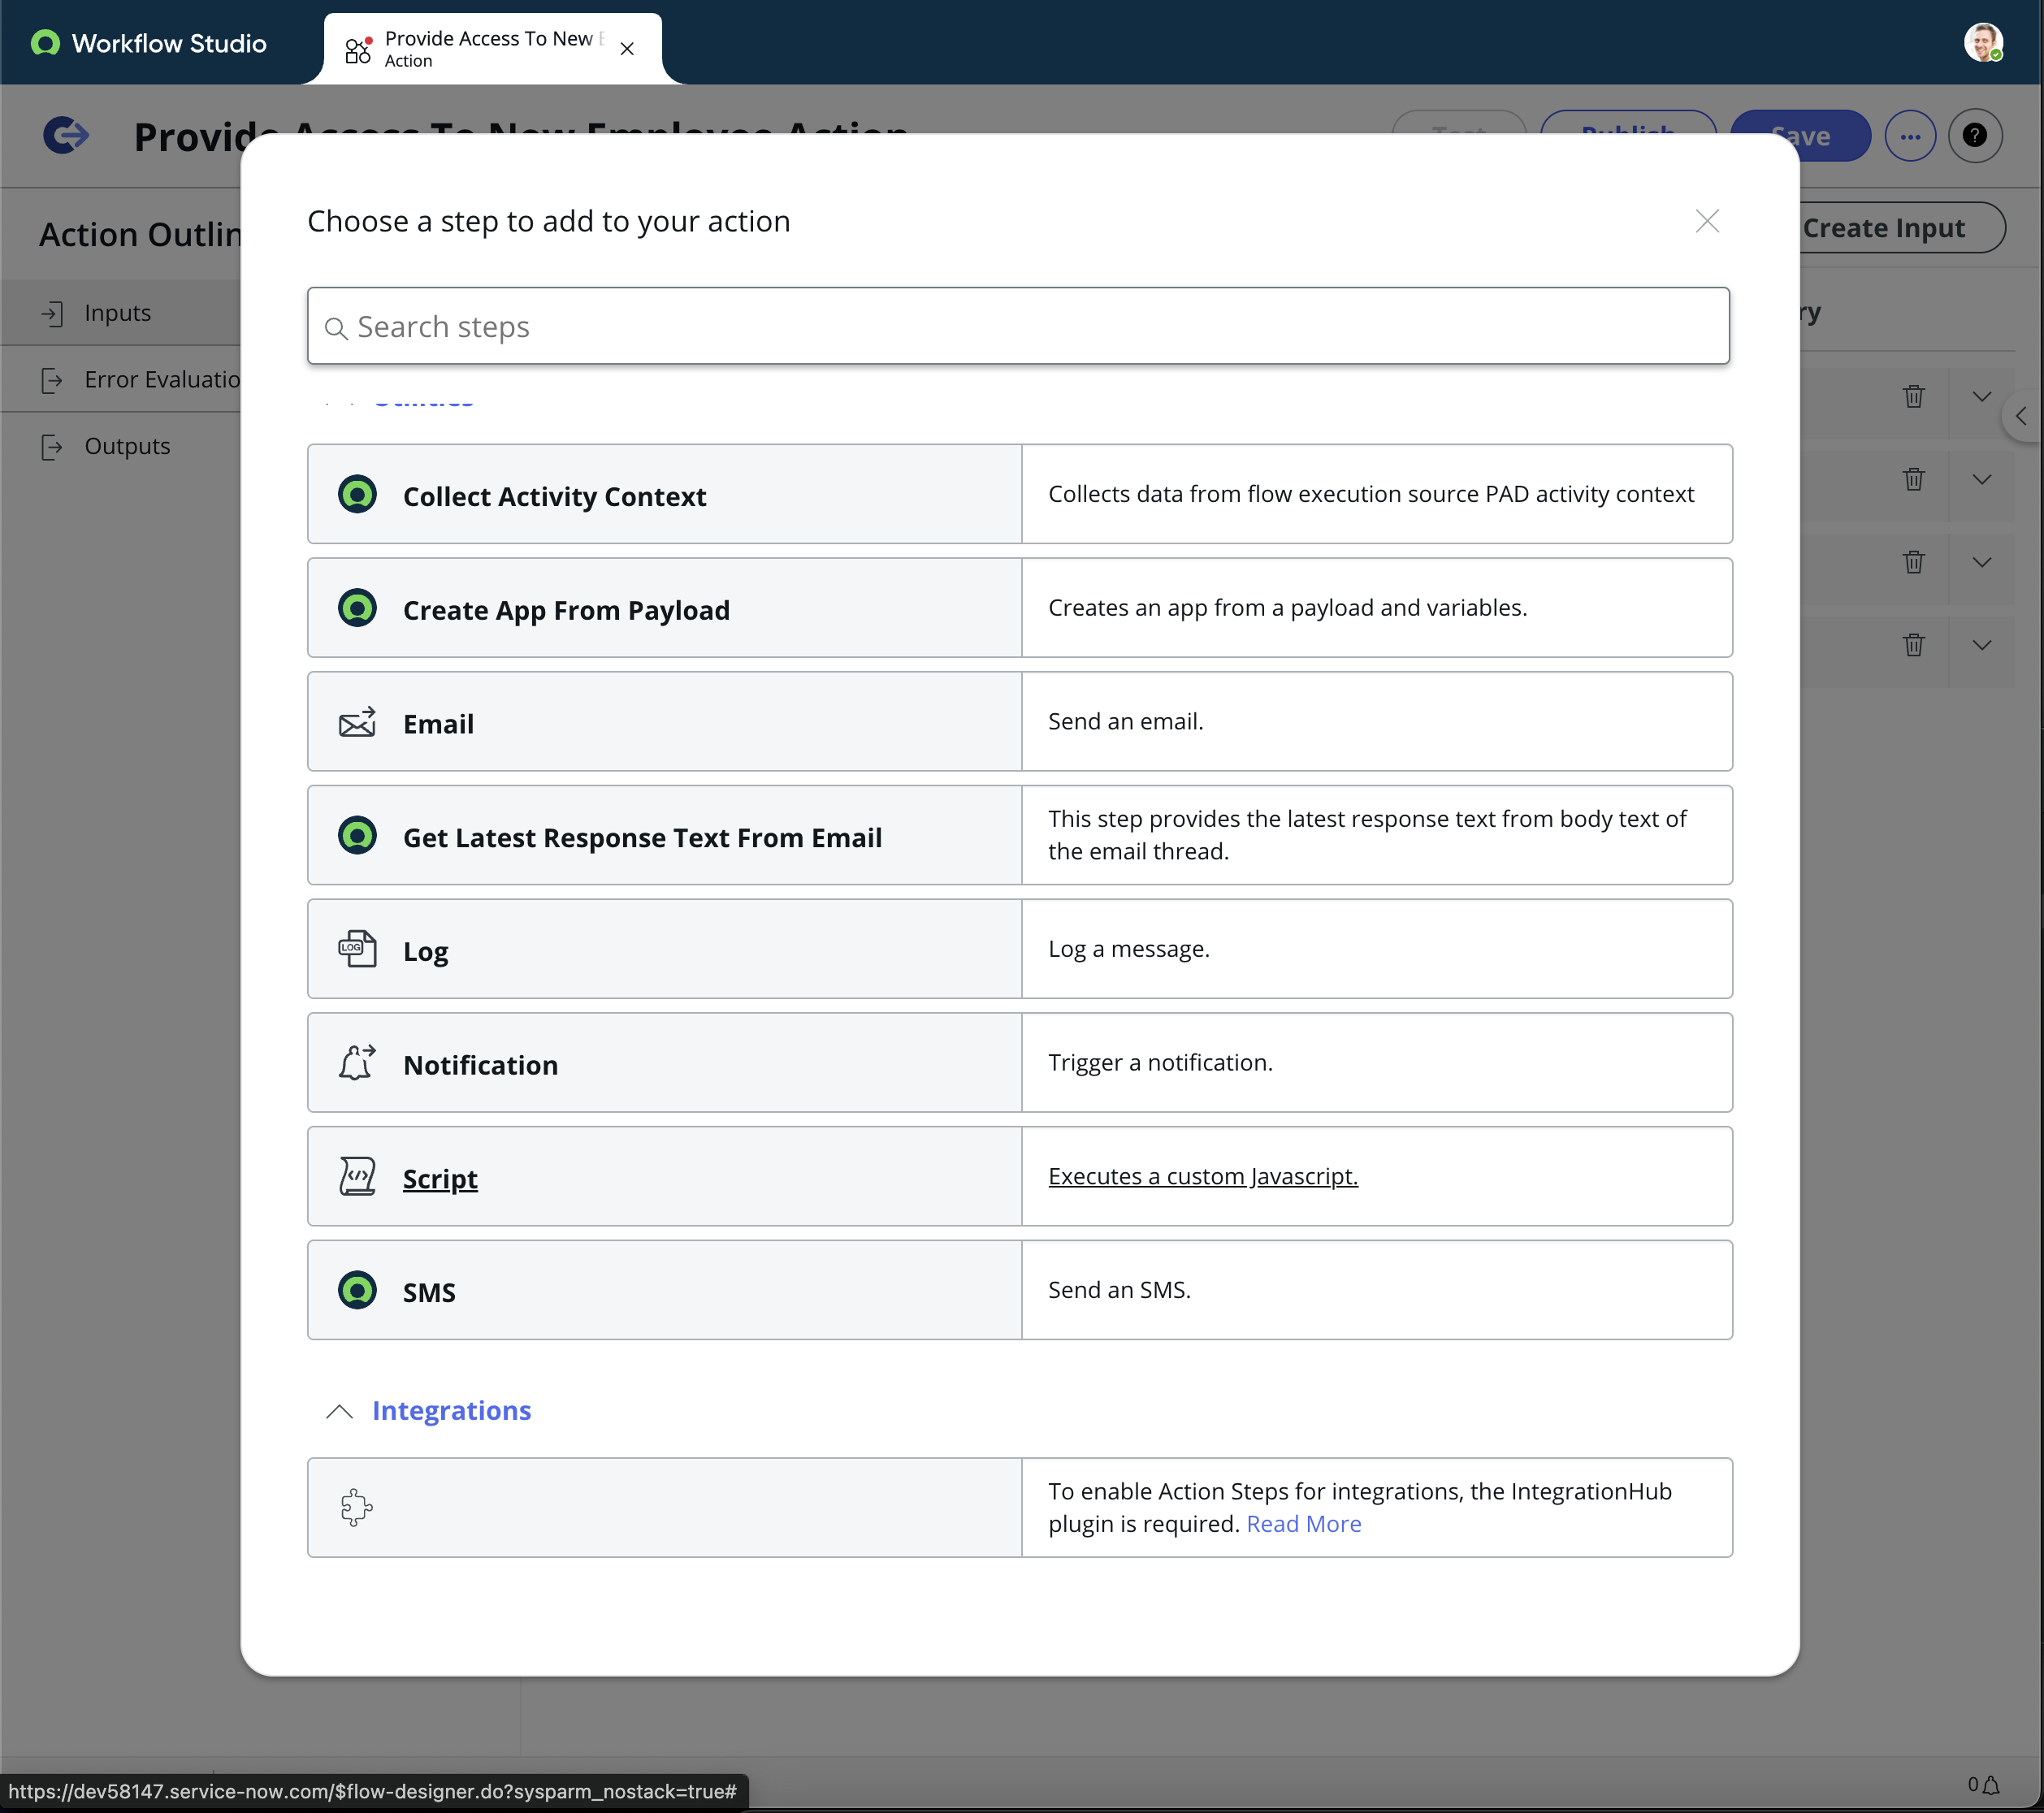
- In the action editor, add a new step and choose the type that allows you to execute a script, often labeled as Run Script or something similar.
- In the script step, you will write the code to make the POST request to the external API. ServiceNow provides a RESTMessageV2 class for this purpose.
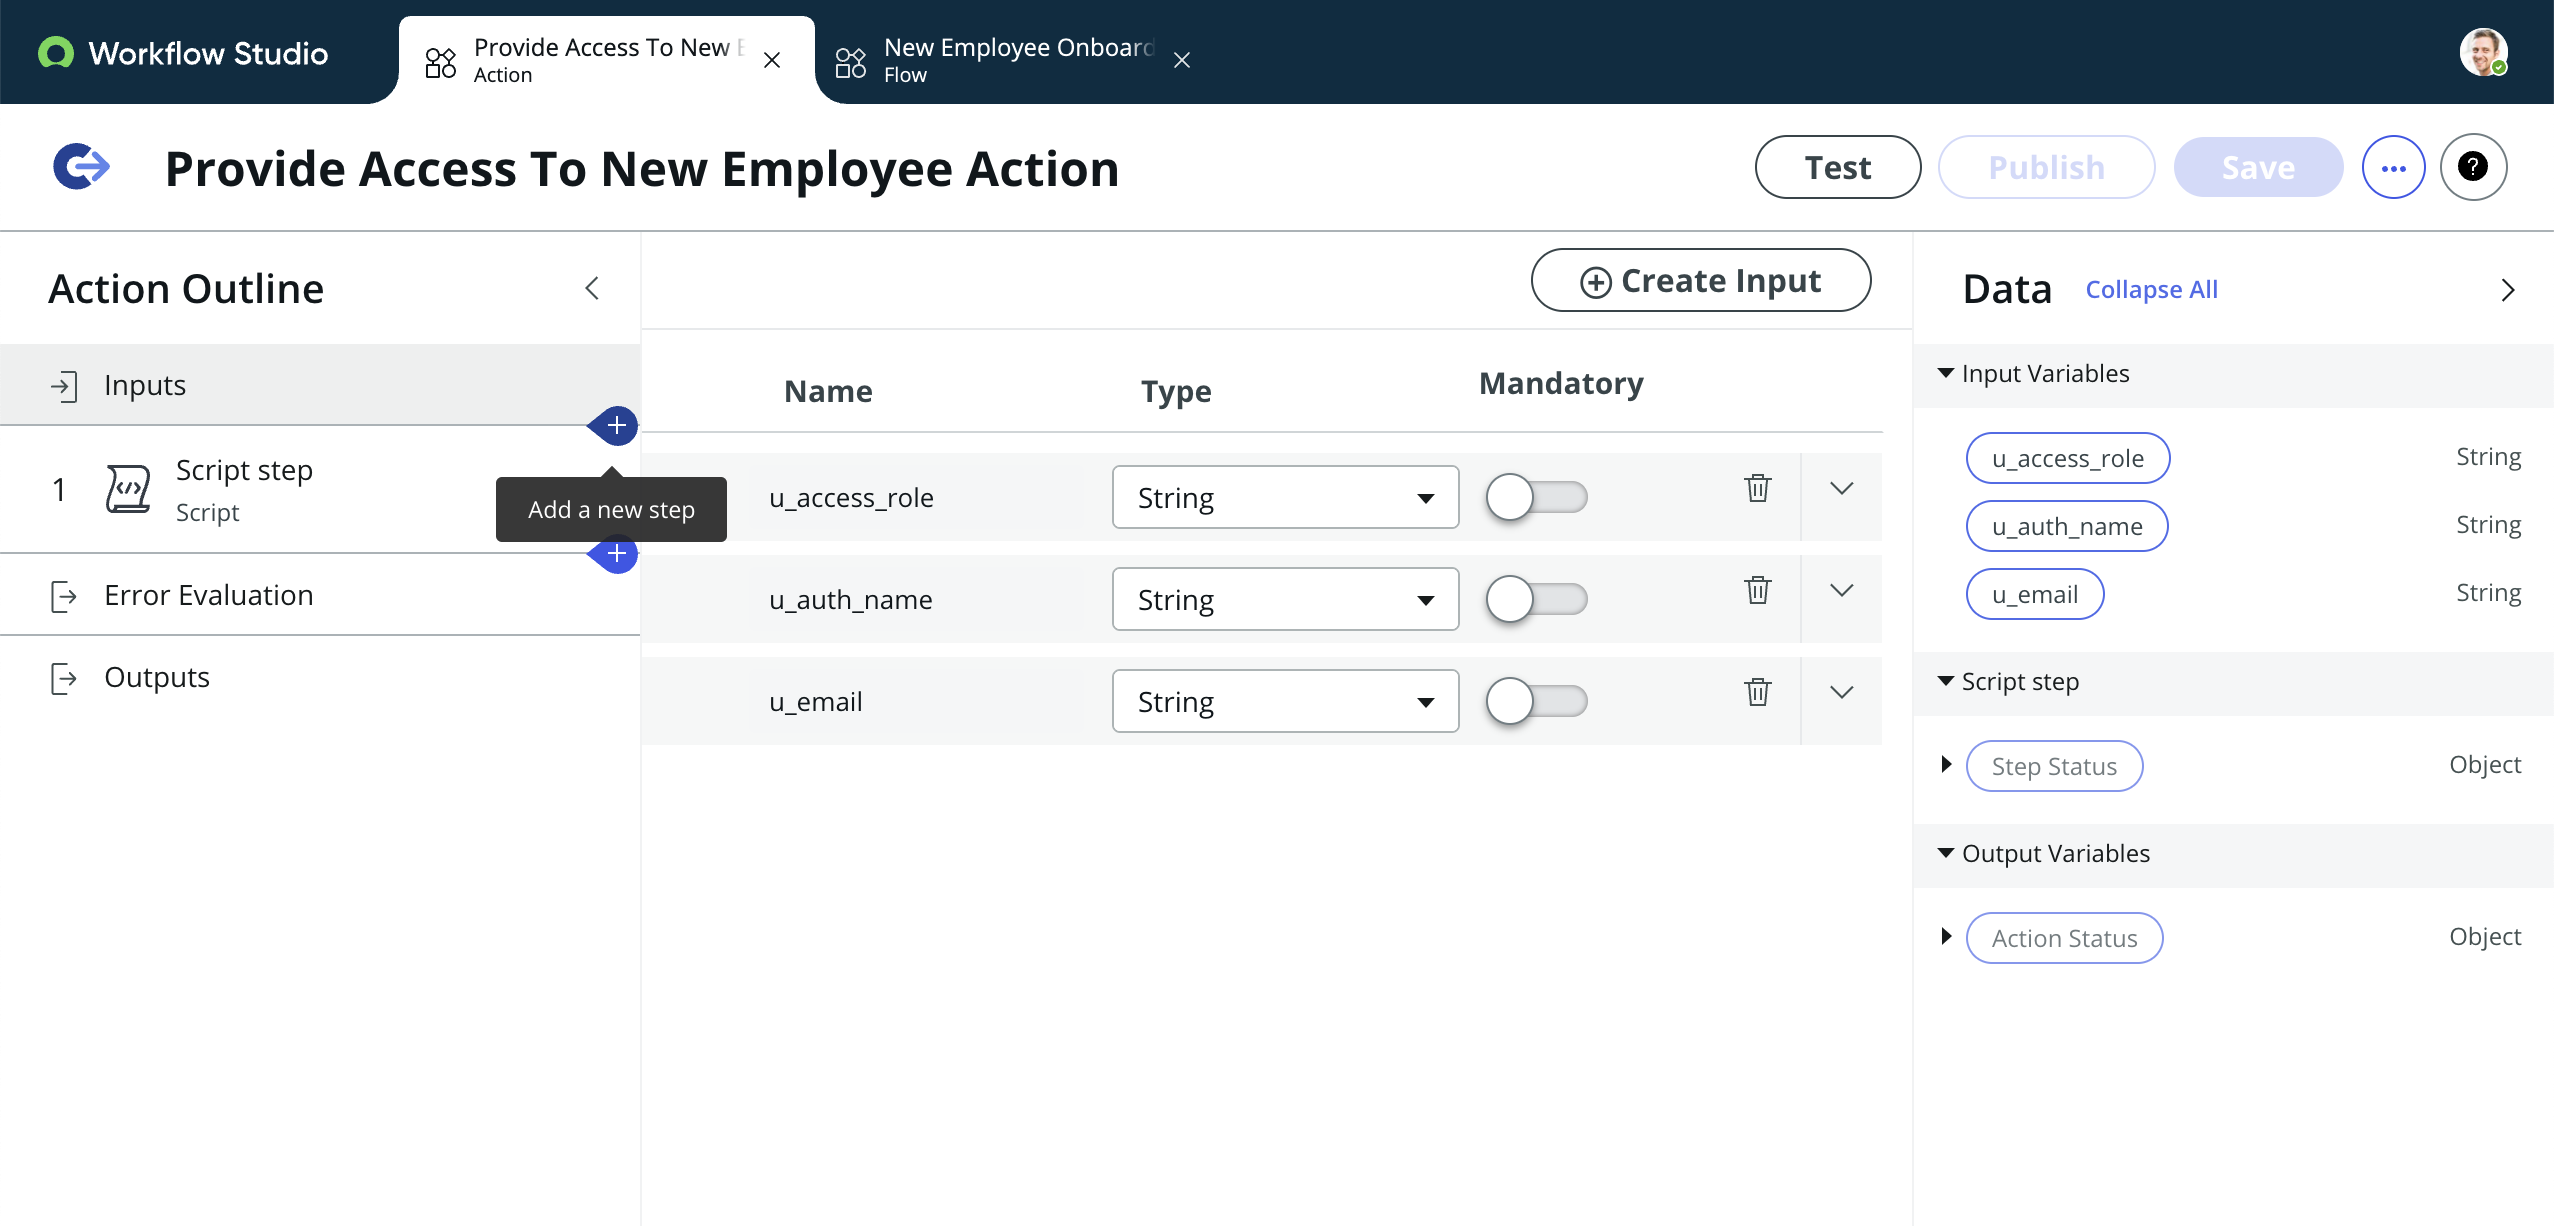
- To add a place where you will be able to write a script select the blue plus button.
- Select script option
- Place to write you script
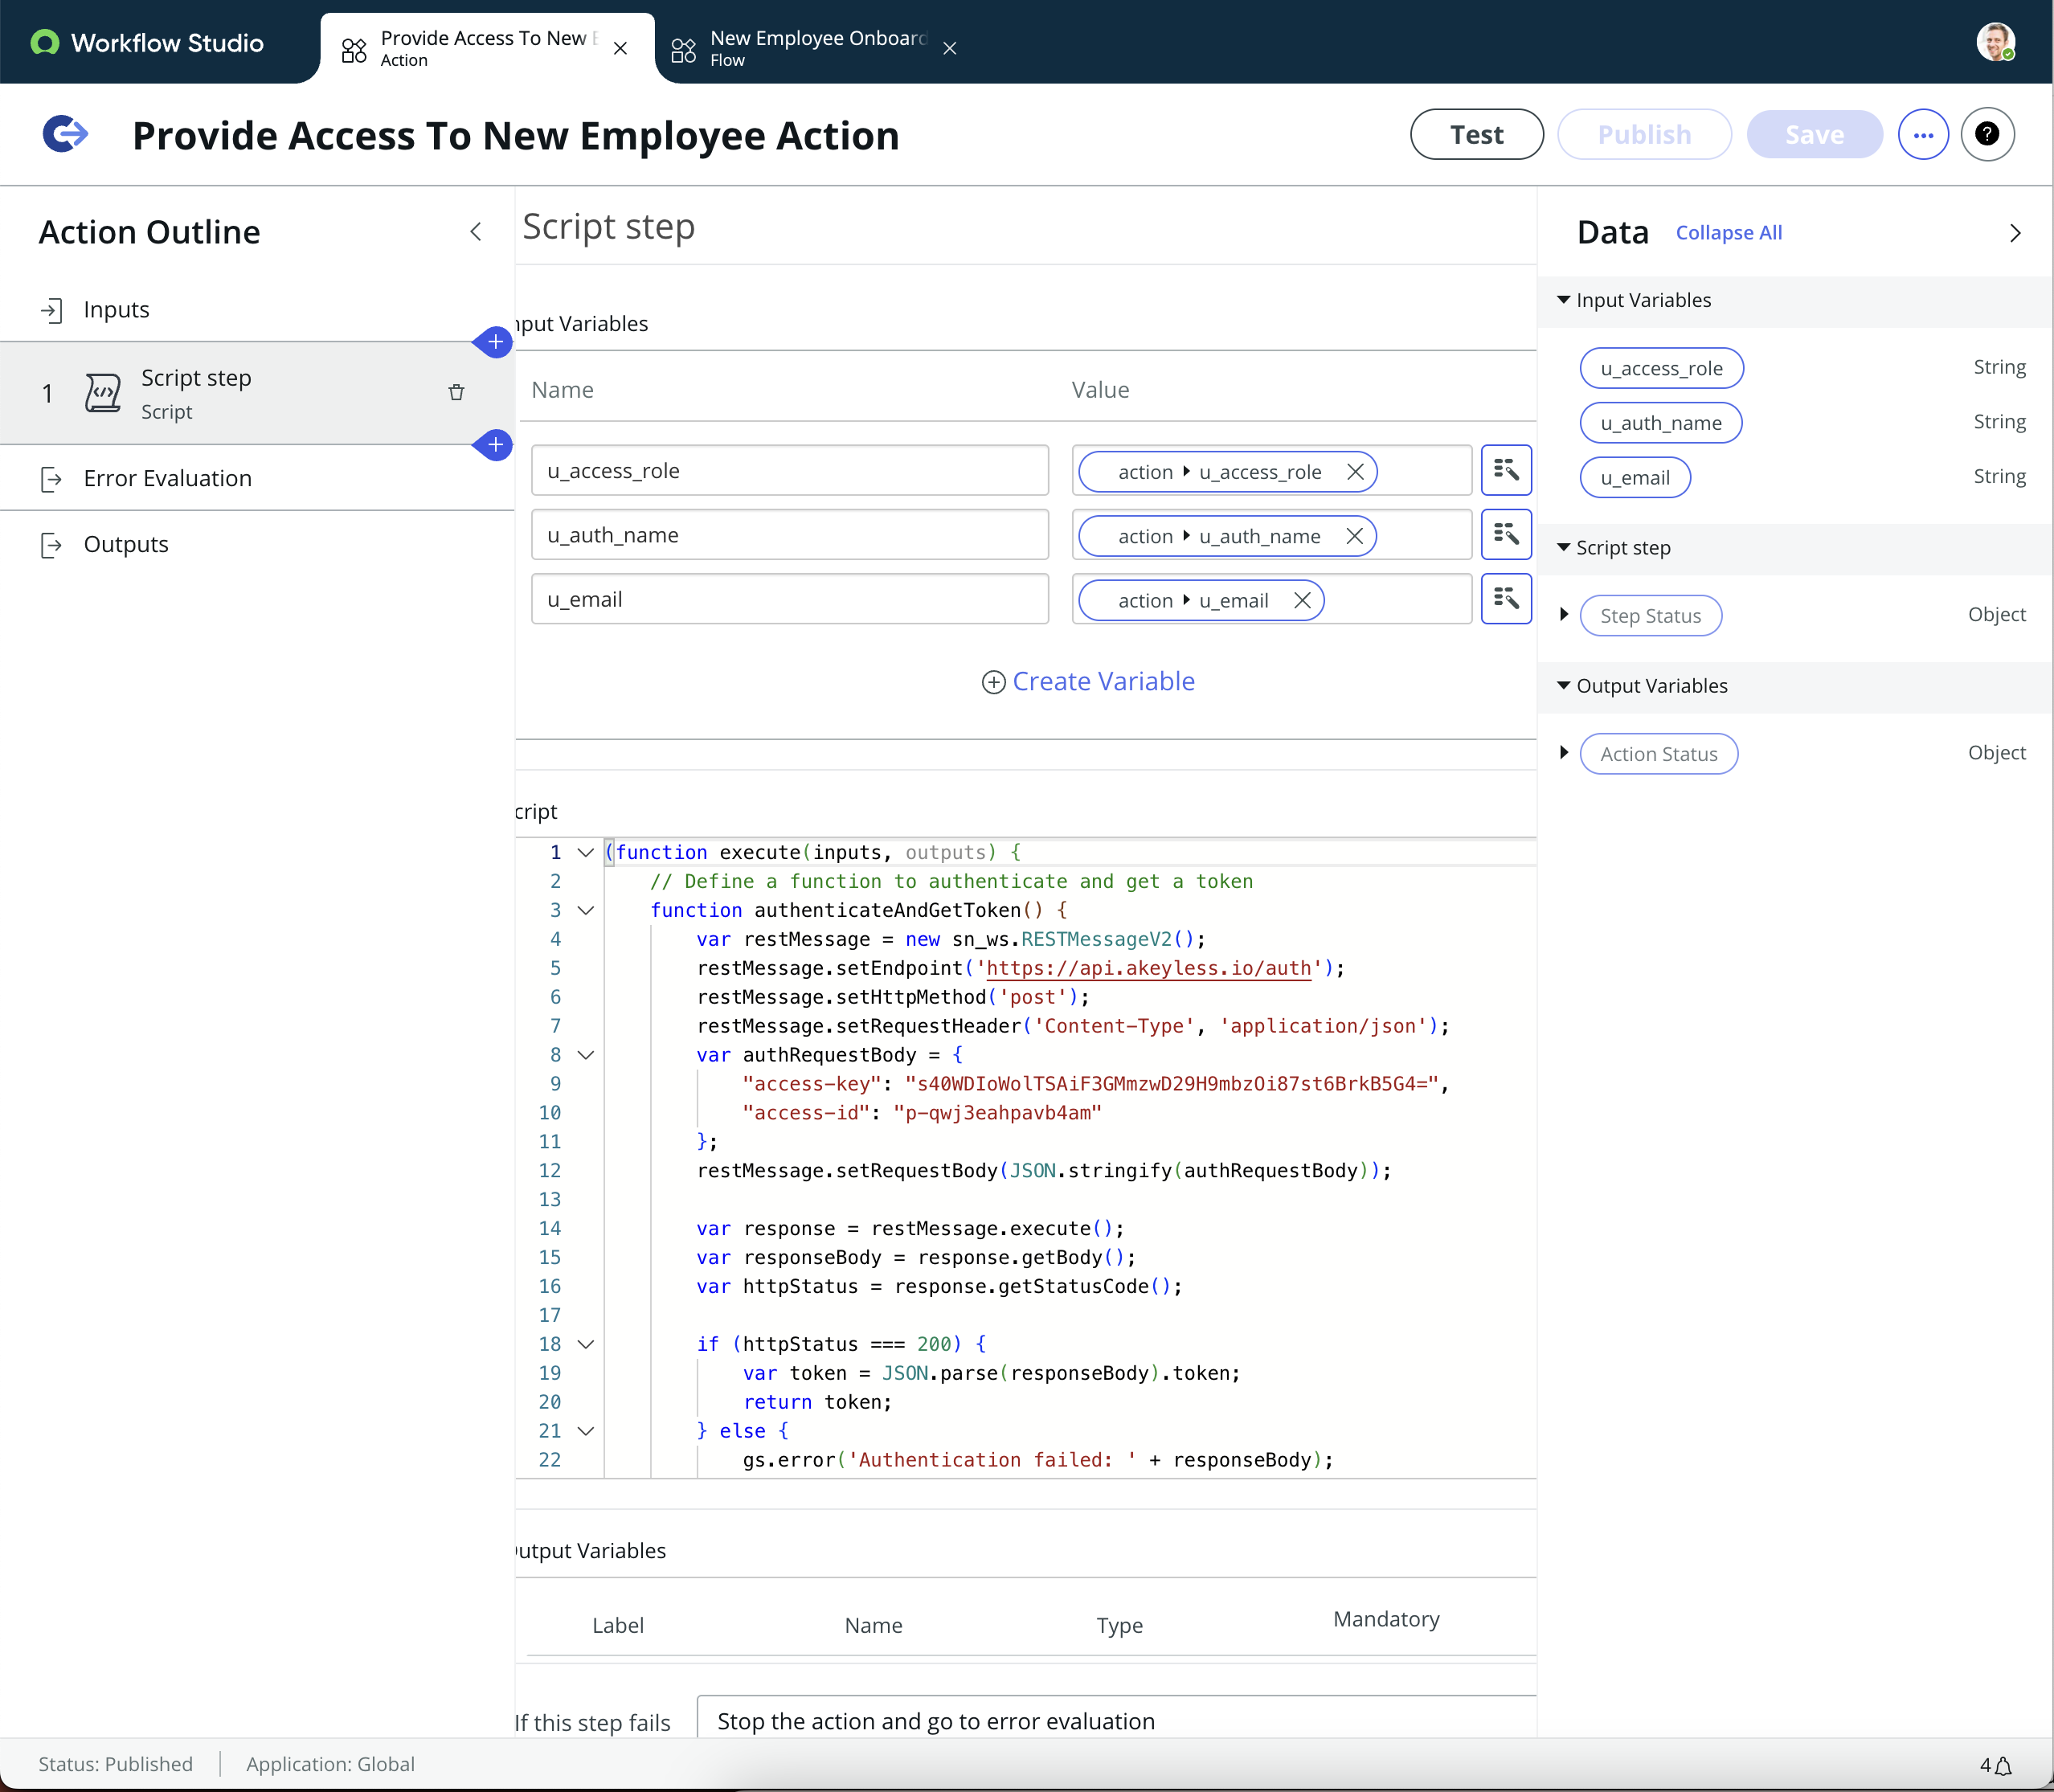
- In our scenario, we aim to obtain a token for utilizing the Akeyless API. Following this, we intend to establish an authentication method for a new employee and subsequently link this authentication method to the appropriate access role. Below is a script exemplifying this process.
(function execute(inputs, outputs) {
    // Define a function to authenticate and get a token
    function authenticateAndGetToken() {
        var restMessage = new sn_ws.RESTMessageV2();
        restMessage.setEndpoint('https://api.akeyless.io/auth');
        restMessage.setHttpMethod('post');
        restMessage.setRequestHeader('Content-Type', 'application/json');
        var authRequestBody = {
            "access-key": inputs.accessKey,
            "access-id": inputs.accessId
        };
        restMessage.setRequestBody(JSON.stringify(authRequestBody));

        var response = restMessage.execute();
        var responseBody = response.getBody();
        var httpStatus = response.getStatusCode();

        if (httpStatus === 200) {
            var token = JSON.parse(responseBody).token;
            return token;
        } else {
            gs.error('Authentication failed: ' + responseBody);
            return null;
        }
    }

    // Use the inputs directly for the employee details
    var employeeDetails = {
        name: inputs.u_auth_name,
        email: inputs.u_email,
        accessRole: inputs.u_access_role
    };

    // Define a function to send a POST request to create a Email auth method
    function sendPostRequest(token, employeeDetails) {
        var restMessage = new sn_ws.RESTMessageV2();
        restMessage.setEndpoint('https://api.akeyless.io/create-auth-method-email');
        restMessage.setHttpMethod('post');
        restMessage.setRequestHeader('Content-Type', 'application/json');
        restMessage.setRequestHeader('Authorization', 'Bearer ' + token);

        var requestBody = {
            "access-expires": 0,
            "json": false,
            "jwt-ttl": 0,
            "token": token,
            "name": employeeDetails.name,
            "email": employeeDetails.email,
        };
        restMessage.setRequestBody(JSON.stringify(requestBody));

        var response = restMessage.execute();
        var responseBody = response.getBody();
        var httpStatus = response.getStatusCode();

        if (httpStatus === 200) {
            gs.info('EMAIL Auth Method Created: ' + responseBody);
            return JSON.parse(responseBody);
        } else {
            gs.error('Failed to create EMAIL Auth Method: ' + responseBody);
            return null;
        }
    }

    // Define a function to associate a role with the auth method
    function associateRoleWithAuthMethod(token, employeeDetails) {
        var restMessage = new sn_ws.RESTMessageV2();
        restMessage.setEndpoint('https://api.akeyless.io/assoc-role-am');
        restMessage.setHttpMethod('post');
        restMessage.setRequestHeader('Content-Type', 'application/json');
        restMessage.setRequestHeader('Authorization', 'Bearer ' + token);

        var requestBody = {
            "case-sensitive": "true",
            "json": false,
            "am-name": employeeDetails.name,
            "role-name": employeeDetails.accessRole,
            "token": token
        };
        restMessage.setRequestBody(JSON.stringify(requestBody));

        var response = restMessage.execute();
        var responseBody = response.getBody();
        var httpStatus = response.getStatusCode();

        if (httpStatus === 200) {
            gs.info('Role associated with Auth Method: ' + responseBody);
            return JSON.parse(responseBody);
        } else {
            gs.error('Failed to associate role: ' + responseBody);
            return null;
        }
    }

    // Execute the functions in sequence
    var token = authenticateAndGetToken();
    if (token) {
        if (employeeDetails) {
            var authMethodResponse = sendPostRequest(token, employeeDetails);
            if (authMethodResponse) {
                associateRoleWithAuthMethod(token, employeeDetails);
            }
        }
    }

})(inputs, outputs);
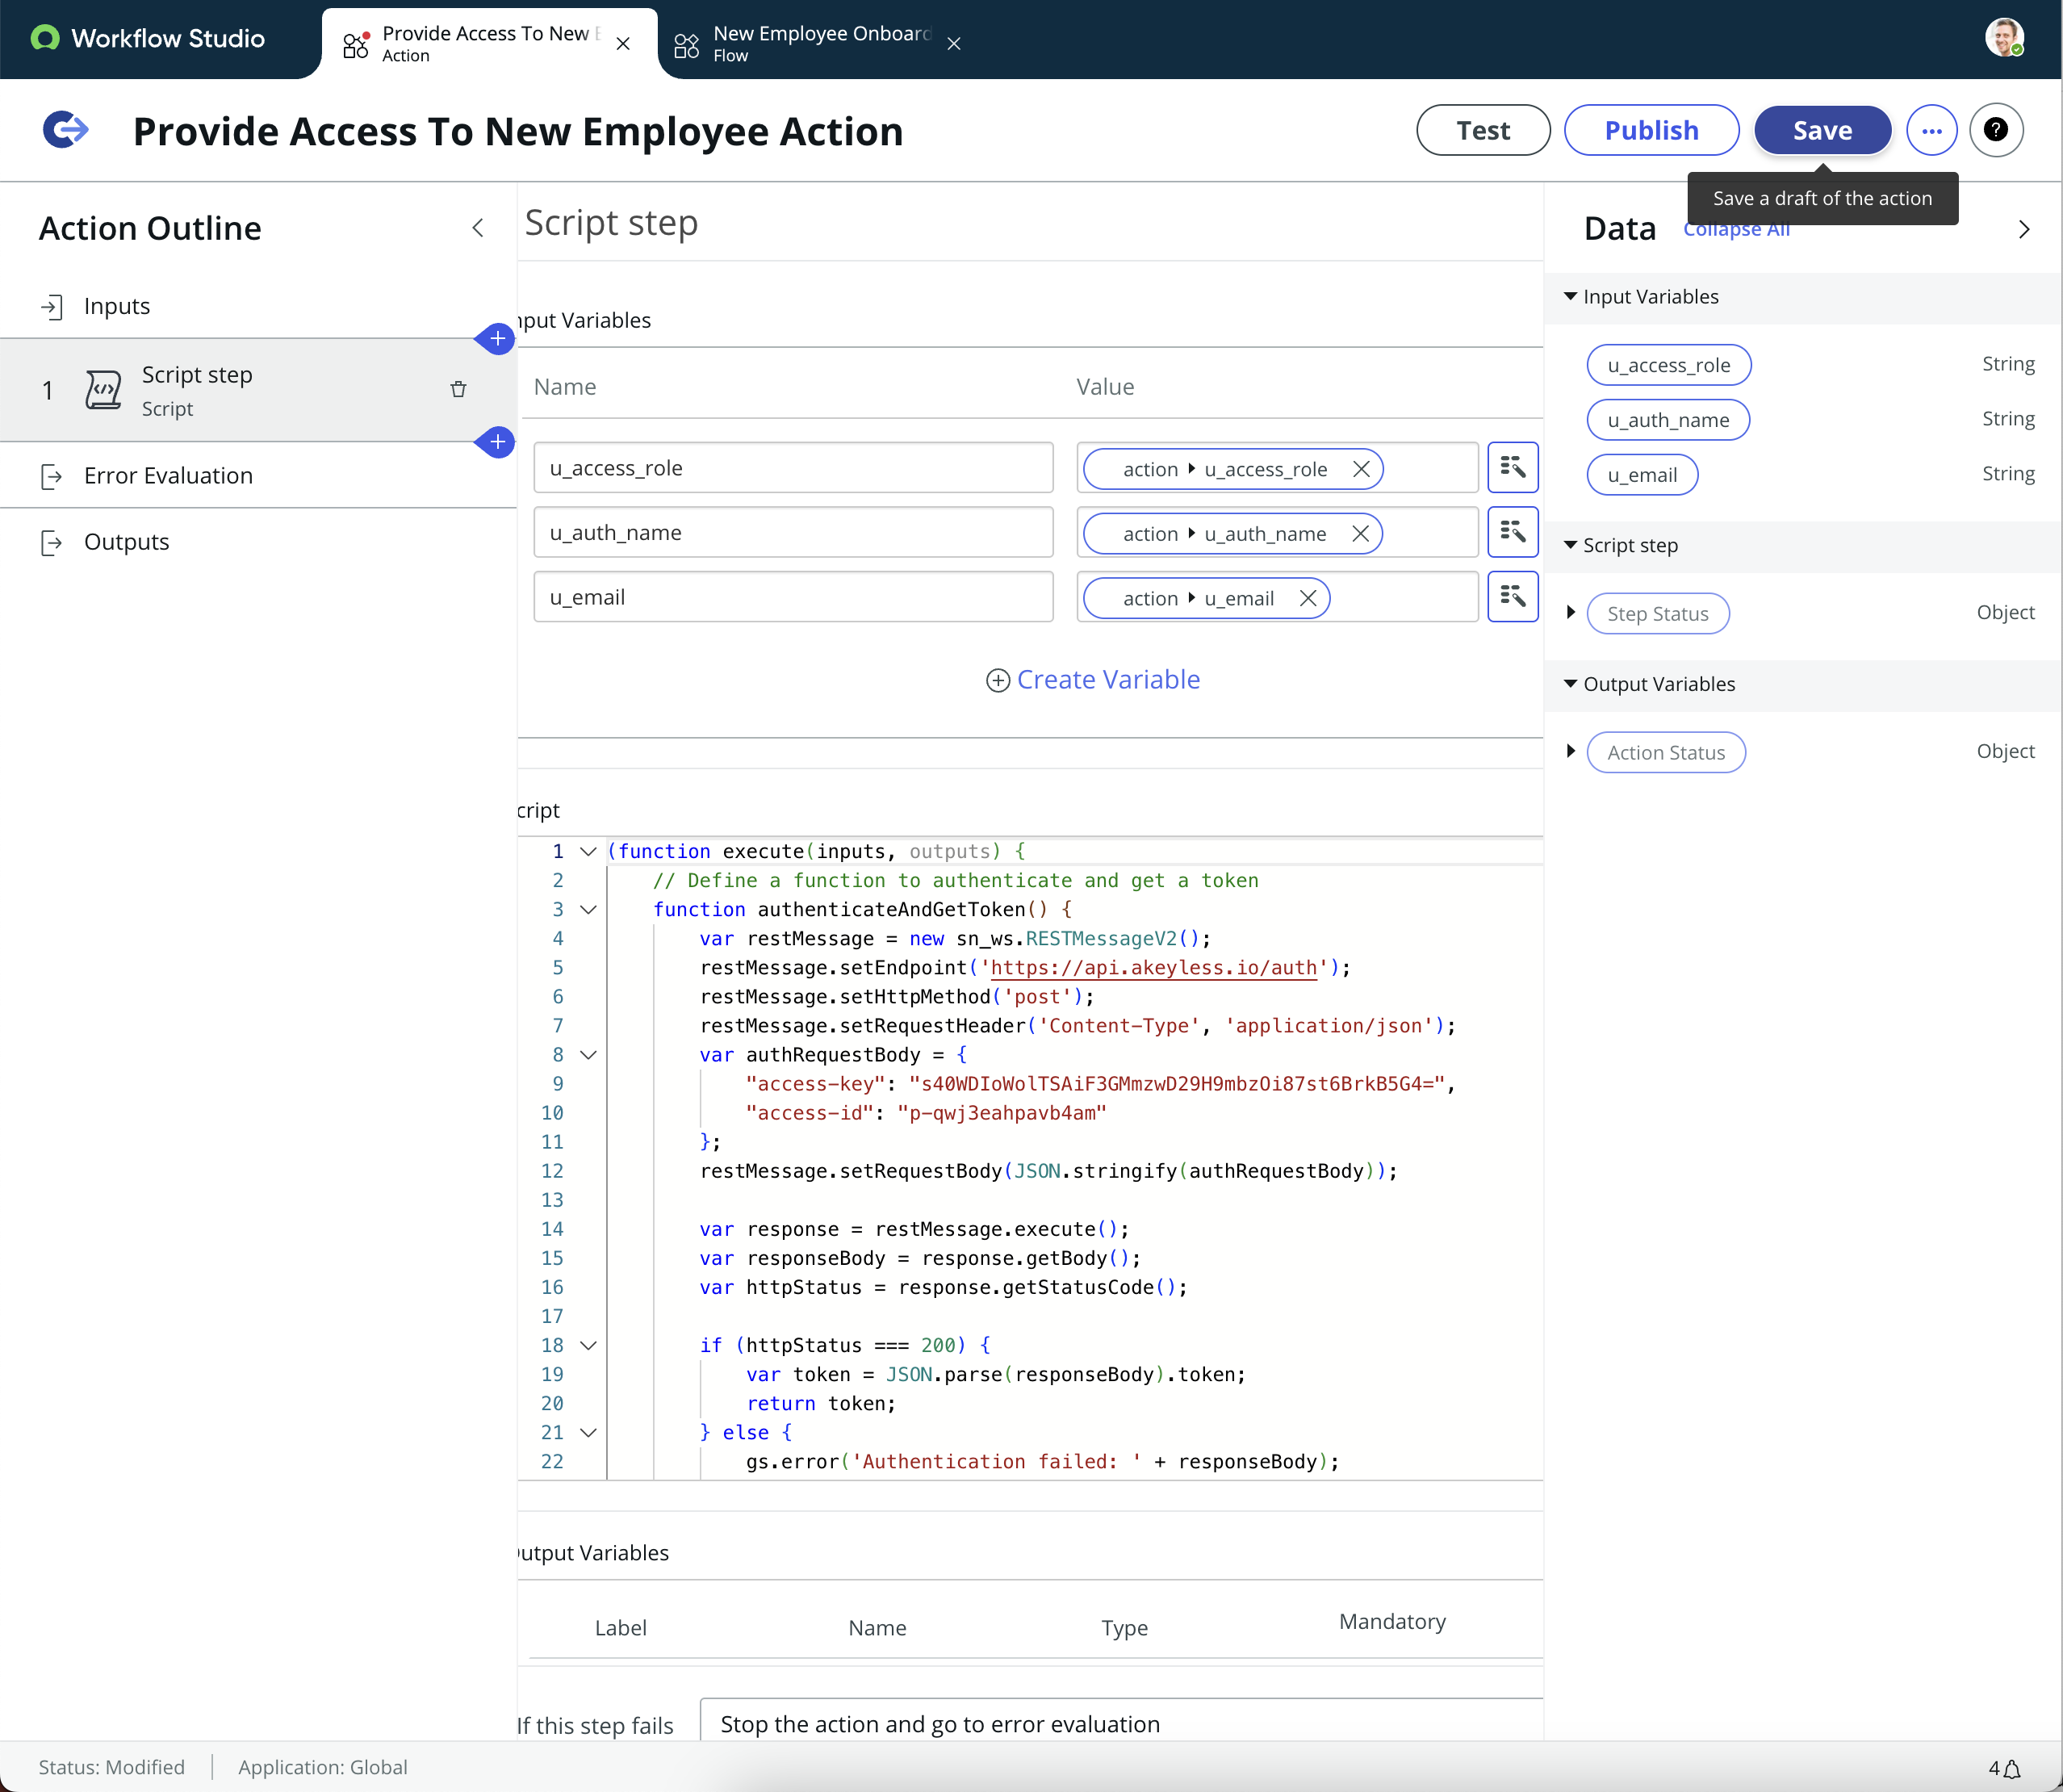
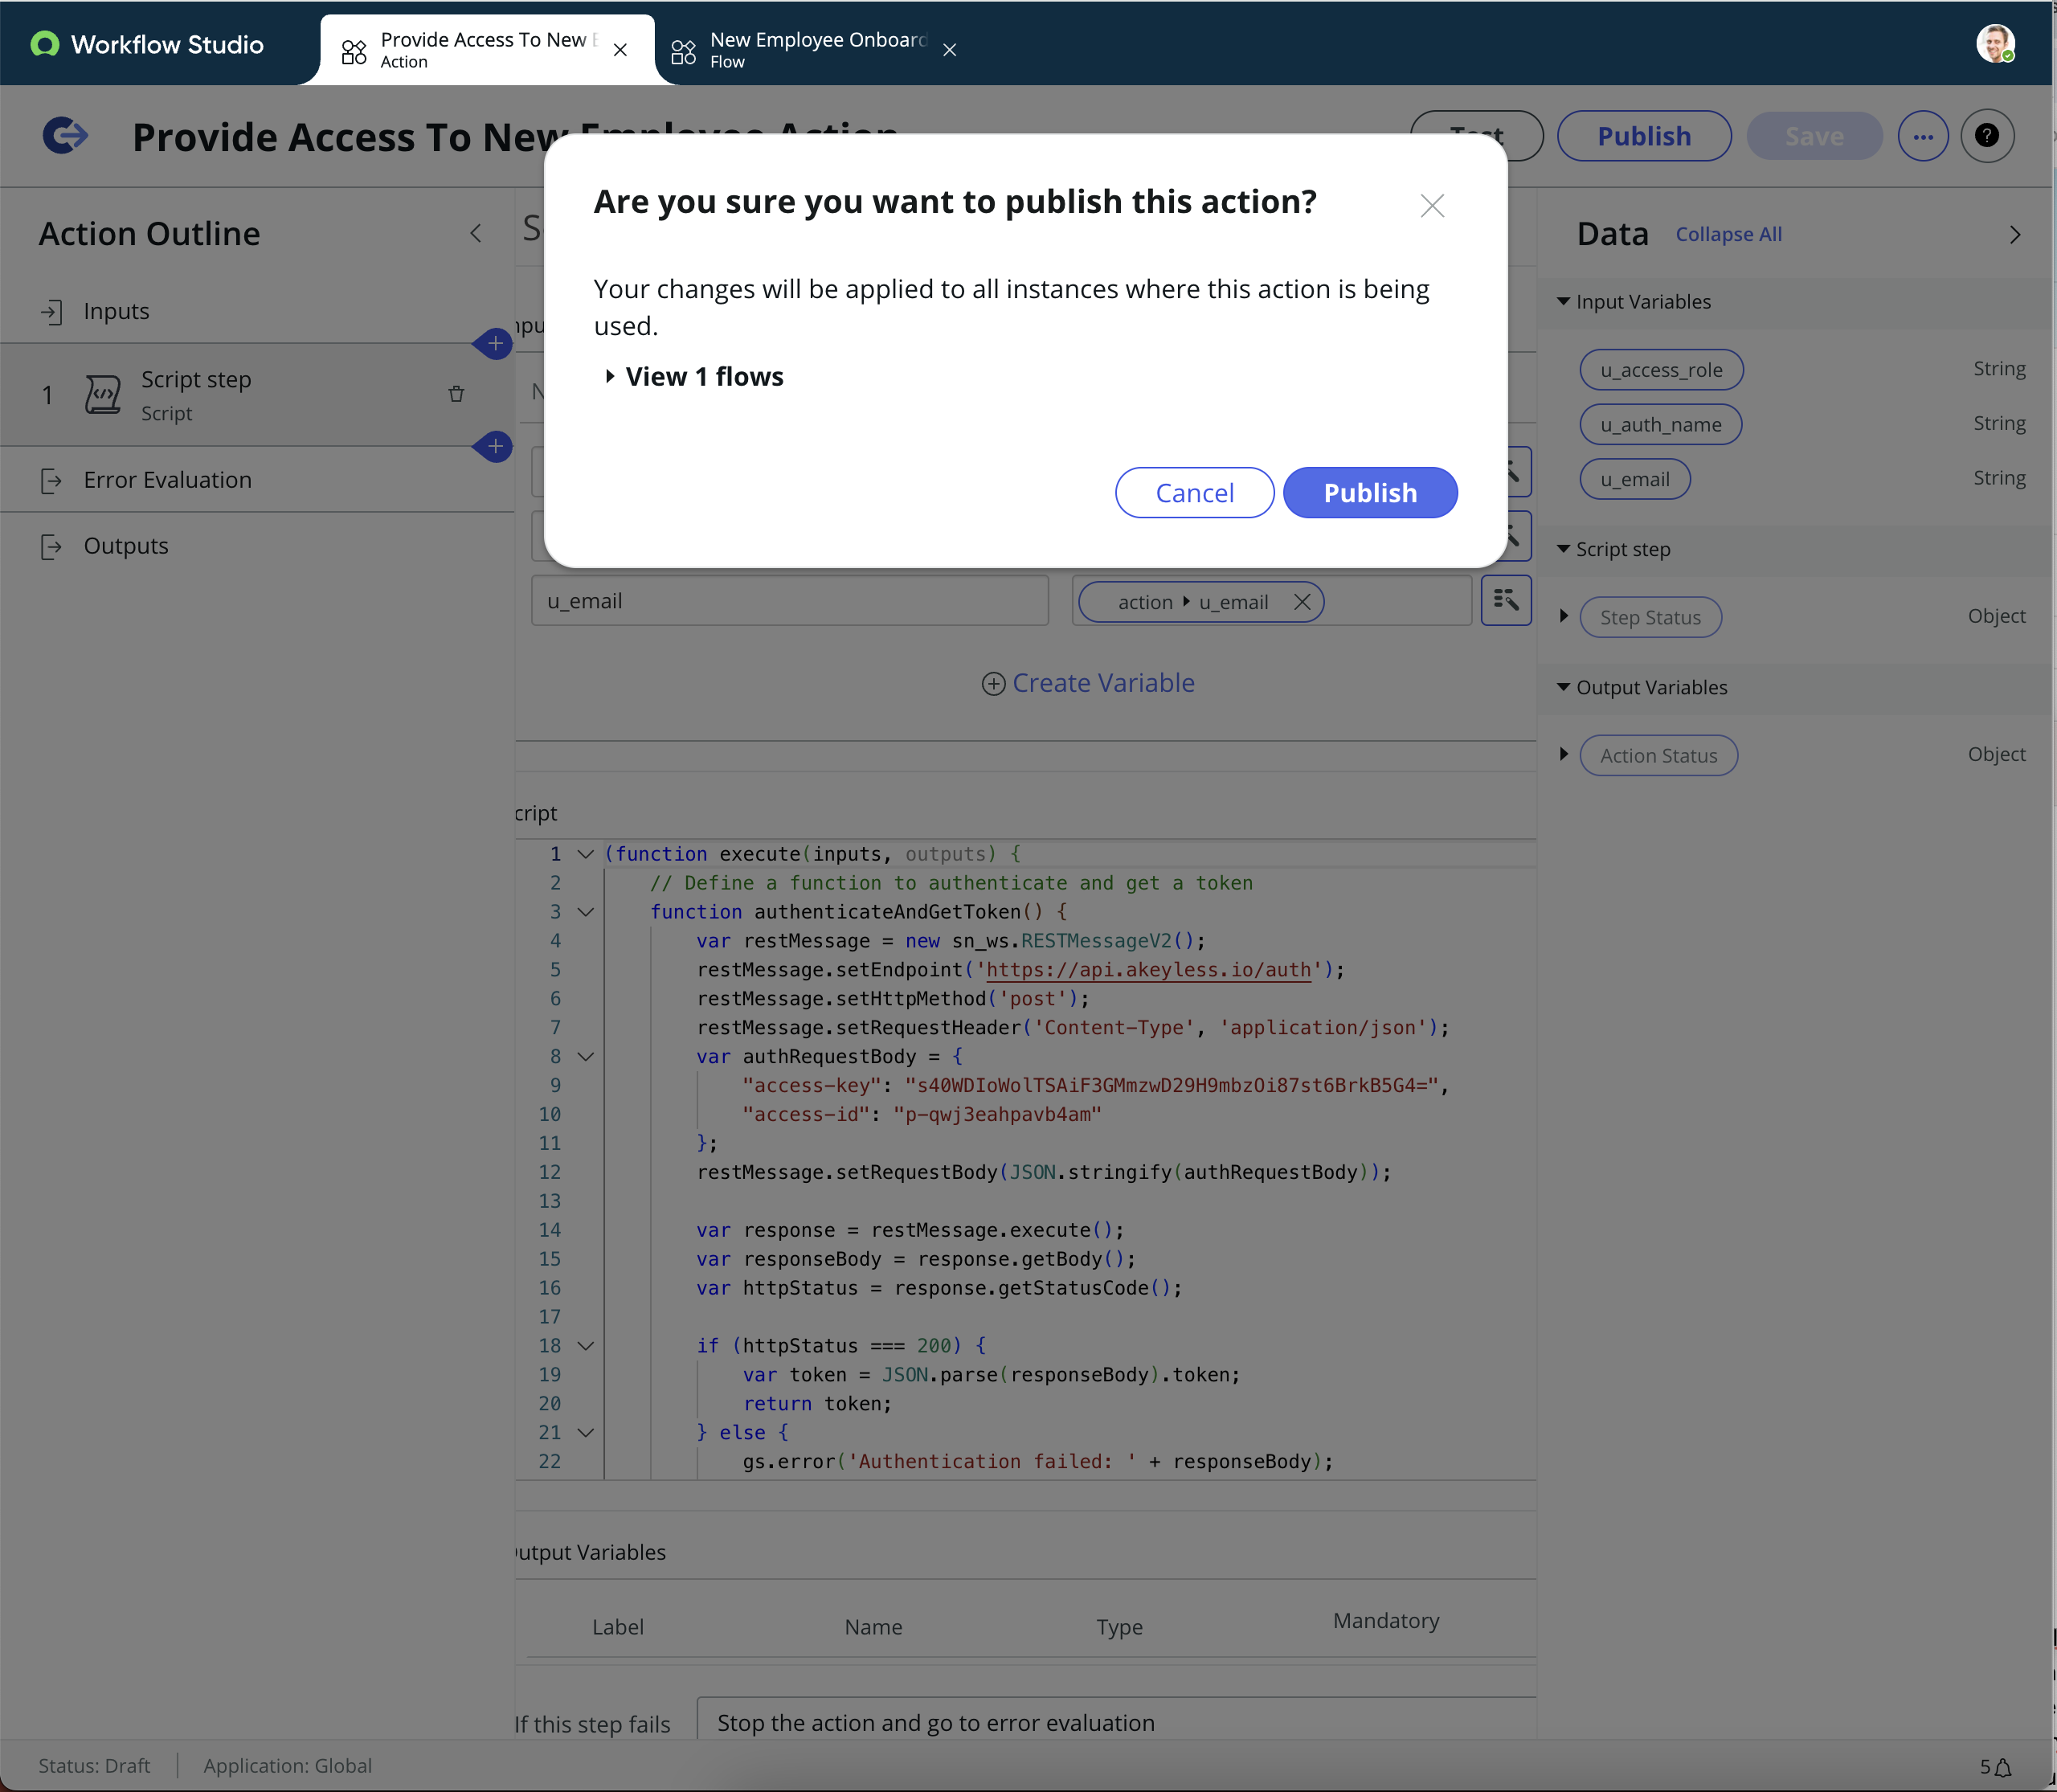
Step 6: Save and Publish the Custom Action
Updated 6 days ago
What’s Next
