Configure Custom/Specific Tenant
This innovative feature enables users to personalize their web browser extension by configuring a custom or specific tenant URL. This customization is designed to tailor the user's browsing experience, allowing for a more streamlined and secure access to web services that are specific to their organizational or personal needs. By setting up a unique tenant URL, users can ensure that their extension directly connects to the desired services or databases, enhancing both efficiency and security.
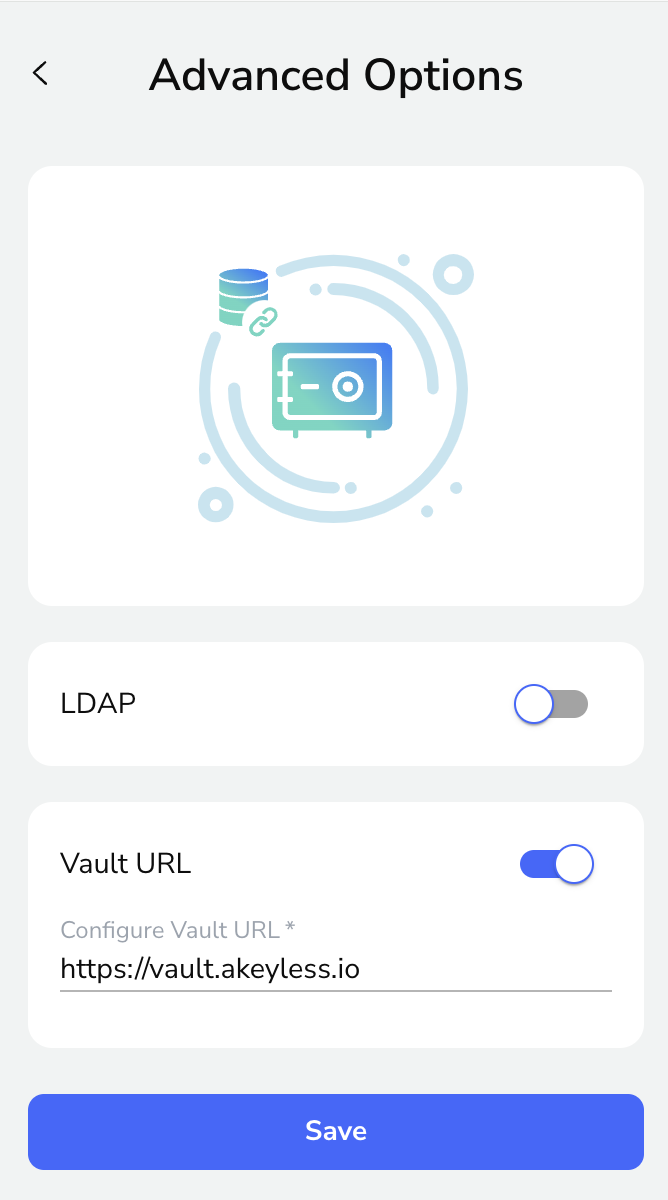
Detailed Instructions for Configuring Your Custom/Specific Tenant URL
Initiation of Configuration Process: Begin the customization by navigating to the sign-in screen of your web browser extension. Look for the three-dot menu icon, which is conveniently located in the top right corner of the extension's interface. This menu is the gateway to adjusting the extension's settings to better suit your individual requirements or preferences.
Entering the Custom/Specific Tenant URL
After accessing the settings through the menu, you will find a dedicated text field for entering the tenant URL. This is where you should input the URL that corresponds to your specific tenant. The tenant URL is a crucial link between your browser extension and the web services it interacts with, dictating how the extension authenticates and connects to these services. It's important to input this URL carefully to ensure a seamless and secure connection.
Saving Your Configuration
Once you have entered the correct tenant URL, finalize the setup by clicking the "Save" button. This action solidifies your settings, applying the custom tenant URL to your browser extension. With this configuration in place, your extension will now automatically use the specified tenant URL for all relevant operations, offering a more customized and secure browsing experience.
Click "Save".
Updated 5 months ago