Editing Password Details
Locating the Password
Navigate to Secrets Section: Start by accessing the 'Secrets' section of the Akeyless application. This area is specifically designed to store and organize your secrets and passwords.
Viewing Saved Secrets: In this section, you will find a comprehensive list of all your saved items, including passwords, secret notes, and other sensitive data.
Understanding the Layout: Familiarize yourself with the layout, noting how the secrets are categorized or arranged, which might be alphabetically, by date modified, or by type.
Access Quick Action Menu
Identifying the Specific Password: Scroll through your list of secrets and locate the specific password you wish to edit.
Revealing the Menu: Next to the identified password, you'll see a three dots icon (often represented as '⋮'). This icon signifies more options or actions related to the password.
Accessing the Menu: Click on this icon to reveal a dropdown menu, commonly referred to as the 'quick action menu', which contains several options for managing the selected password.
Initiate Edit Mode
Selecting Edit Option: In the quick action menu, look for and select the 'Edit' option. This choice will transition the interface into an editable mode for the selected password.
Understanding Edit Mode: In edit mode, the fields that were previously static will now become interactive, allowing you to make changes.
Observe Edit Mode Transition
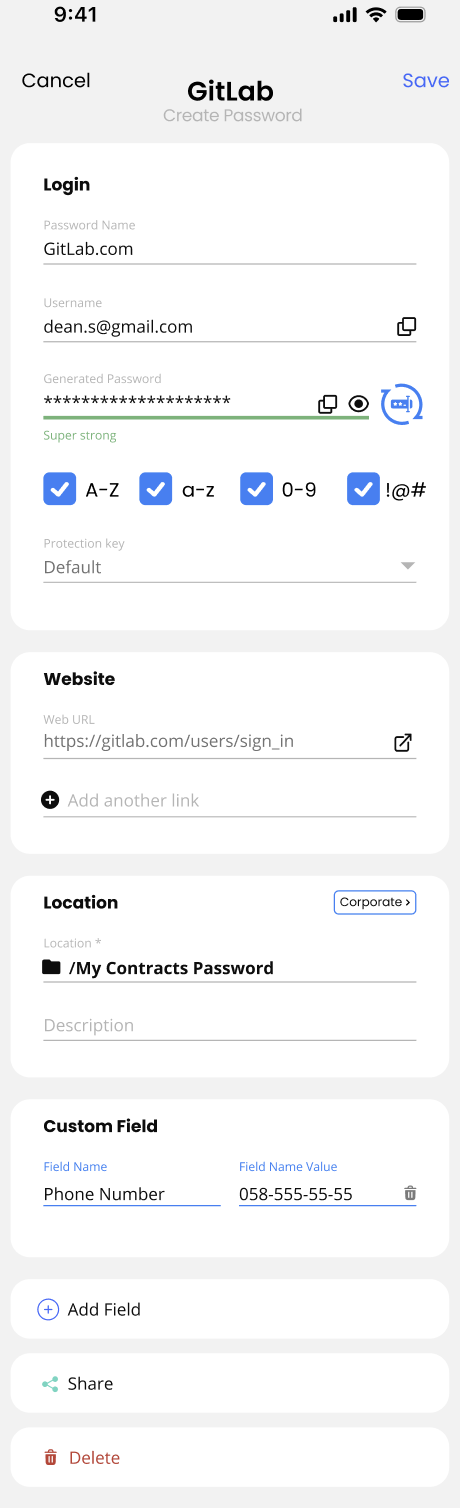
Recognizing Interface Changes: Notice that the 'Edit' option, once selected, will be replaced with a 'Save' option. This is typically located at the top right part of the screen.
Indicator of Readiness: The appearance of the 'Save' button is an indication that the application is now in edit mode and is ready to accept and apply your changes.
Make Desired Changes
Editing Fields: You can now modify the password's information. This may include changing the password itself, updating the username, altering the description, or adjusting associated URLs.
Utilizing Advanced Options: Depending on the nature of your password, you might also have advanced options like setting expiration dates, changing sharing settings, or updating security notes.
Apply Changes
Reviewing Changes: Before saving, take a moment to review the changes you’ve made. Ensure that all modifications are accurate and as intended.
Clicking Save: Once satisfied, click the 'Save' button. This action confirms and applies the changes you've made to the password.
Confirmation of Saved Changes
Acknowledging the Update: The application will process your request and update the password with the new information.
Visual Confirmation: Typically, you'll receive a visual cue or a message confirming that your changes have been successfully saved.
Post-Edit Review: It’s good practice to revisit the edited password entry to ensure all updates are correctly reflected.
Updated 6 months ago