Jenkins Plugin
Introduction
The Akeyless Plugin for Jenkins enables secure integration of Akeyless-managed secrets and certificates within Jenkins pipelines. It supports multiple authentication methods, ensuring seamless and secure access to secrets and certificates.
Additionally, JSON-structured secrets can be retrieved by specifying specific keys, allowing precise control over the data fetched from Akeyless.
Installation
Run the following steps to install the Akeyless plugin for Jenkins:
- Navigate to Manage Jenkins → Plugins.
- Go to Available Plugins and search for Akeyless.
- Check the plugin and select Install
Supported Authentication Methods
- API Key
- AWS IAM
- Azure AD
- Certificate
- Google Cloud Platform (GCP)
- Kubernetes
- Universal Identity
Configuration
To Configure the Akeyless Plugin in Jenkins
- From the Jenkins Dashboard, select New Item, choose Freestyle Project, give it a name and select ok.
- Scroll down to Environment and check Akeyless Plugin
- Set the Akeyless URL to your gateway URL, with the /api/v2 endpoint.
- Add a new Access Mode:
-
Under Vault Credential, select Add > Jenkins.
-
Choose the Authentication Method from the Kind drop-down
- Username with password - Email Authentication Method.
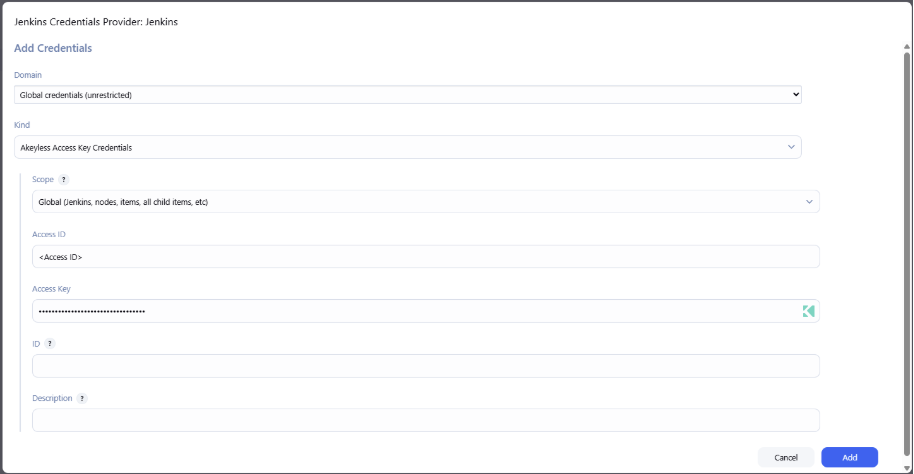
- Akeyless Access Key Credentials - API Key Authentication Method.
- Akeyless Certificate Credentials - Certificate Authentication Method.
- Akeyless Cloud Provider Credentials - AWS, Azure or GCP Authentication Method.
- Akeyless Universal Identity Credentials - Universal Identity Authentication Method.
- Akeyless t-Token Credentials - t-Token.
-
Click Add to save the configuration.
Retrieving Items
The Akeyless plugin allows you to retrieve Static, Dynamic, and Rotated Secrets and PKI and SSH certificates.
Retrieving Secrets
To retrieve a secret:
- Click Add Akeyless Secret.
- Configure the following parameters:
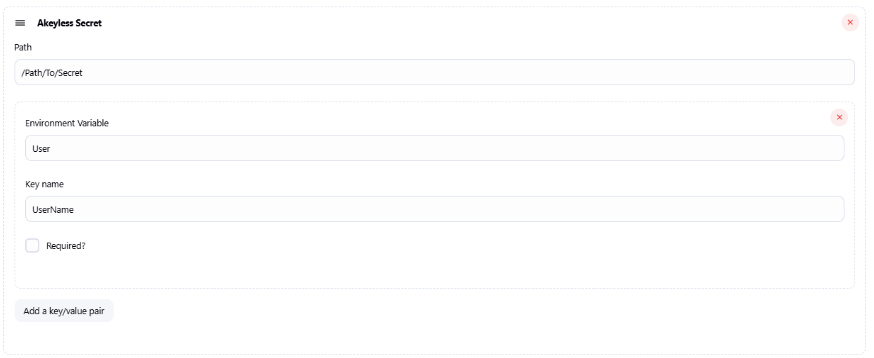
- Path: Enter the full path of the secret.
- Environment Variable: Define an environment variable to store the secret's value.
- Key Name (for JSON-type secrets): Specify the key to fetch. To retrieve all keys, enter data.
Issuing Certificates
To Issue a certificate:
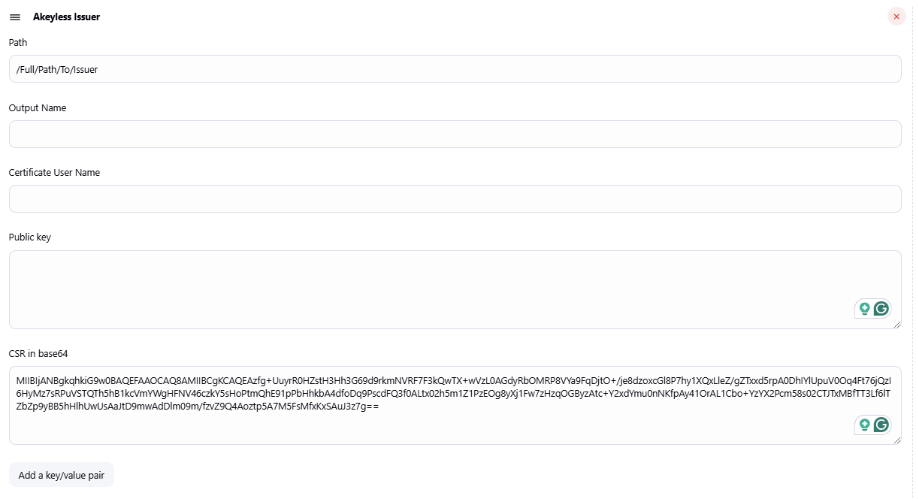
- Click Add Akeyless Issuer.
- Configure the following parameters:
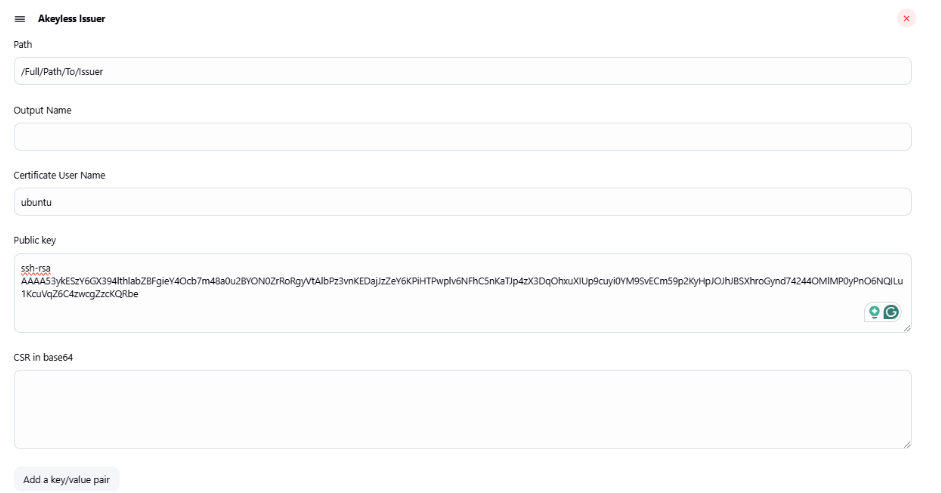
- Path: Enter the full path of the certificate issuer.
- Output Name: Name the retrieved certificate.
- Certificate User Name: (For SSH certificates) Enter the username to be signed.
- Public Key: Provide the public key (if required).
- CSR in Base64: Provide the Certificate Signing Request (CSR) in Base64 format.
- Environment Variable: Define an environment variable to store the certificate.
- Key Name: Specify the key to fetch. To retrieve all keys, enter data.
Examples
The following examples demonstrate how to authenticate and retrieve items using the Akeyless Plugin for Jenkins.
Setting API Key Authentication
The following configuration utilizes an existing API Key in Akeyless for Jenkins authentication.
Fetching a Static Secret
The following configuration will fetch a static secret to your pipeline. This example uses a JSON-Structured secret, where only the UserName key of the secret is saved to User Environment Variable.
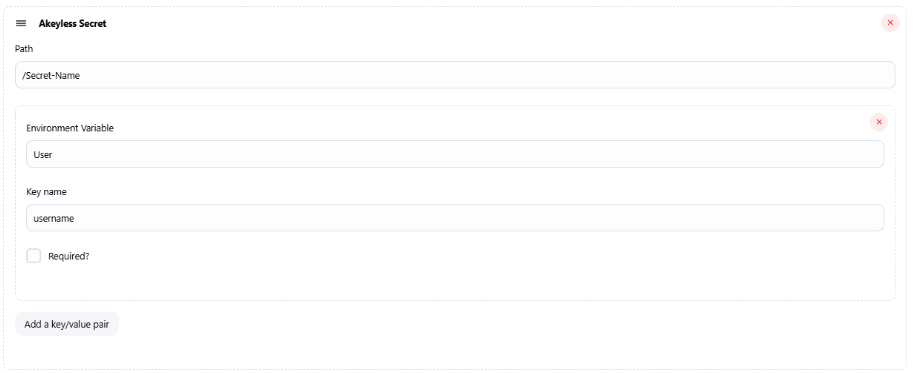
Fetching a Rotated Secret With Specific Keys
The following example will only fetch the username of the rotated secret value, and will store it into User environment variable:
Issuing an SSH Certificate
The following above will generate an SSH Certificate that will be allowed for the ubuntu user, using a public key:
Issuing a PKI Certificate
The following example will generate PKI Certificate using predefined Certificate Signing Request:
Updated 19 days ago
