KMIP for vSphere
Add a KMS to vCenter Server in vSphere Web Client
Create a KMIP Client on Akeyless Gateway
-
From the Akeyless CLI, enable the KMIP server:
akeyless kmip-server-setup --hostname <akeyless.gateway.hostname> --gateway-url <Your_Akeyless_GW_URL> --root /kmip/default -
Create KMIP client:
akeyless kmip-create-client --name myVCenter --gateway-url <Your_Akeyless_GW_URL>This returns the
client ID,private keyandcertificate:$ New client successfully created. Client ID: Zvzw0...VM2u Client Key: -----BEGIN RSA PRIVATE KEY----- MIIEpA...yRCF8UQ== -----END RSA PRIVATE KEY----- Client Certificate: -----BEGIN CERTIFICATE----- MIIDSz...0otOEQQ== -----END CERTIFICATE----- -
Save the received certificate and key in a safe place. They will be used to set up the connection.
-
By default, KMIP clients have no permissions. To grant your KMIP client minimal access permissions, execute the following command:
akeyless kmip-client-set-rule --gateway-url <Your_Akeyless_GW_URL> --client-id <From step 2, kc-TmA3...VM2u> \
    --path "/*" \
    --capability CREATE \
    --capability GET \
    --capability GET_ATTRIBUTES \
    --capability ACTIVATE
vCenter Server Setup
-
Log in to the vCenter Server system with the vSphere Web Client.
-
Browse the inventory list and select the vCenter Server instance.
-
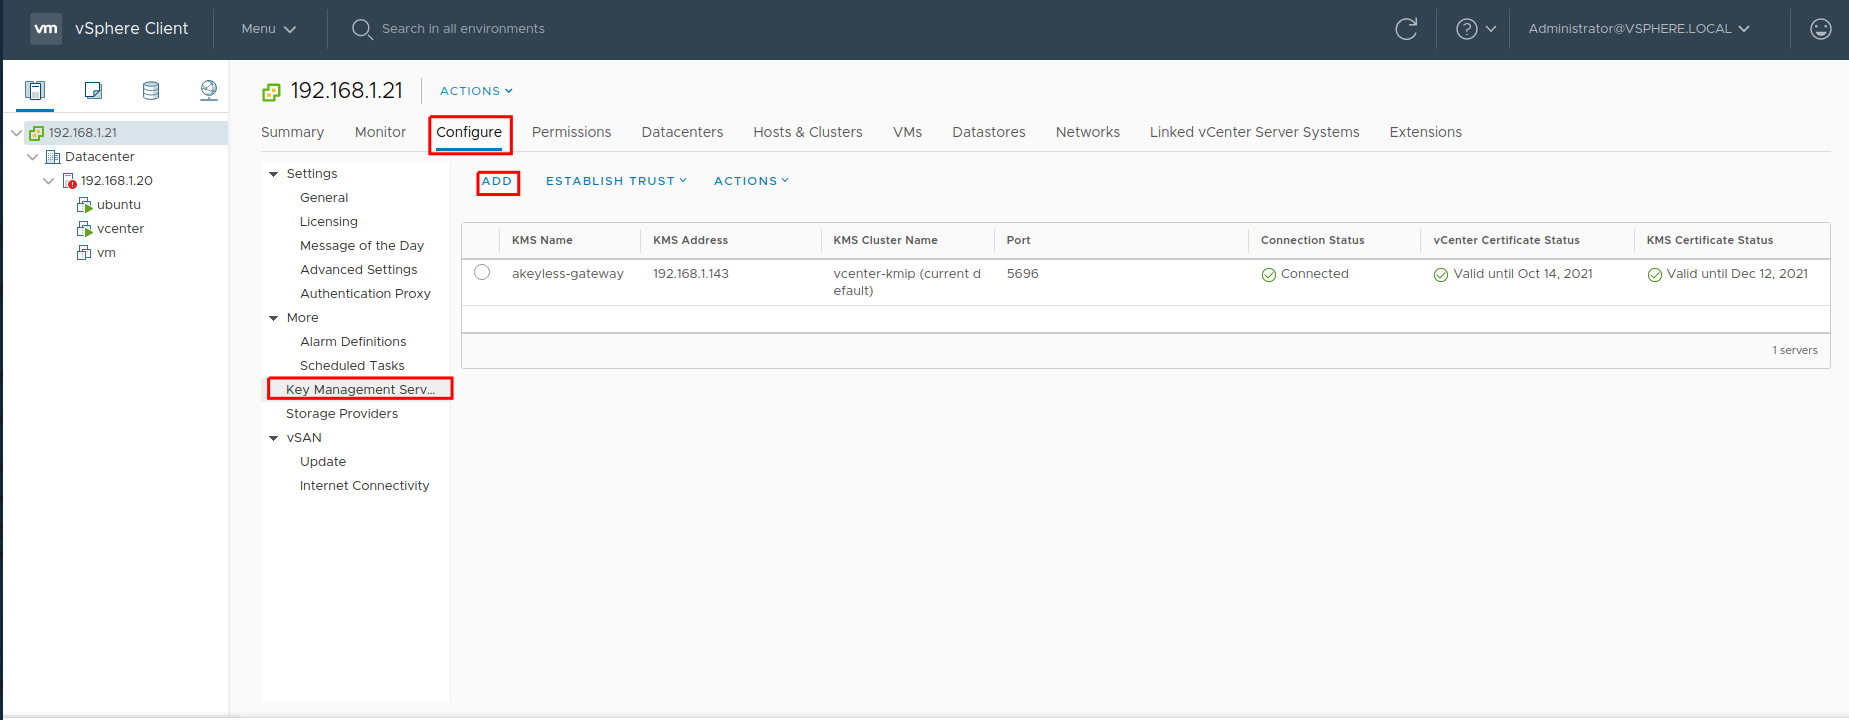
Click Configure, then click Key Management Servers.
-
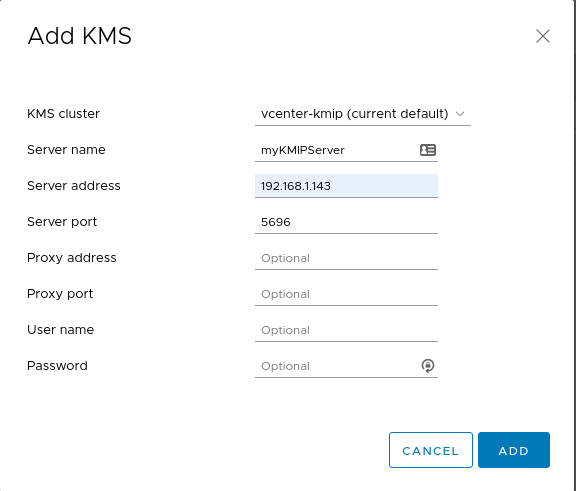
Click Add KMS. For Server address, supply your Akeyless Gateway address, for Server port, use 5696. Click Add.
-
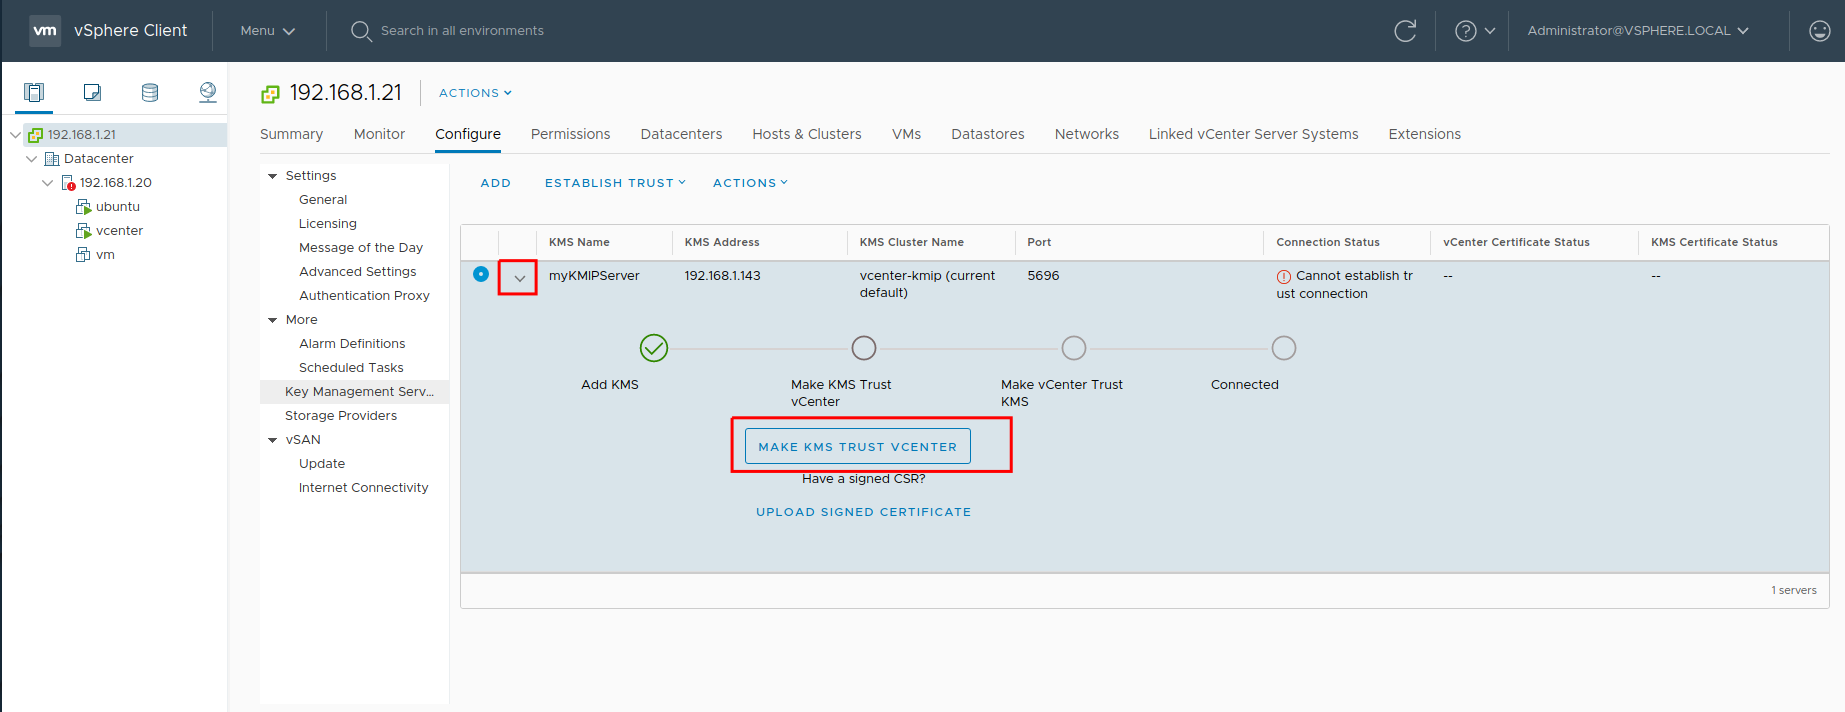
Extend the new line and click Make KMS Trusted vCenter:
-
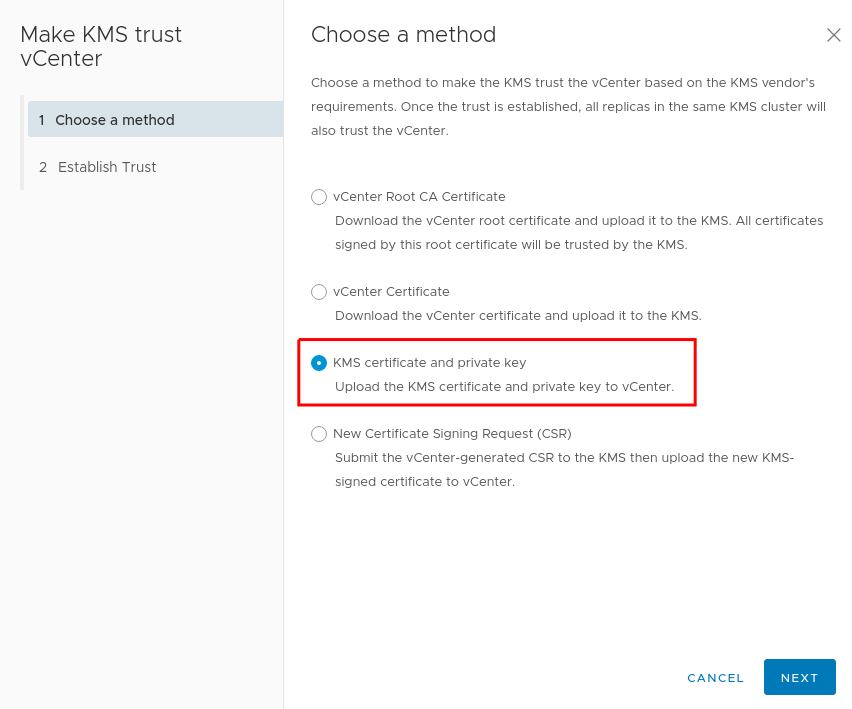
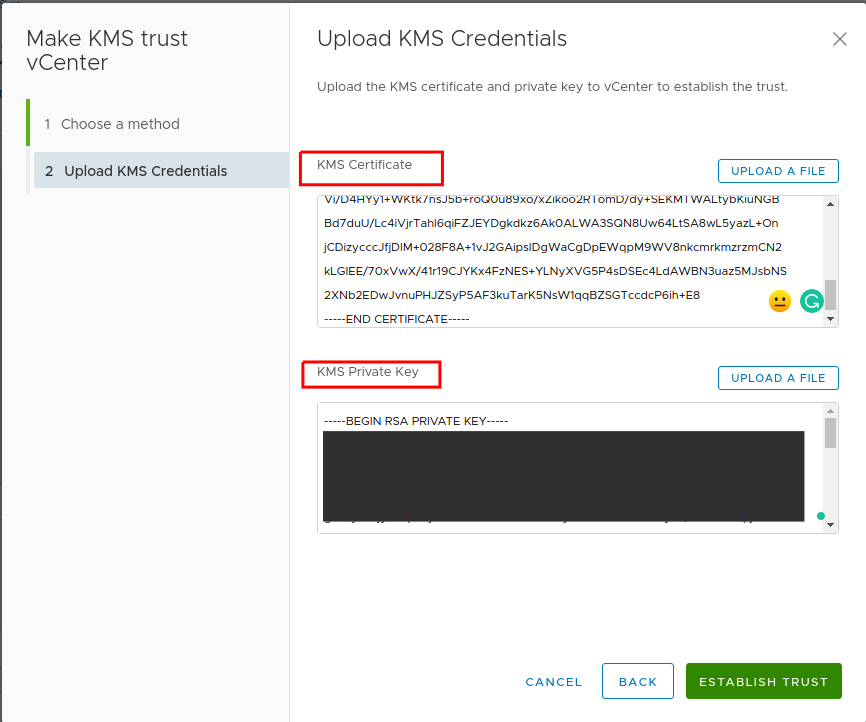
For a method, choose KMS certificate and private key:
-
For KMS Certificate and KMS Private key, set the certificate and private key, and click Establish Trust:
-
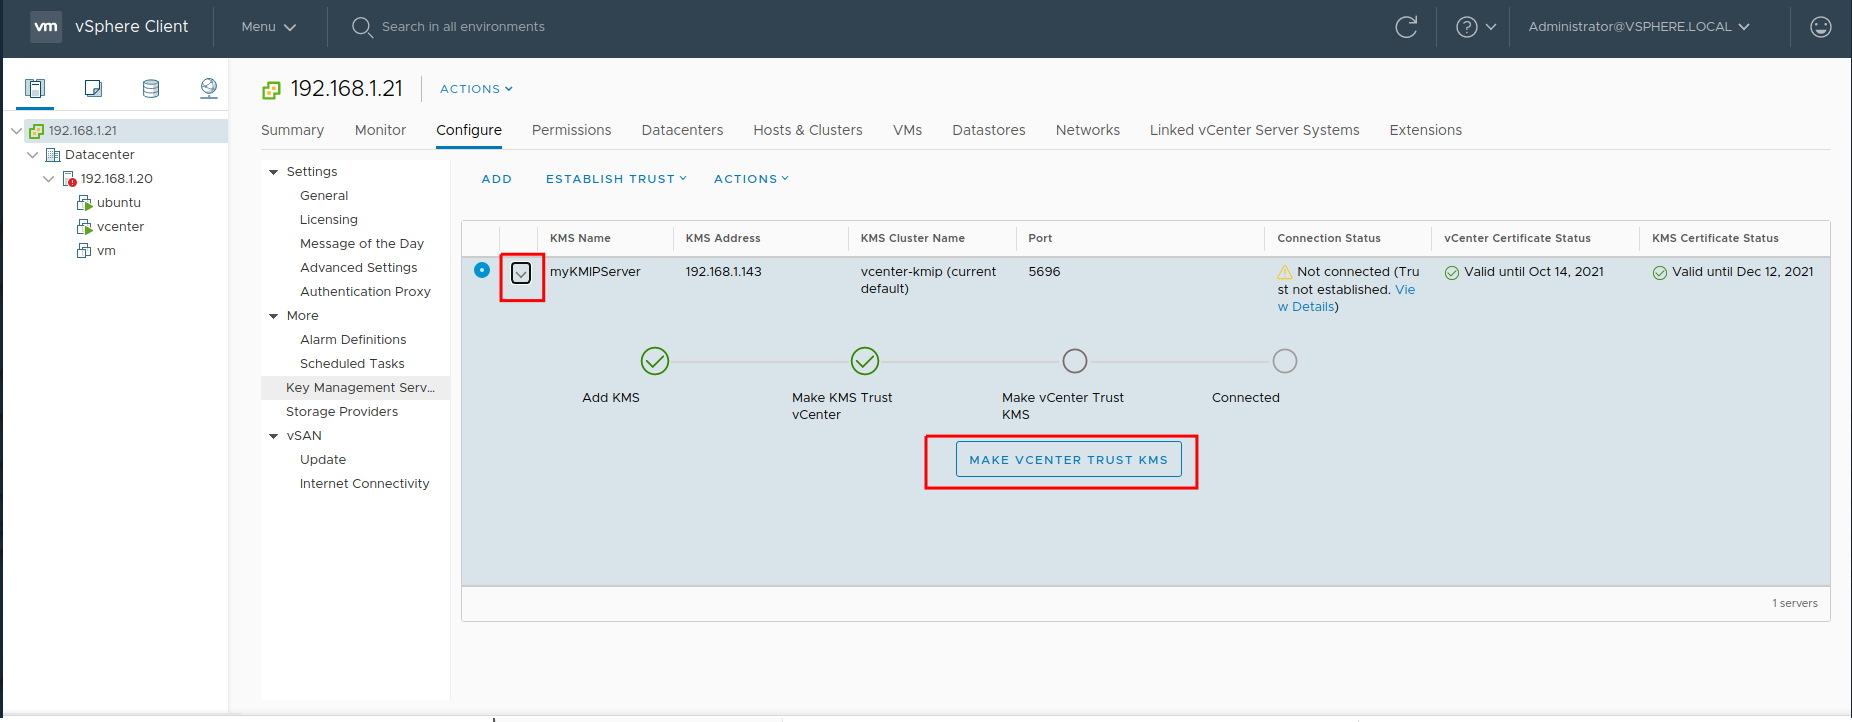
Extend the new line again and click Make vCenter Trust KMS:
-
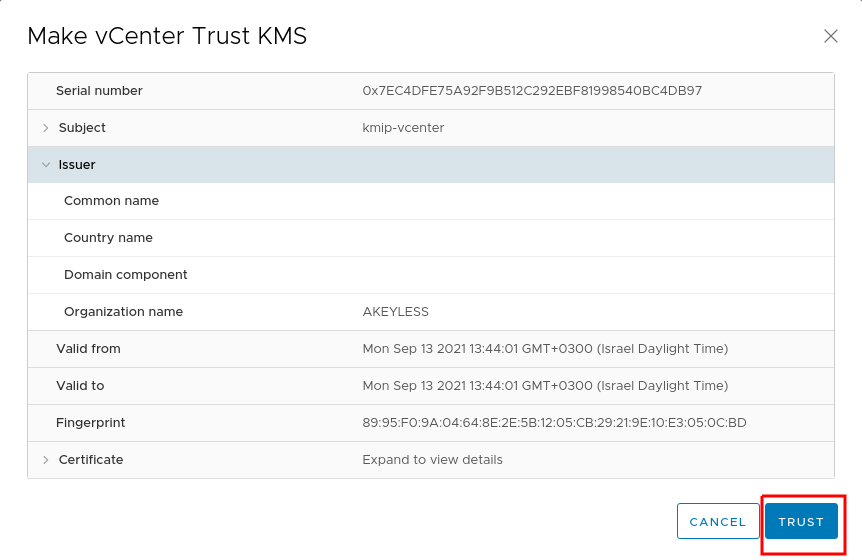
In the dialog, click TRUST:
-
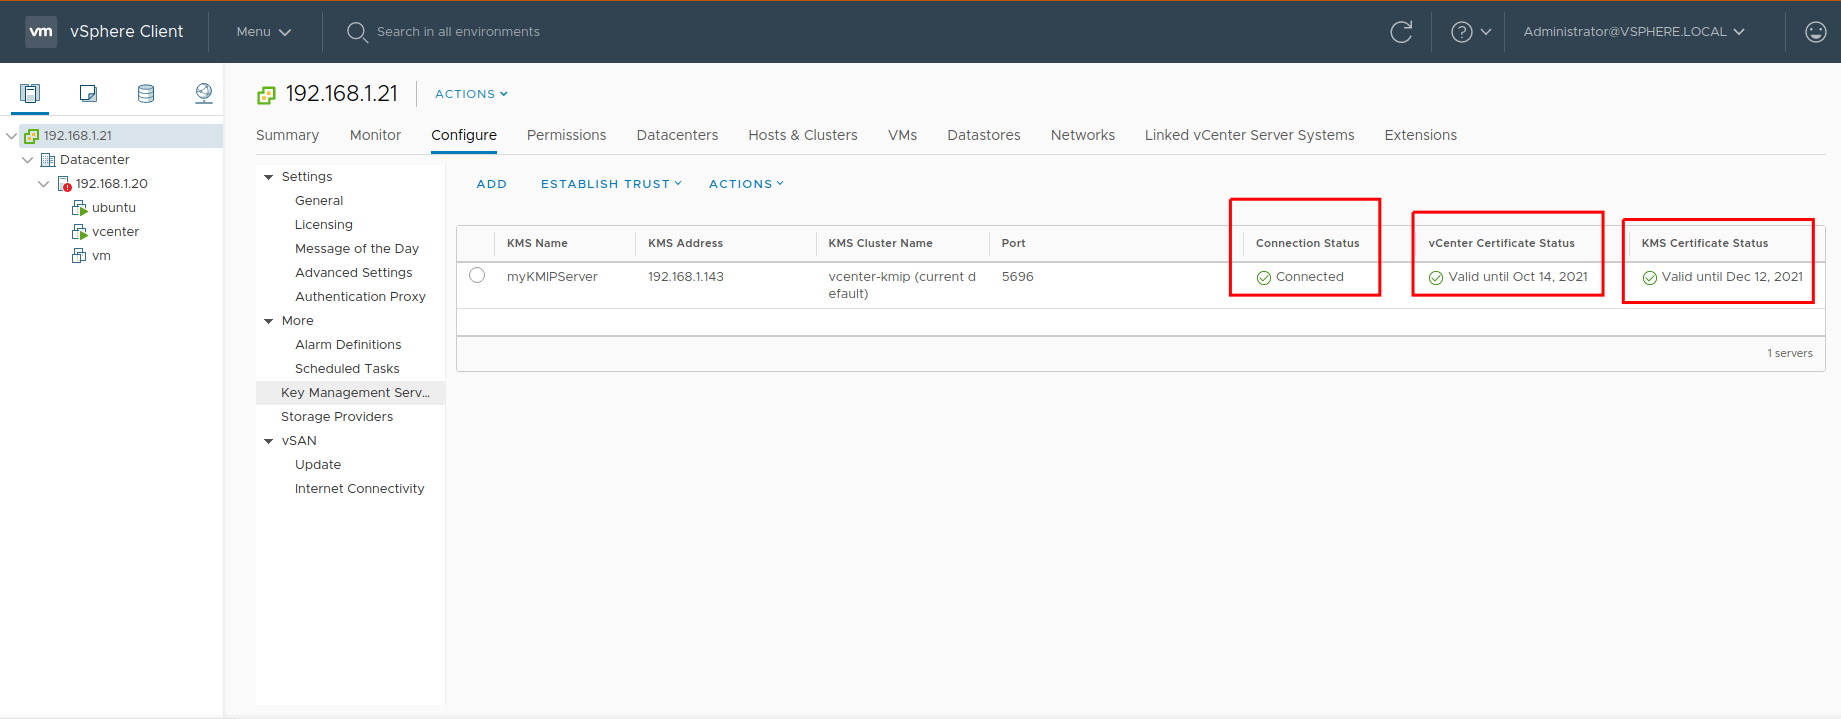
Verify all statuses are valid:
Updated 5 months ago