Okta - OIDC
To use Okta as an IdP to authenticate into the Akeyless Platform by way of OIDC, follow the steps below.
Create an Okta Application
-
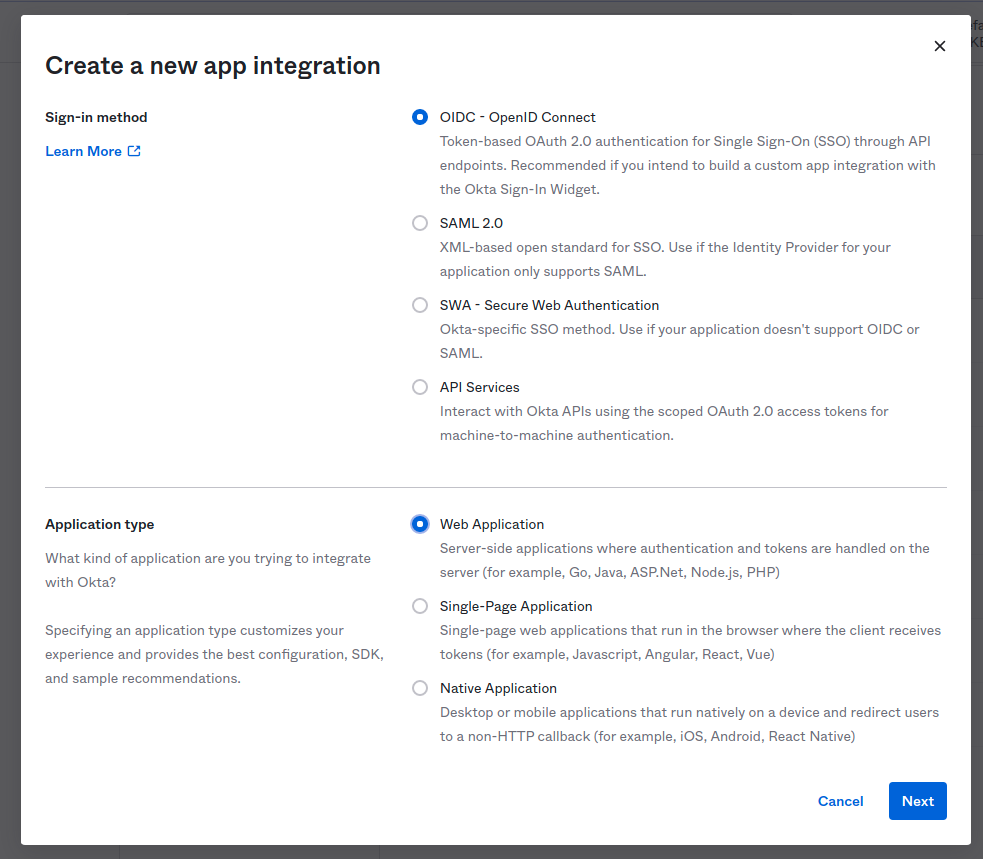
In your Okta account, go to Applications > Add Application > Create App Integration.
-
For Sign-in method, select OIDC - OpenID Connect and for Application type, select Web Application and select Next.
-
On the Settings page:
a. For the Grant type, check Authorization Code.
b. Sethttps://auth.akeyless.io/oidc/callbackinto the Sign-in redirect URIs.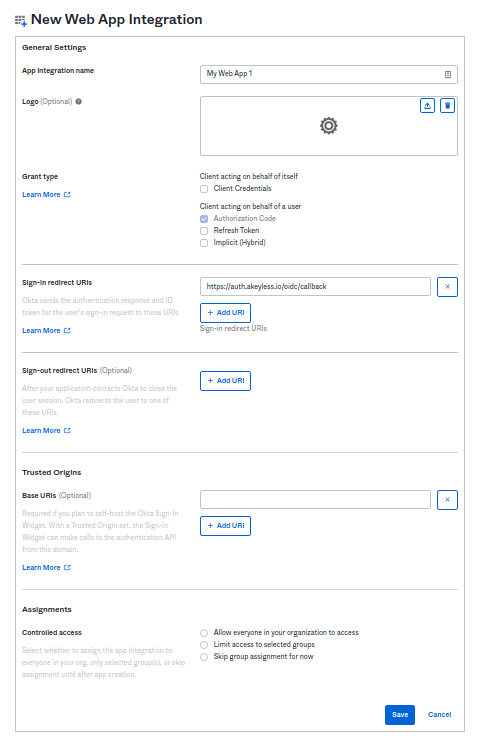
-
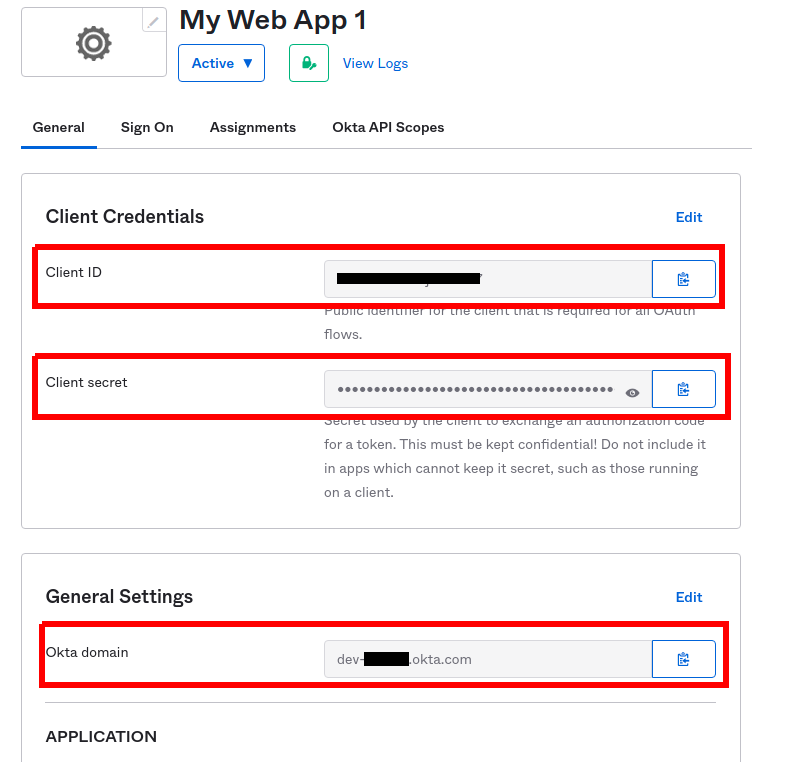
Once the OIDC app has been created, you need to obtain the Client ID, Client secret, and Okta domain:
 Adding ״groups״ claim - Okta side
In Okta, add a custom "groups" claim under Authorization Server → Claims, using a filter (For example, regex) and bind it to a custom scope.
In Okta, add a custom "groups" claim under Authorization Server → Claims, using a filter (for example, regex) and bind it to a custom scope. -
To bind the Okta application with your Akeyless account, create an OIDC Authentication Method using either CLI or UI, as described below.
Create an OIDC Authentication Method with the CLI
akeyless auth-method create oidc --name 'My Okta app' --issuer https://{your-okta-domain}.okta.com --client-id {your-client-id} --client-secret {your-client-secret} --required-scopes groups --unique-identifier {your-unique-identifier (for example, 'email' or 'username')}
Note (Required Scopes):Set the OIDC Auth Method "Required Scopes" to "groups" so it is included in the sub-claims.
Log in With OIDC From the Akeyless CLI
-
Configure a new profile with your Access ID from the previous step and OIDC type (if no profile name is provided, the default profile will be configured):
akeyless configure --access-id <your-access-id> --access-type oidc --profile 'okta-app'For more information about creating and managing CLI profiles, see CLI Profiles.
-
Now, you can run any Akeyless CLI command and be authenticated with the Okta application:
akeyless list-items --profile okta-app
Updated 3 months ago