Azure AD - OIDC
To use Azure Active Directory (AAD) as an IdP to authenticate the Akeyless Platform by way of OIDC, follow the steps below.
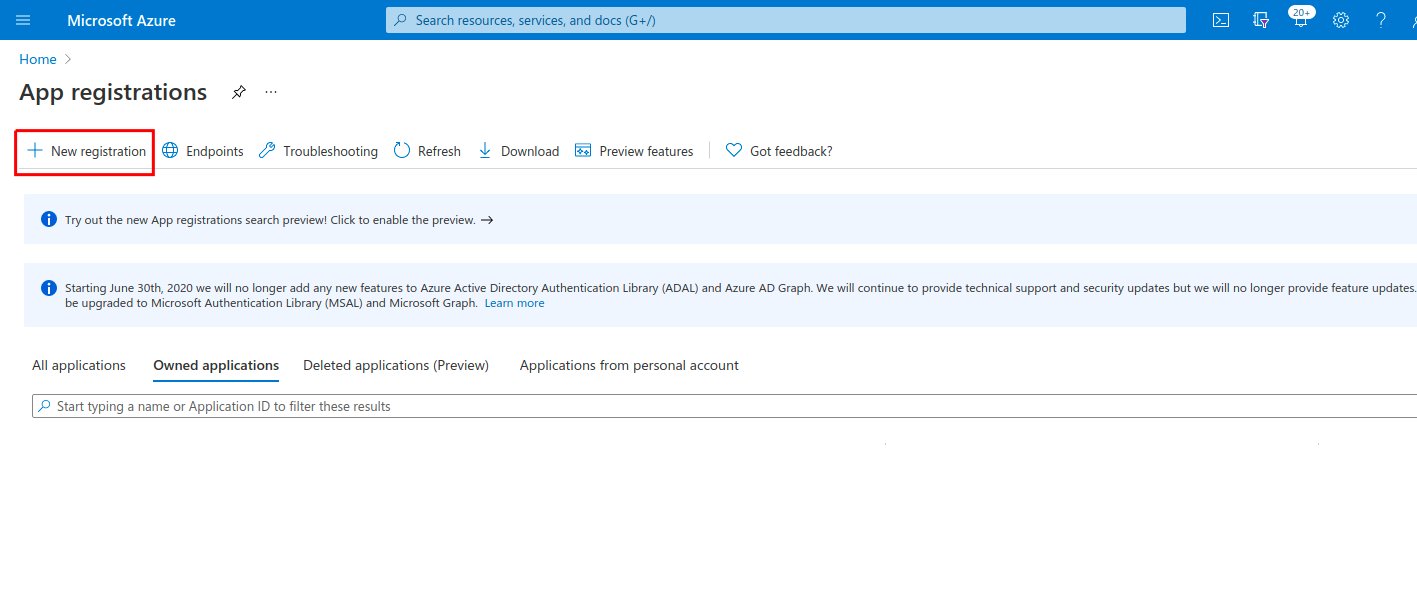
Create an Application
-
In your Azure account, go to App registrations > New registrations.
-
For Redirect URI, select Web for Application type. Set
https://auth.akeyless.io/oidc/callbackas the value and select Register.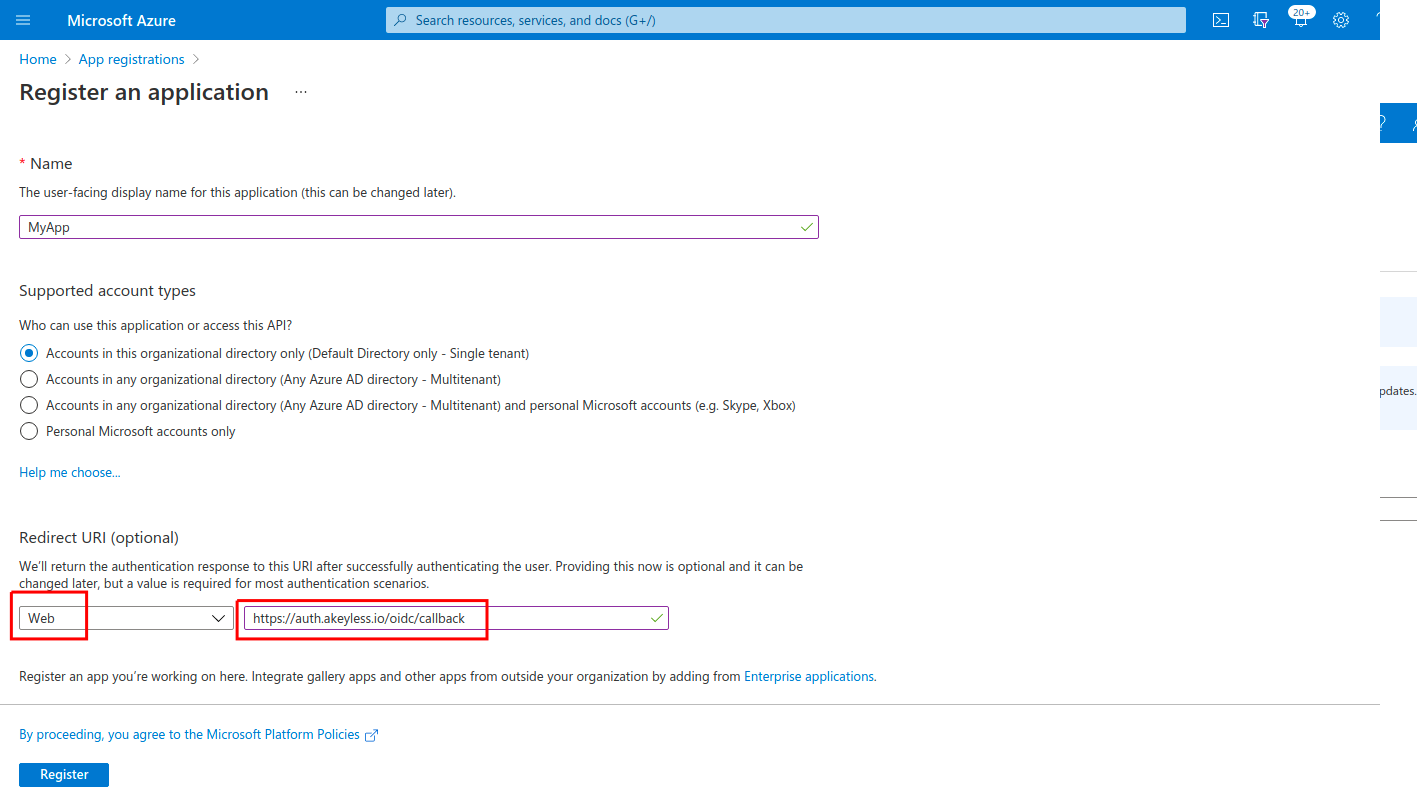
-
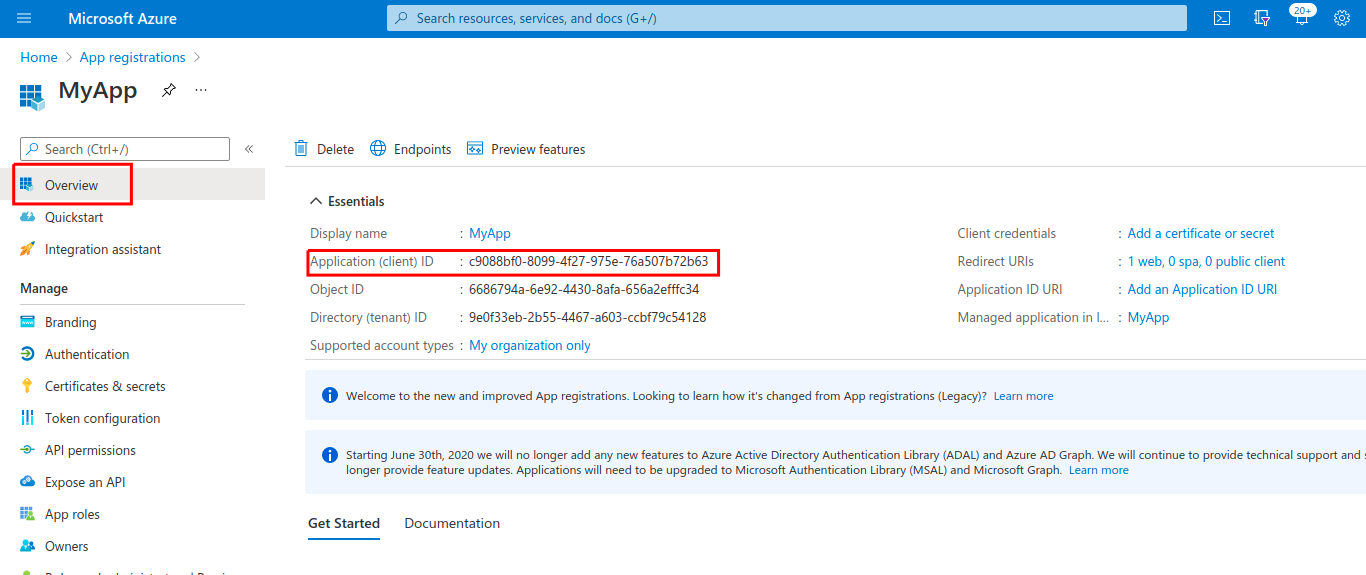
Once the app has been created, you need to obtain the Client ID, Client Secret, and the Issuer URL:
- The Client ID can be fetched from Overview > Application (client) ID:
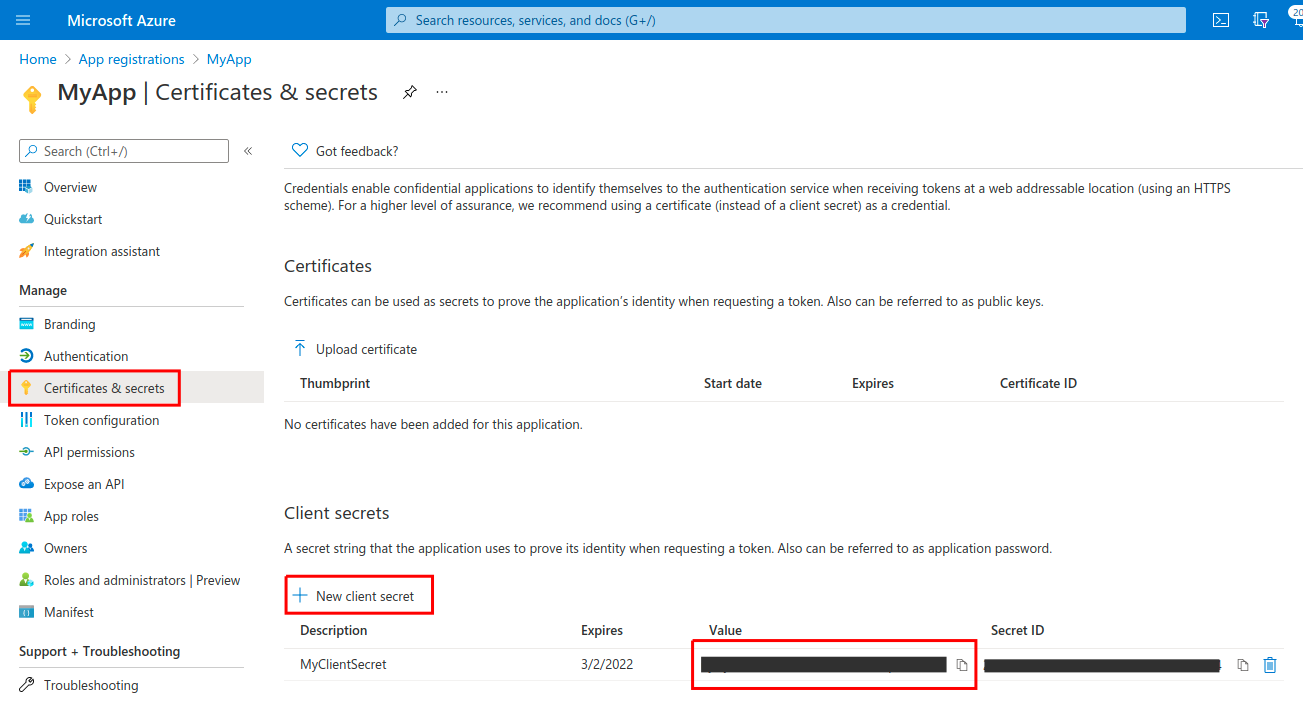
- The Client Secret can be created under Certificates & Secrets > New Client Secret (make sure to copy the Secret Value, not the Secret ID):
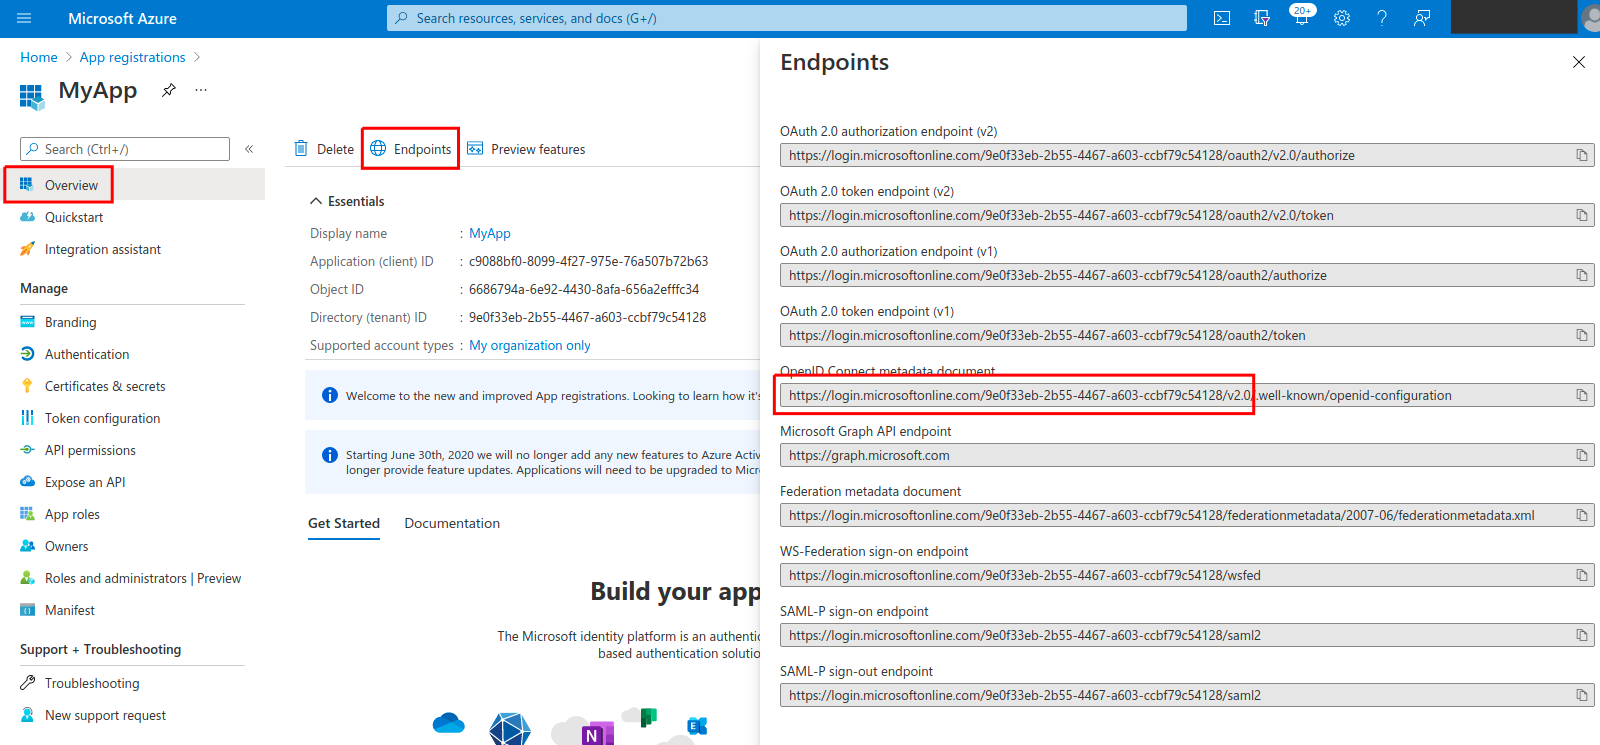
- The Issuer URL can be fetched from Overview > Endpoints > OpenID Connect metadata document (note that the suffix /.well-known/openid-configuration should be omitted so that the Issuer URL will look like:
https://login.microsoftonline.com/tenant-id-abcd-efgh-a123-b456/v2.0):
-
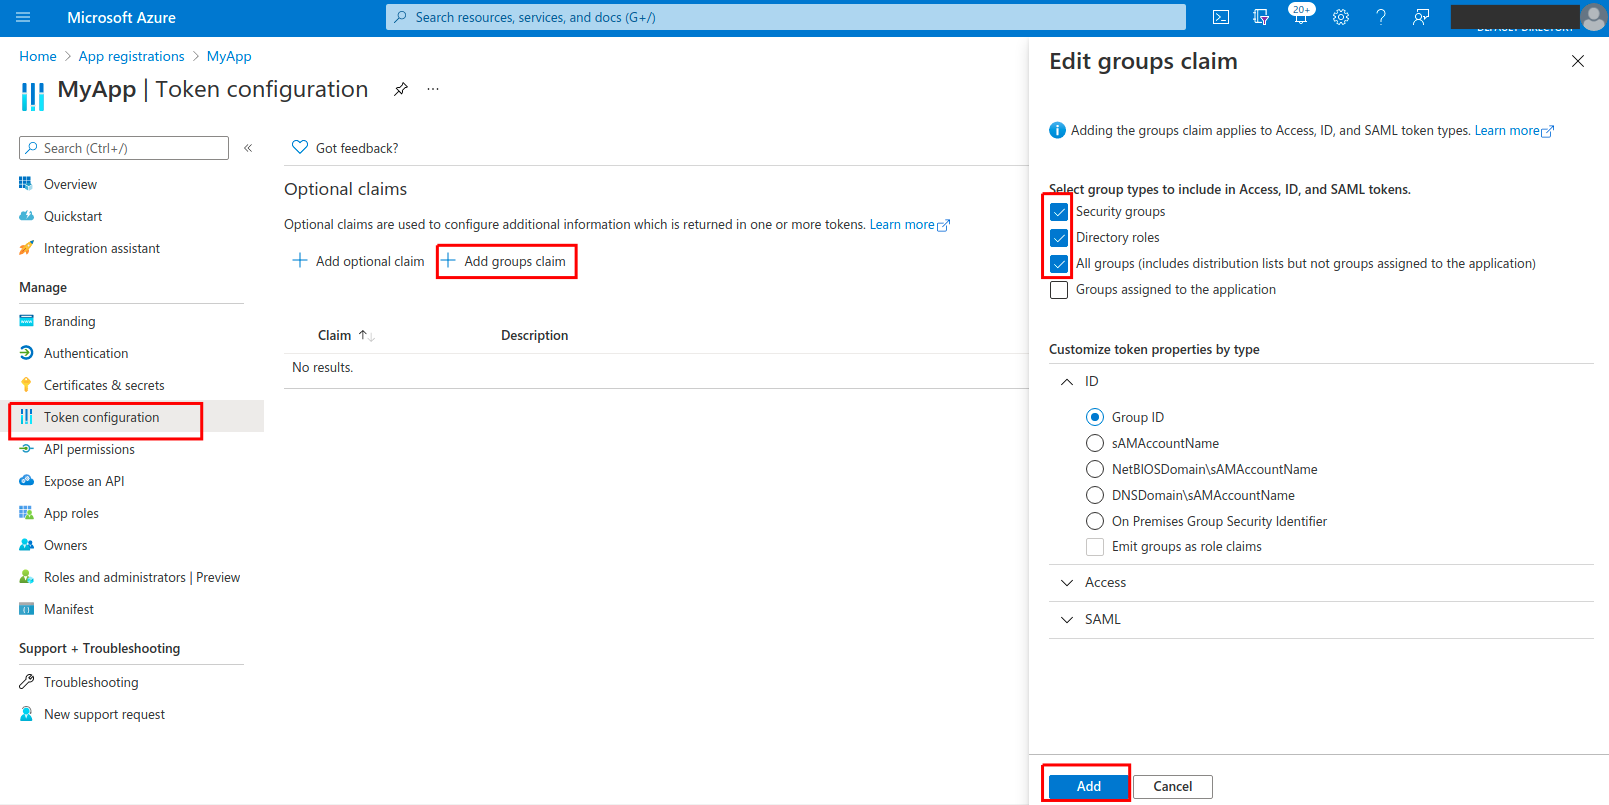
To add the AD group as a sub-claim, go to Token configuration > Add Groups Claim:
-
To bind the Azure application with your Akeyless account, create an OIDC Authentication Method using either CLI or UI, as described below.
Create an OIDC Authentication Method with the CLI
akeyless auth-method create oidc --name 'my Azure app' --issuer https://{your-issuer-url} --client-id {your-client-id} --client-secret {your-client-secret} --unique-identifier {your-unique-identifier (for example, 'email' or 'username')}This can also be done from the Console UI by creating a New OIDC Auth Method and filling in the same required parameters.
Notice that unique-identifier must be an available claim, which out of the box might be the preferred_username field.
If you wish to use a field such as email instead, make sure to first Add optional claim under Token configuration (in the Azure App), and add the email claim.
To log in with SSO to Akeyless using your new Azure AD OIDC Auth Method, log in to the Console, browse to Auth Methods, select the newly created OIDC Auth Method, and click Generate OIDC Bookmark URL. This provides the SSO link.
Log in With OIDC Using the CLI
Configure a new profile with your Access ID from the previous step and OIDC type (if no profile name is provided, the default will be configured):
akeyless configure --access-id <your-access-id> --access-type oidc --profile 'azure-app'Now, you can run any Akeyless CLI command and be authenticated with the Azure application:
akeyless list-items --profile azure-appAzure Groups Overage Claim
When Azure does not include the groups claim directly in an OIDC token and instead returns distributed-claim pointers (_claim_names / _claim_sources), as documented in Groups overage claim, Akeyless attempts to resolve the user's full group list by calling Microsoft Graph. According to Microsoft, this overage behavior occurs when membership exceeds 200 groups for JWT (OIDC) tokens or 150 groups for SAML tokens.
{
  "_claim_names": {
    "groups": "src1"
  },
  "_claim_sources": {
    "src1": {
      "endpoint": "https://graph.microsoft.com/v1.0/users/{objectId}/getMemberObjects"
    }
  }
}
Akeyless detects this distributed-claim pattern and calls Microsoft Graph by using the OIDC auth method's client credentials (client_id and client_secret) to retrieve group memberships from the getMemberObjects endpoint. For this flow to succeed, the Azure app registration must have Microsoft Graph Application permissions that allow group membership retrieval (for example, GroupMember.Read.All or Directory.Read.All), with admin consent granted.
Grant the Required API Permission
- In the Azure portal, navigate to App registrations and select your Akeyless OIDC application.
- Go to API permissions and select Add a permission.
- Select Microsoft Graph.
- Select Application permissions.
- Search for and add
GroupMember.Read.All(orDirectory.Read.All). - Select Grant admin consent for <your directory> and confirm.
Note:This permission is only required for distributed-claim group resolution. If Azure includes
groupsdirectly in the token for your users, no additional Graph API permission is required.
Updated 3 months ago