Create WorkFlow
Initiate a Workflow in ServiceNow Triggered by New Employee Records
Creating a flow in ServiceNow involves using the Flow Designer, a powerful tool that enables you to automate processes and tasks within your ServiceNow environment without the need for extensive coding. Flows can consist of triggers, actions, and logic to perform a wide range of automated tasks, from simple notifications to complex orchestration of cross-application processes. Below is a step-by-step guide on how to create a flow in ServiceNow.
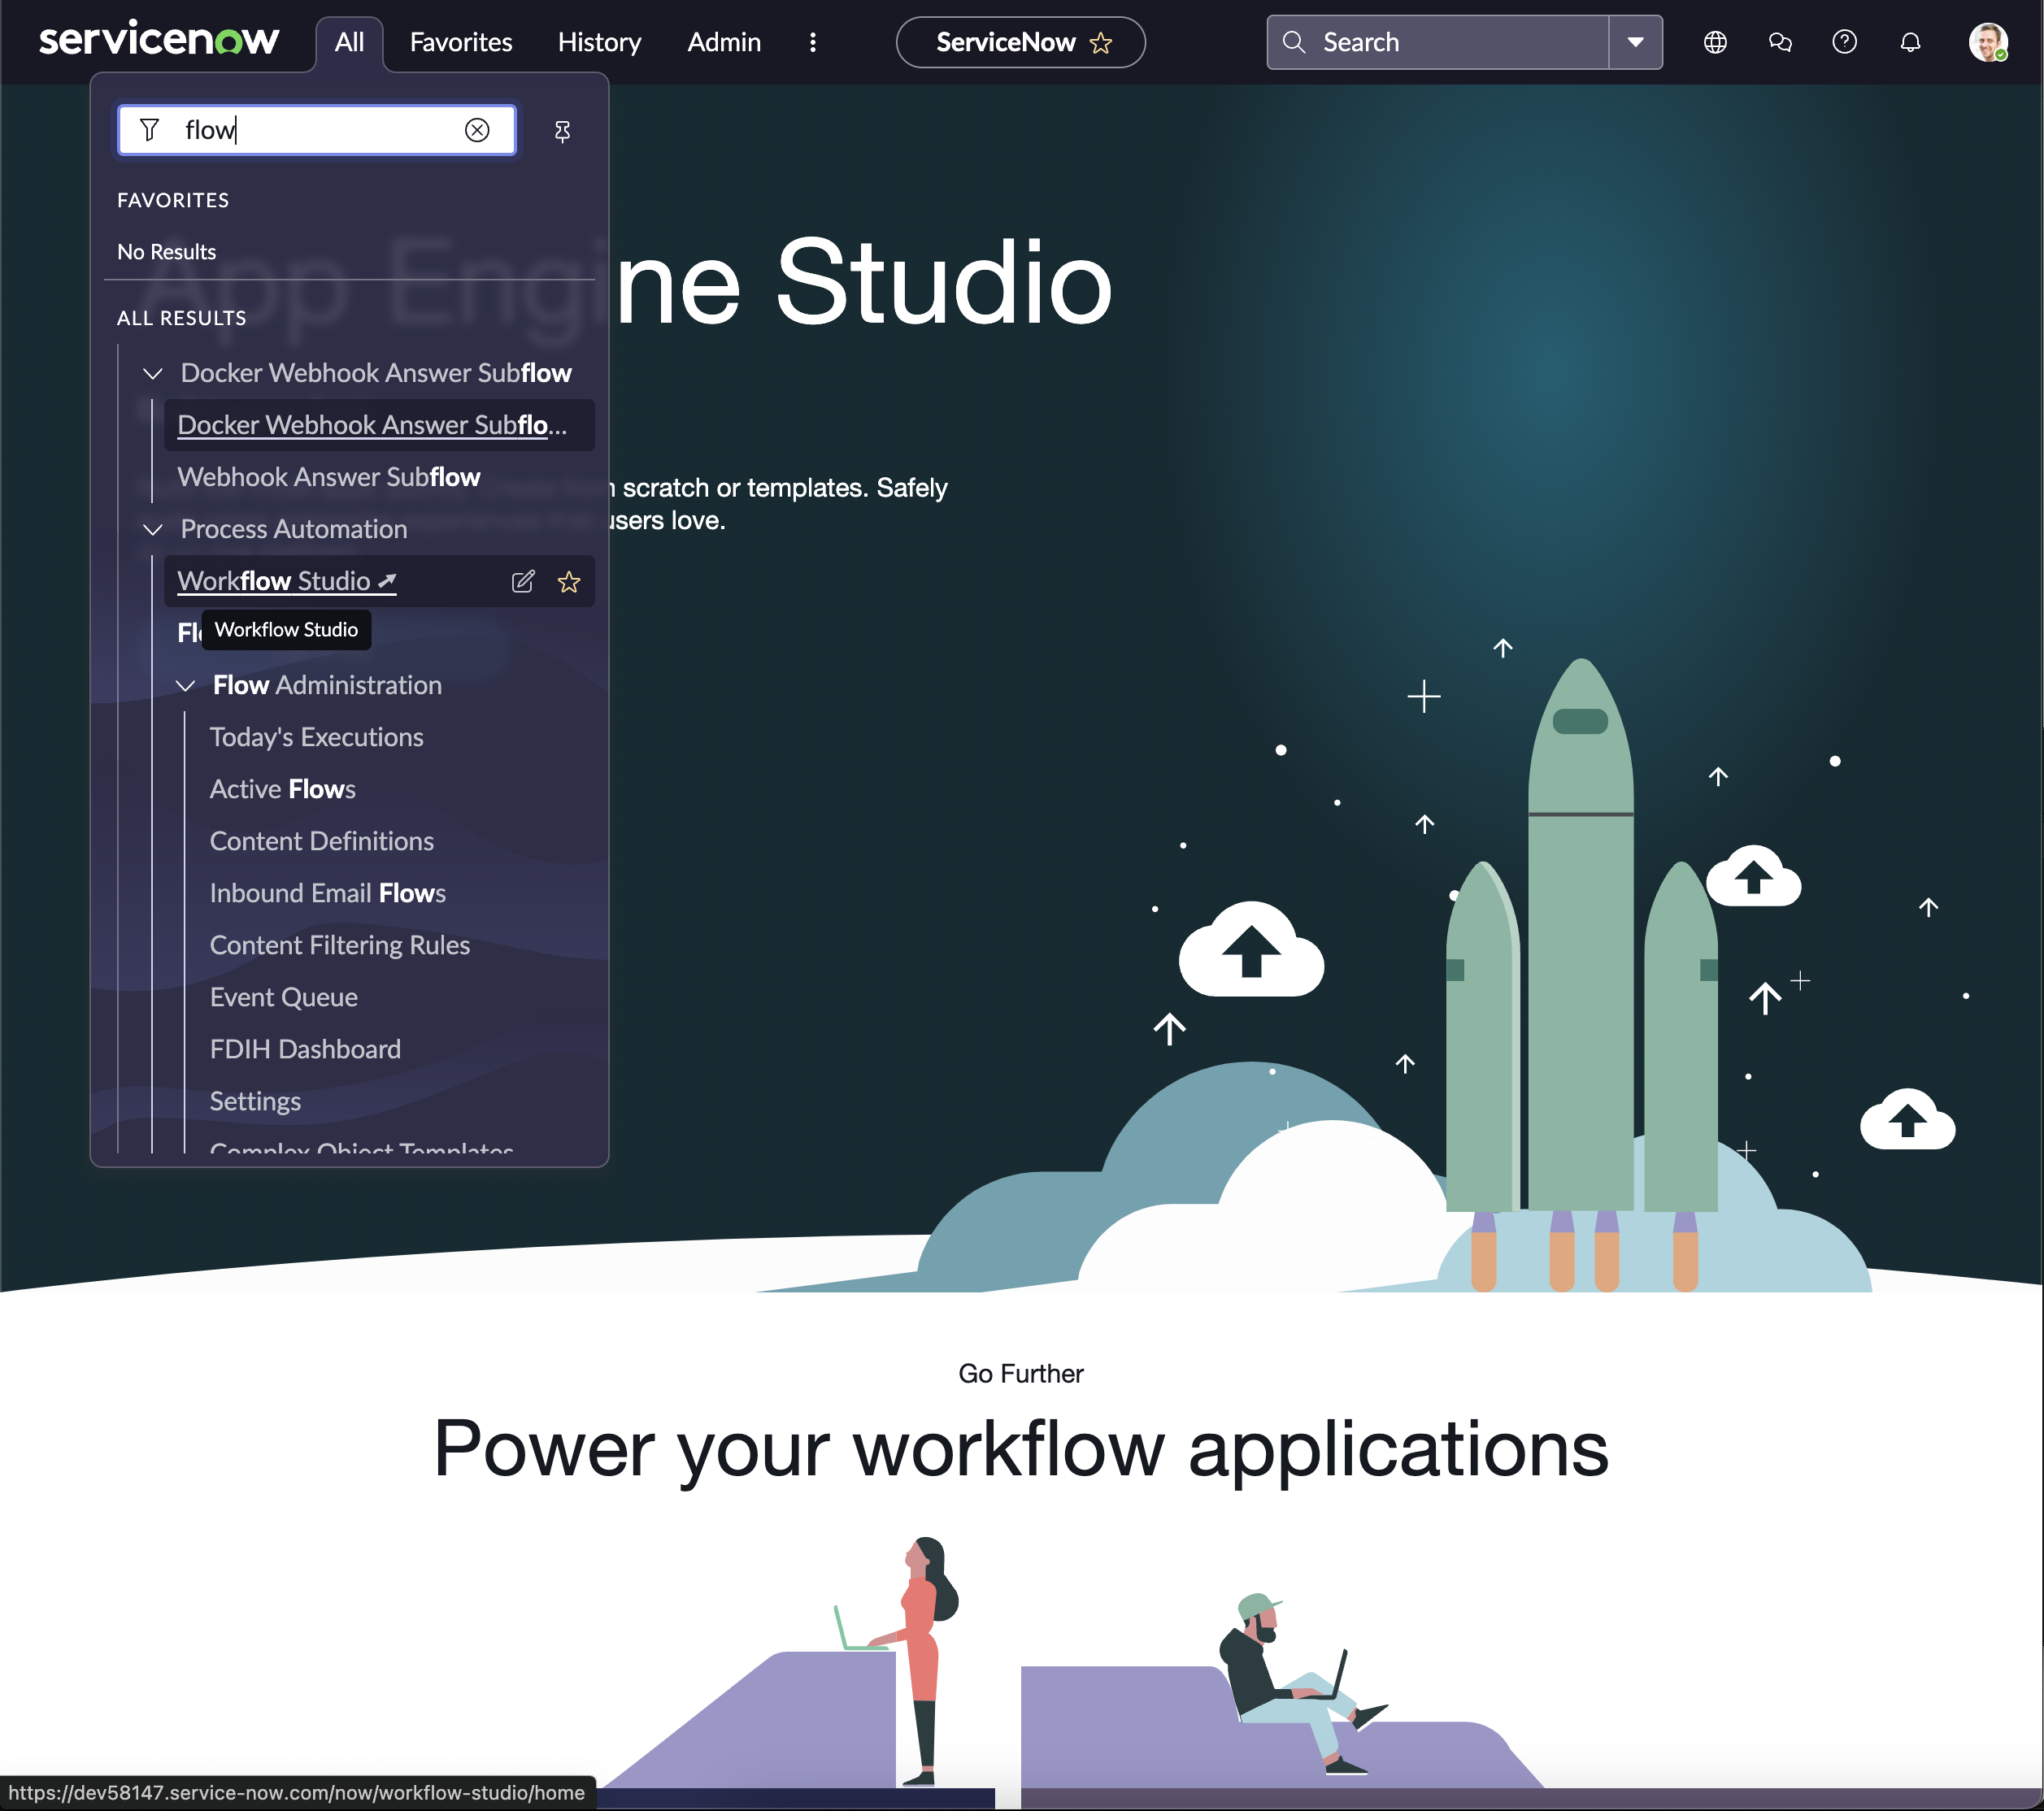
Step 1: Access the Flow Designer
- Log in to your ServiceNow instance.
- In the Navigation Filter box, type Flow Designer.
- Click on Flow Designer to open the Flow Designer interface.
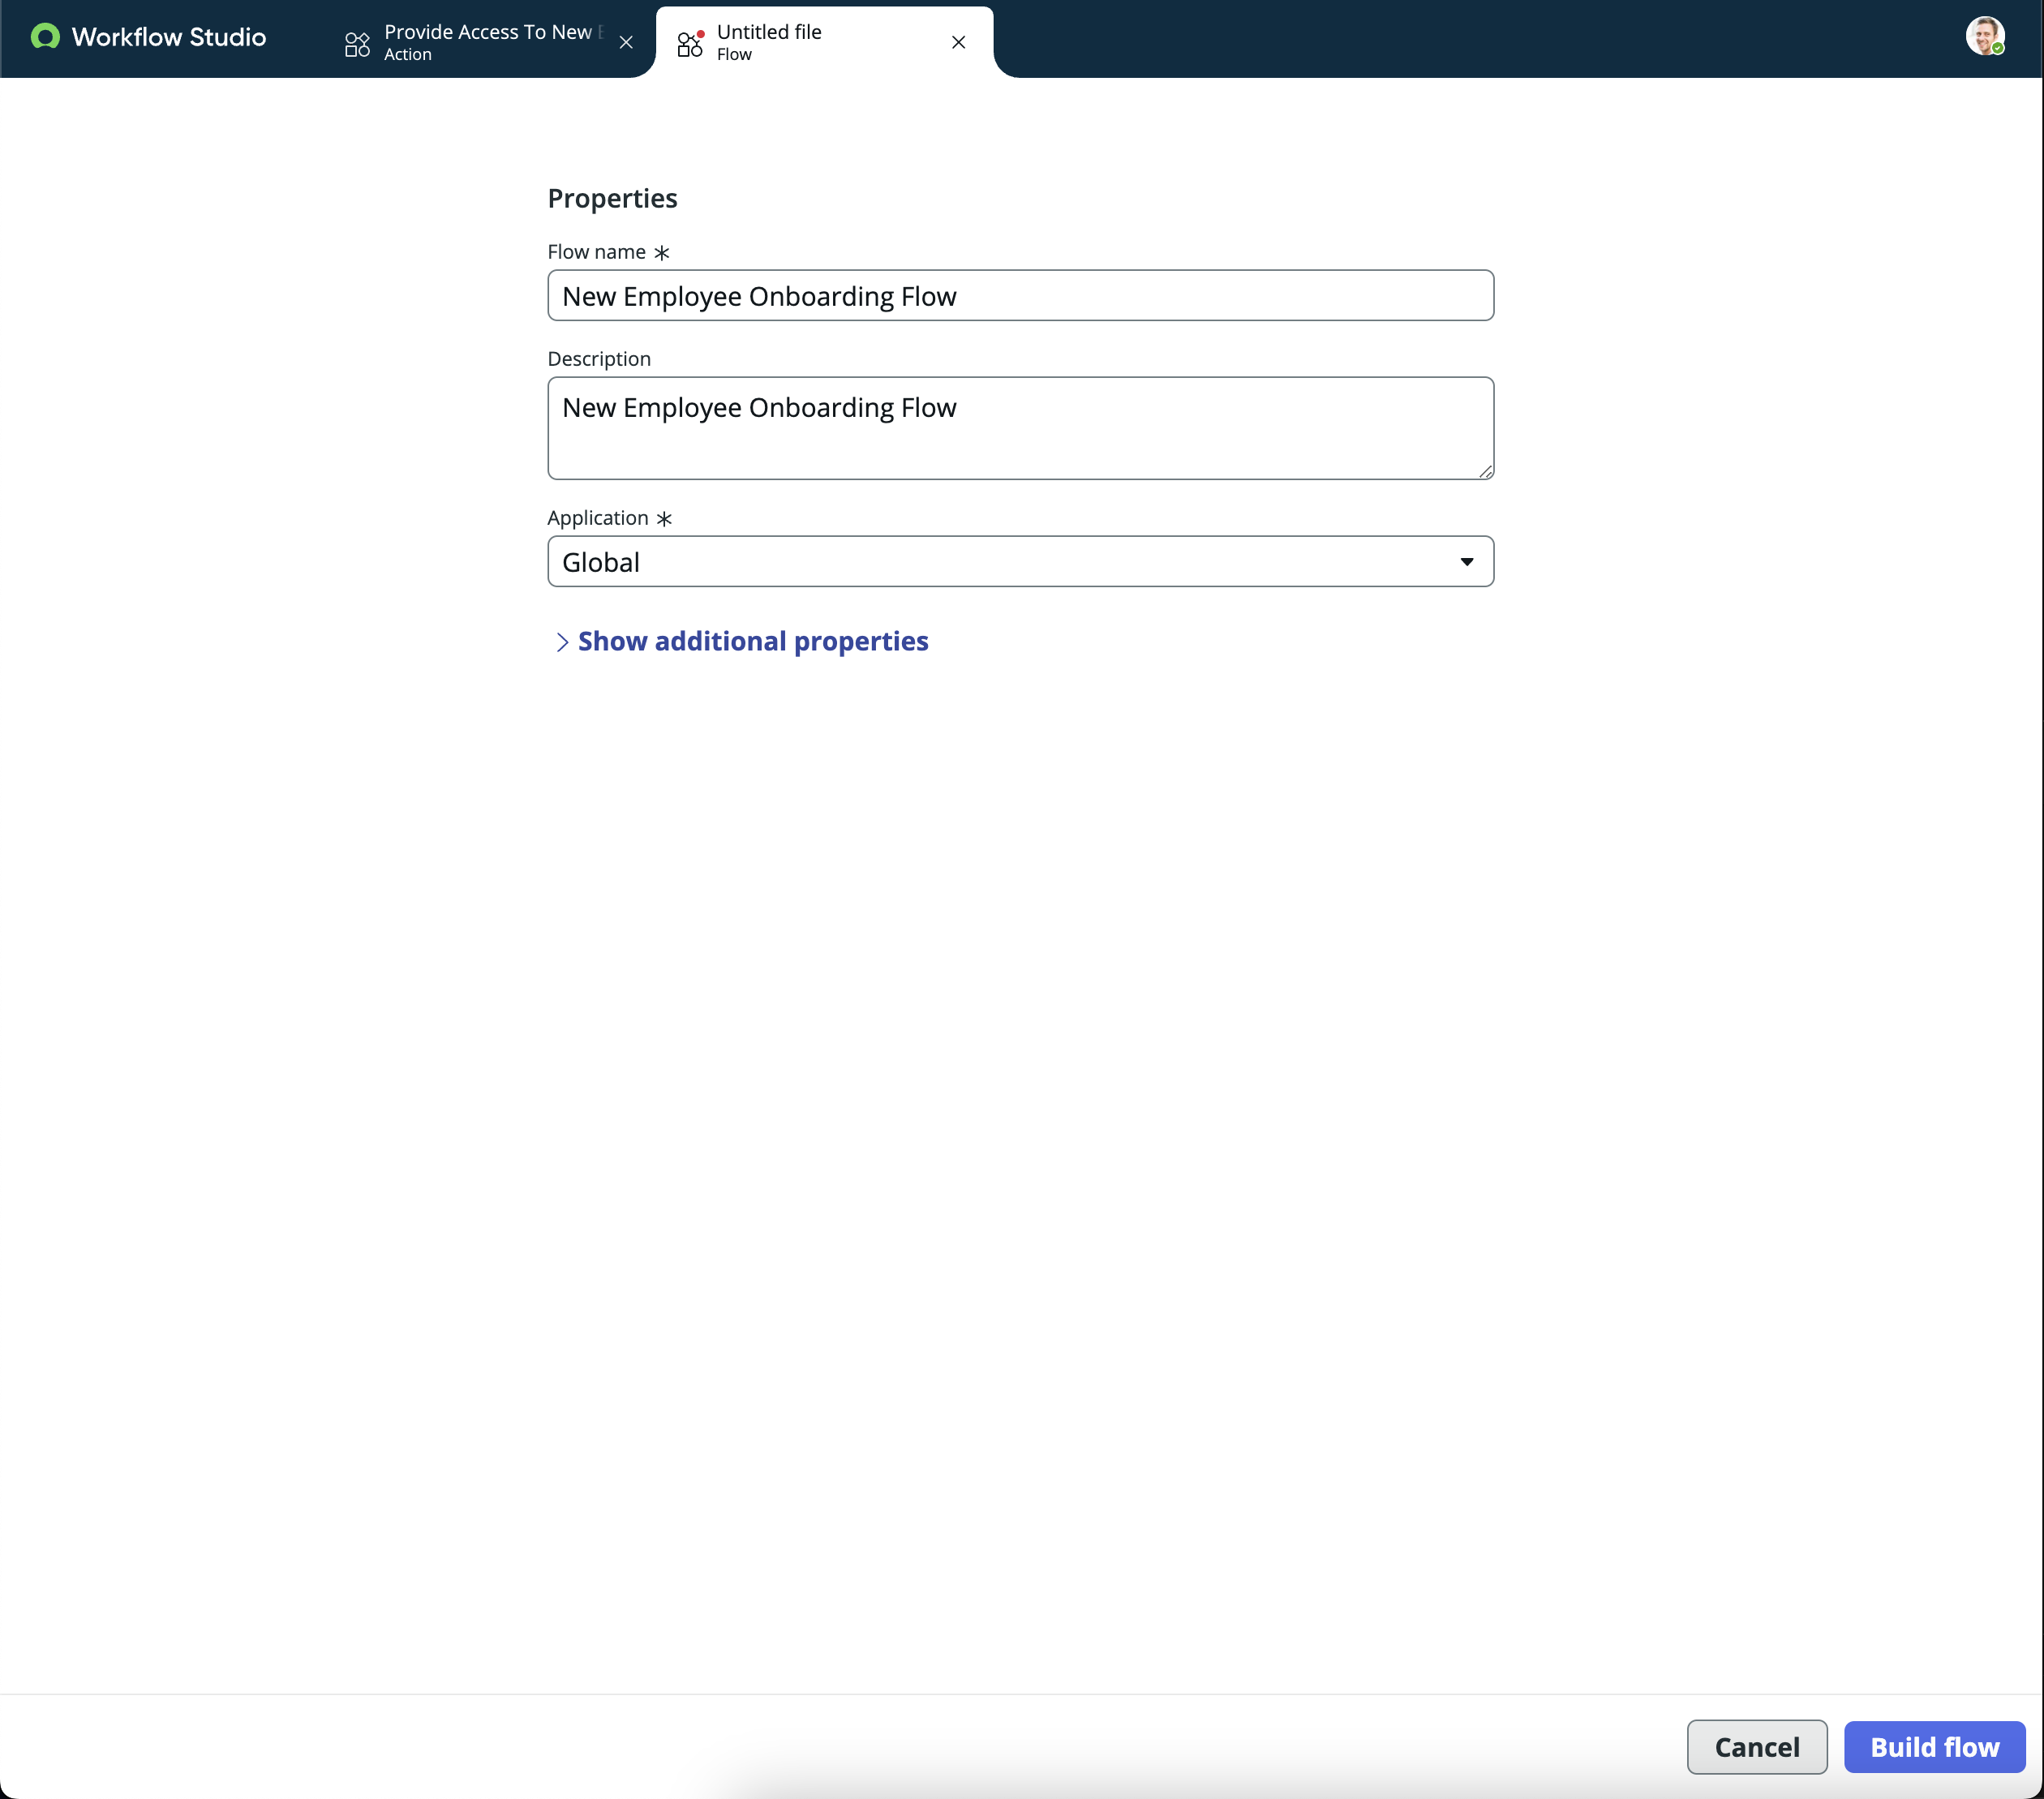
Step 2: Create a New Flow
- In the Flow Designer interface, click on the New button to create a new flow.
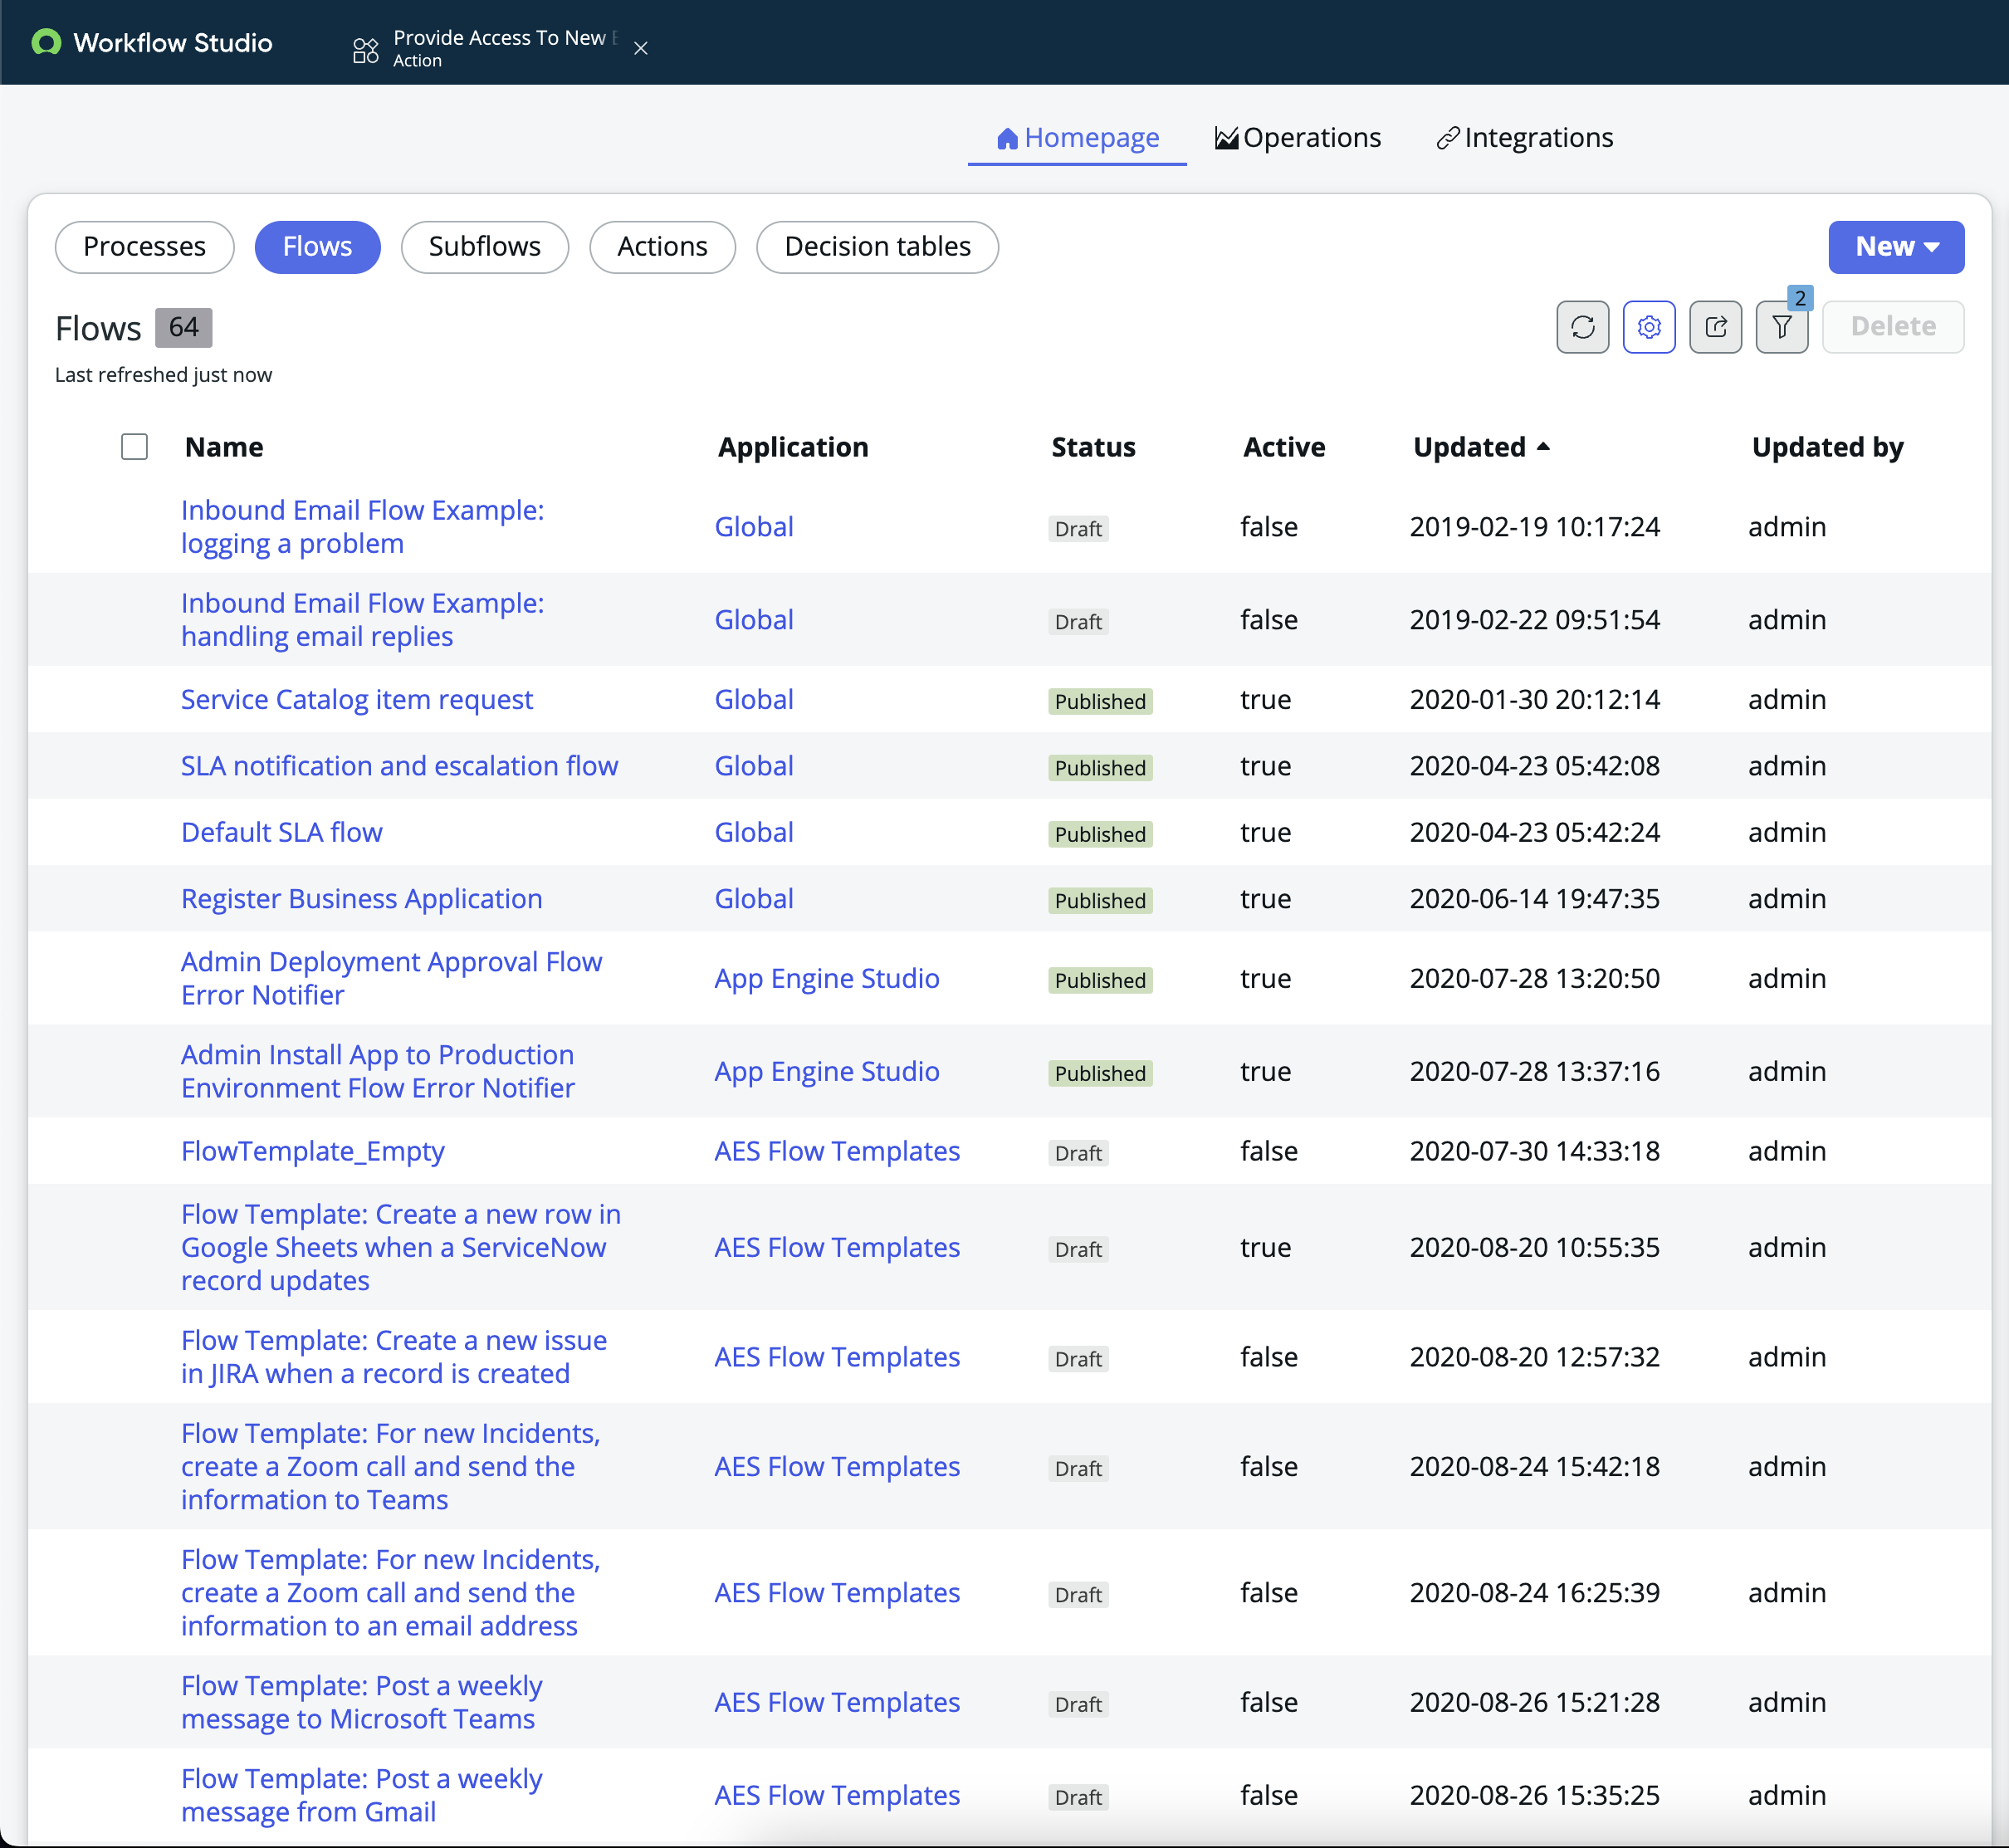
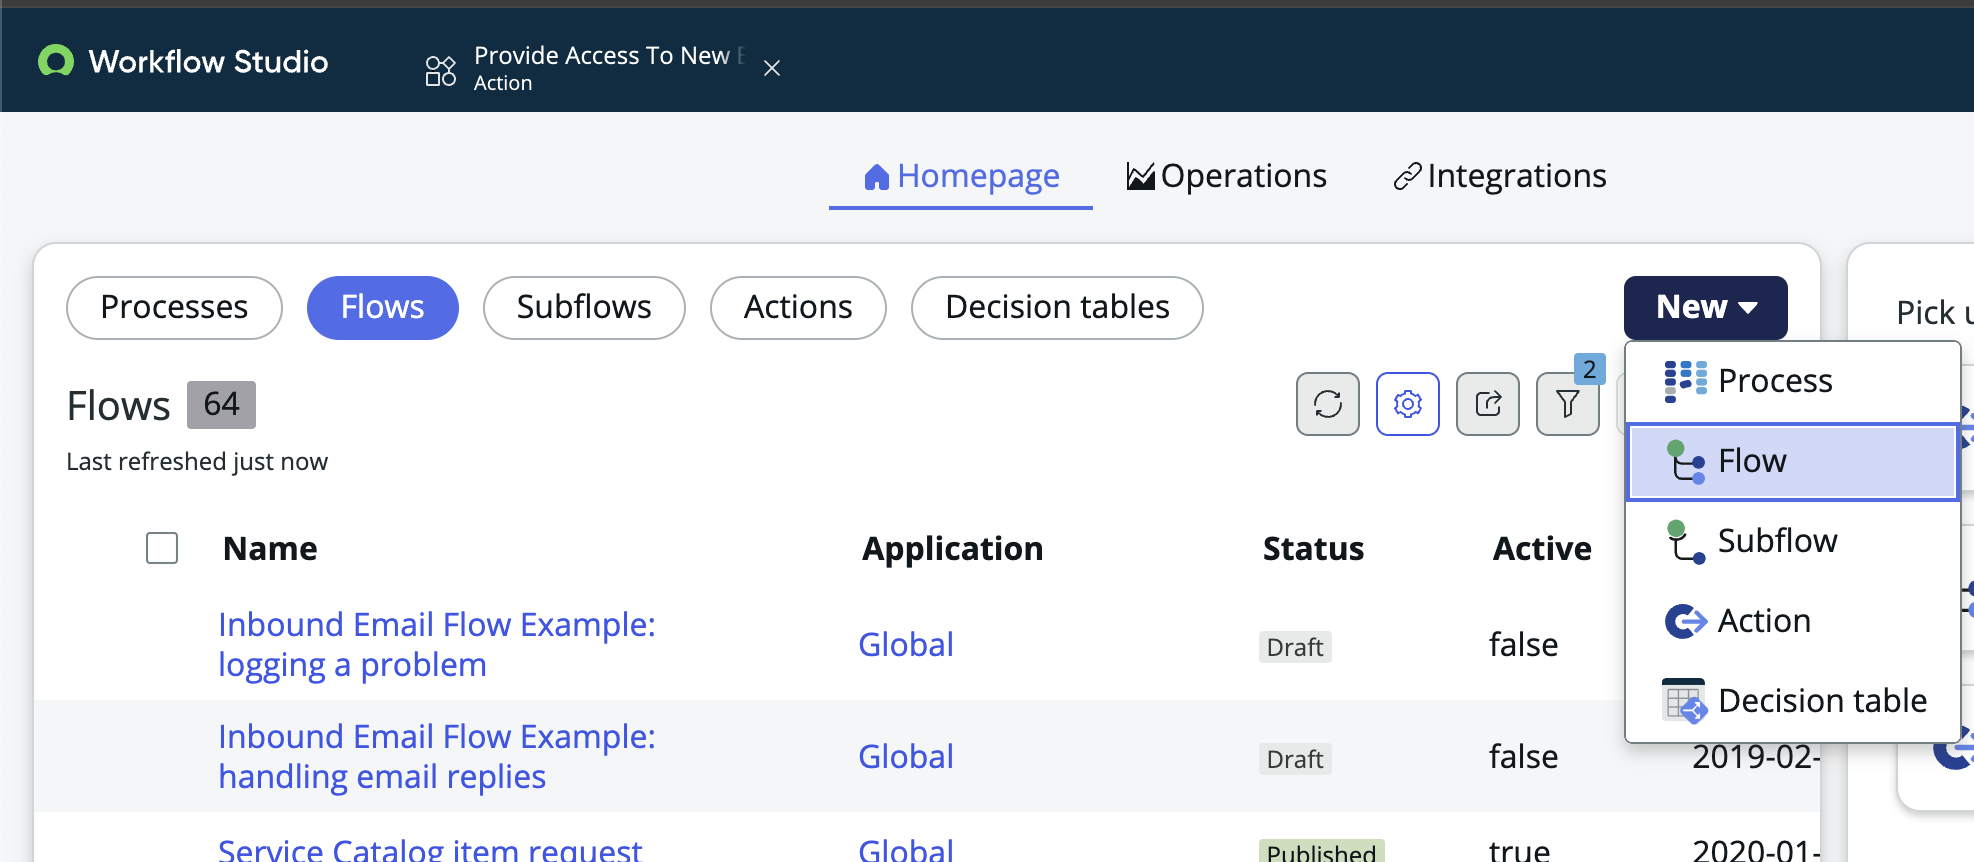
- You'll be prompted to enter some initial details about your flow:
- Name: Give your flow a descriptive name.
- Description (Optional): Provide a brief description of what your flow does.
- Application: Select the application scope in which your flow will be created. This determines which data and actions your flow can access.
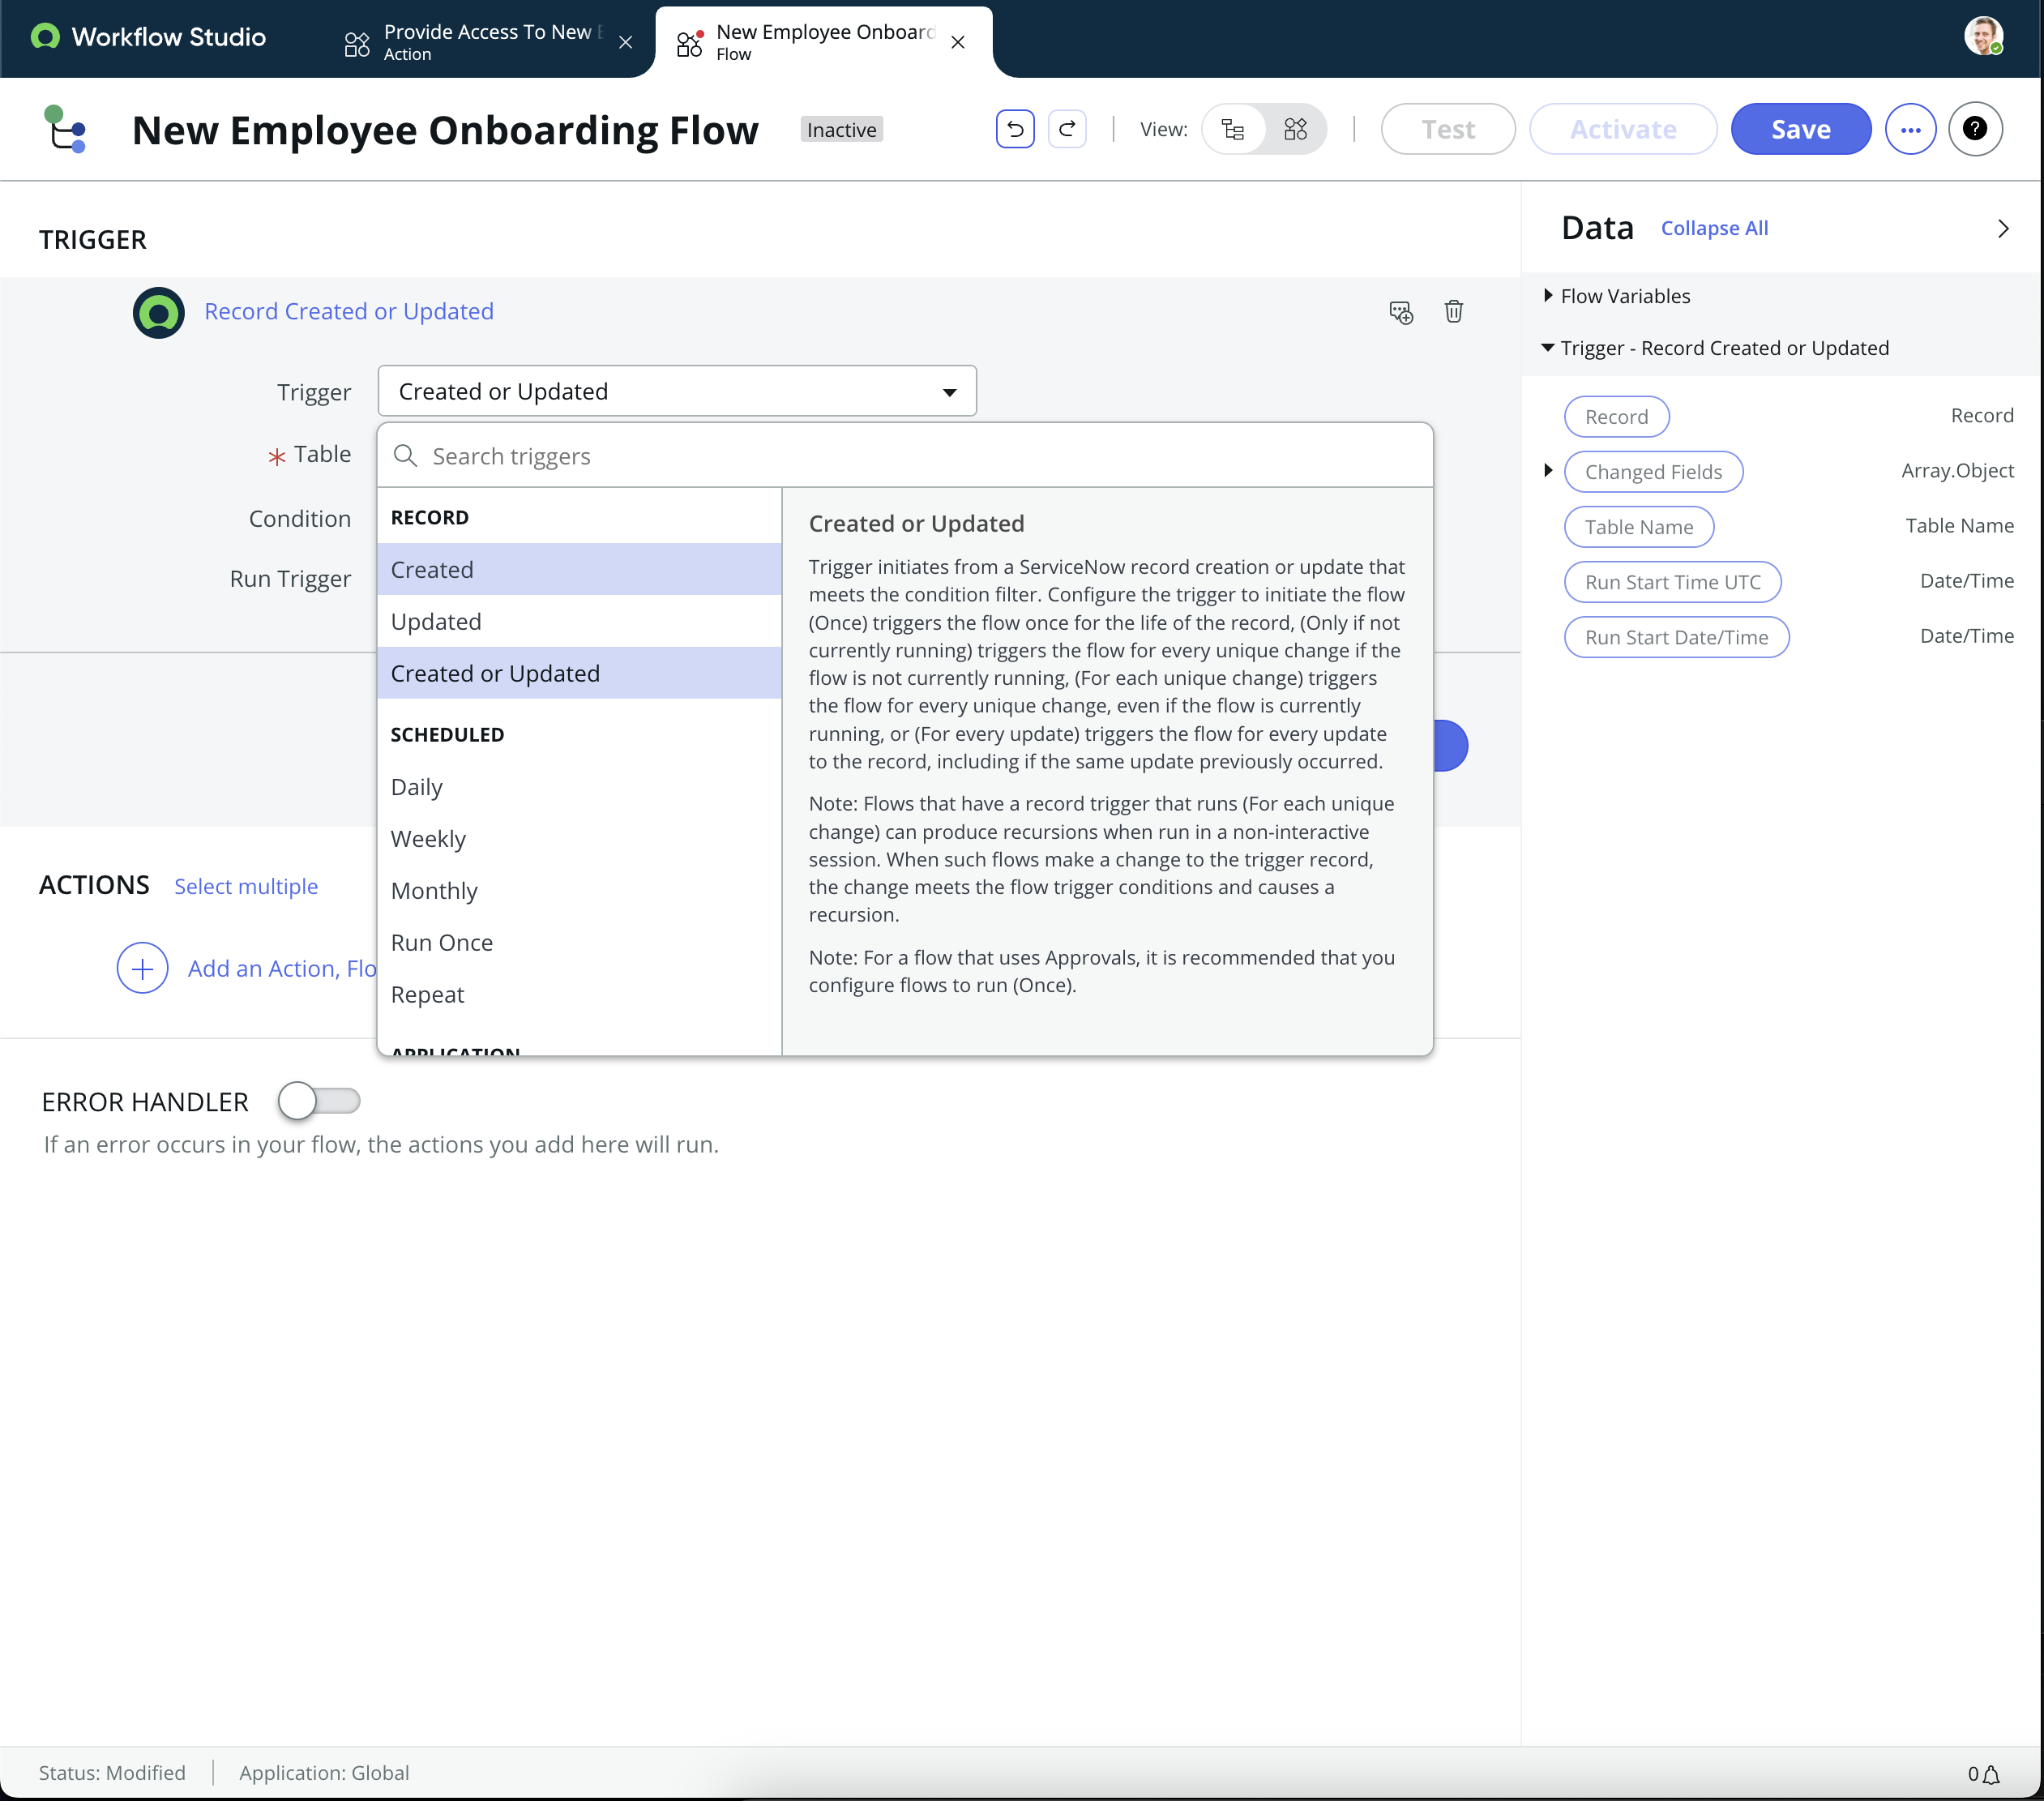
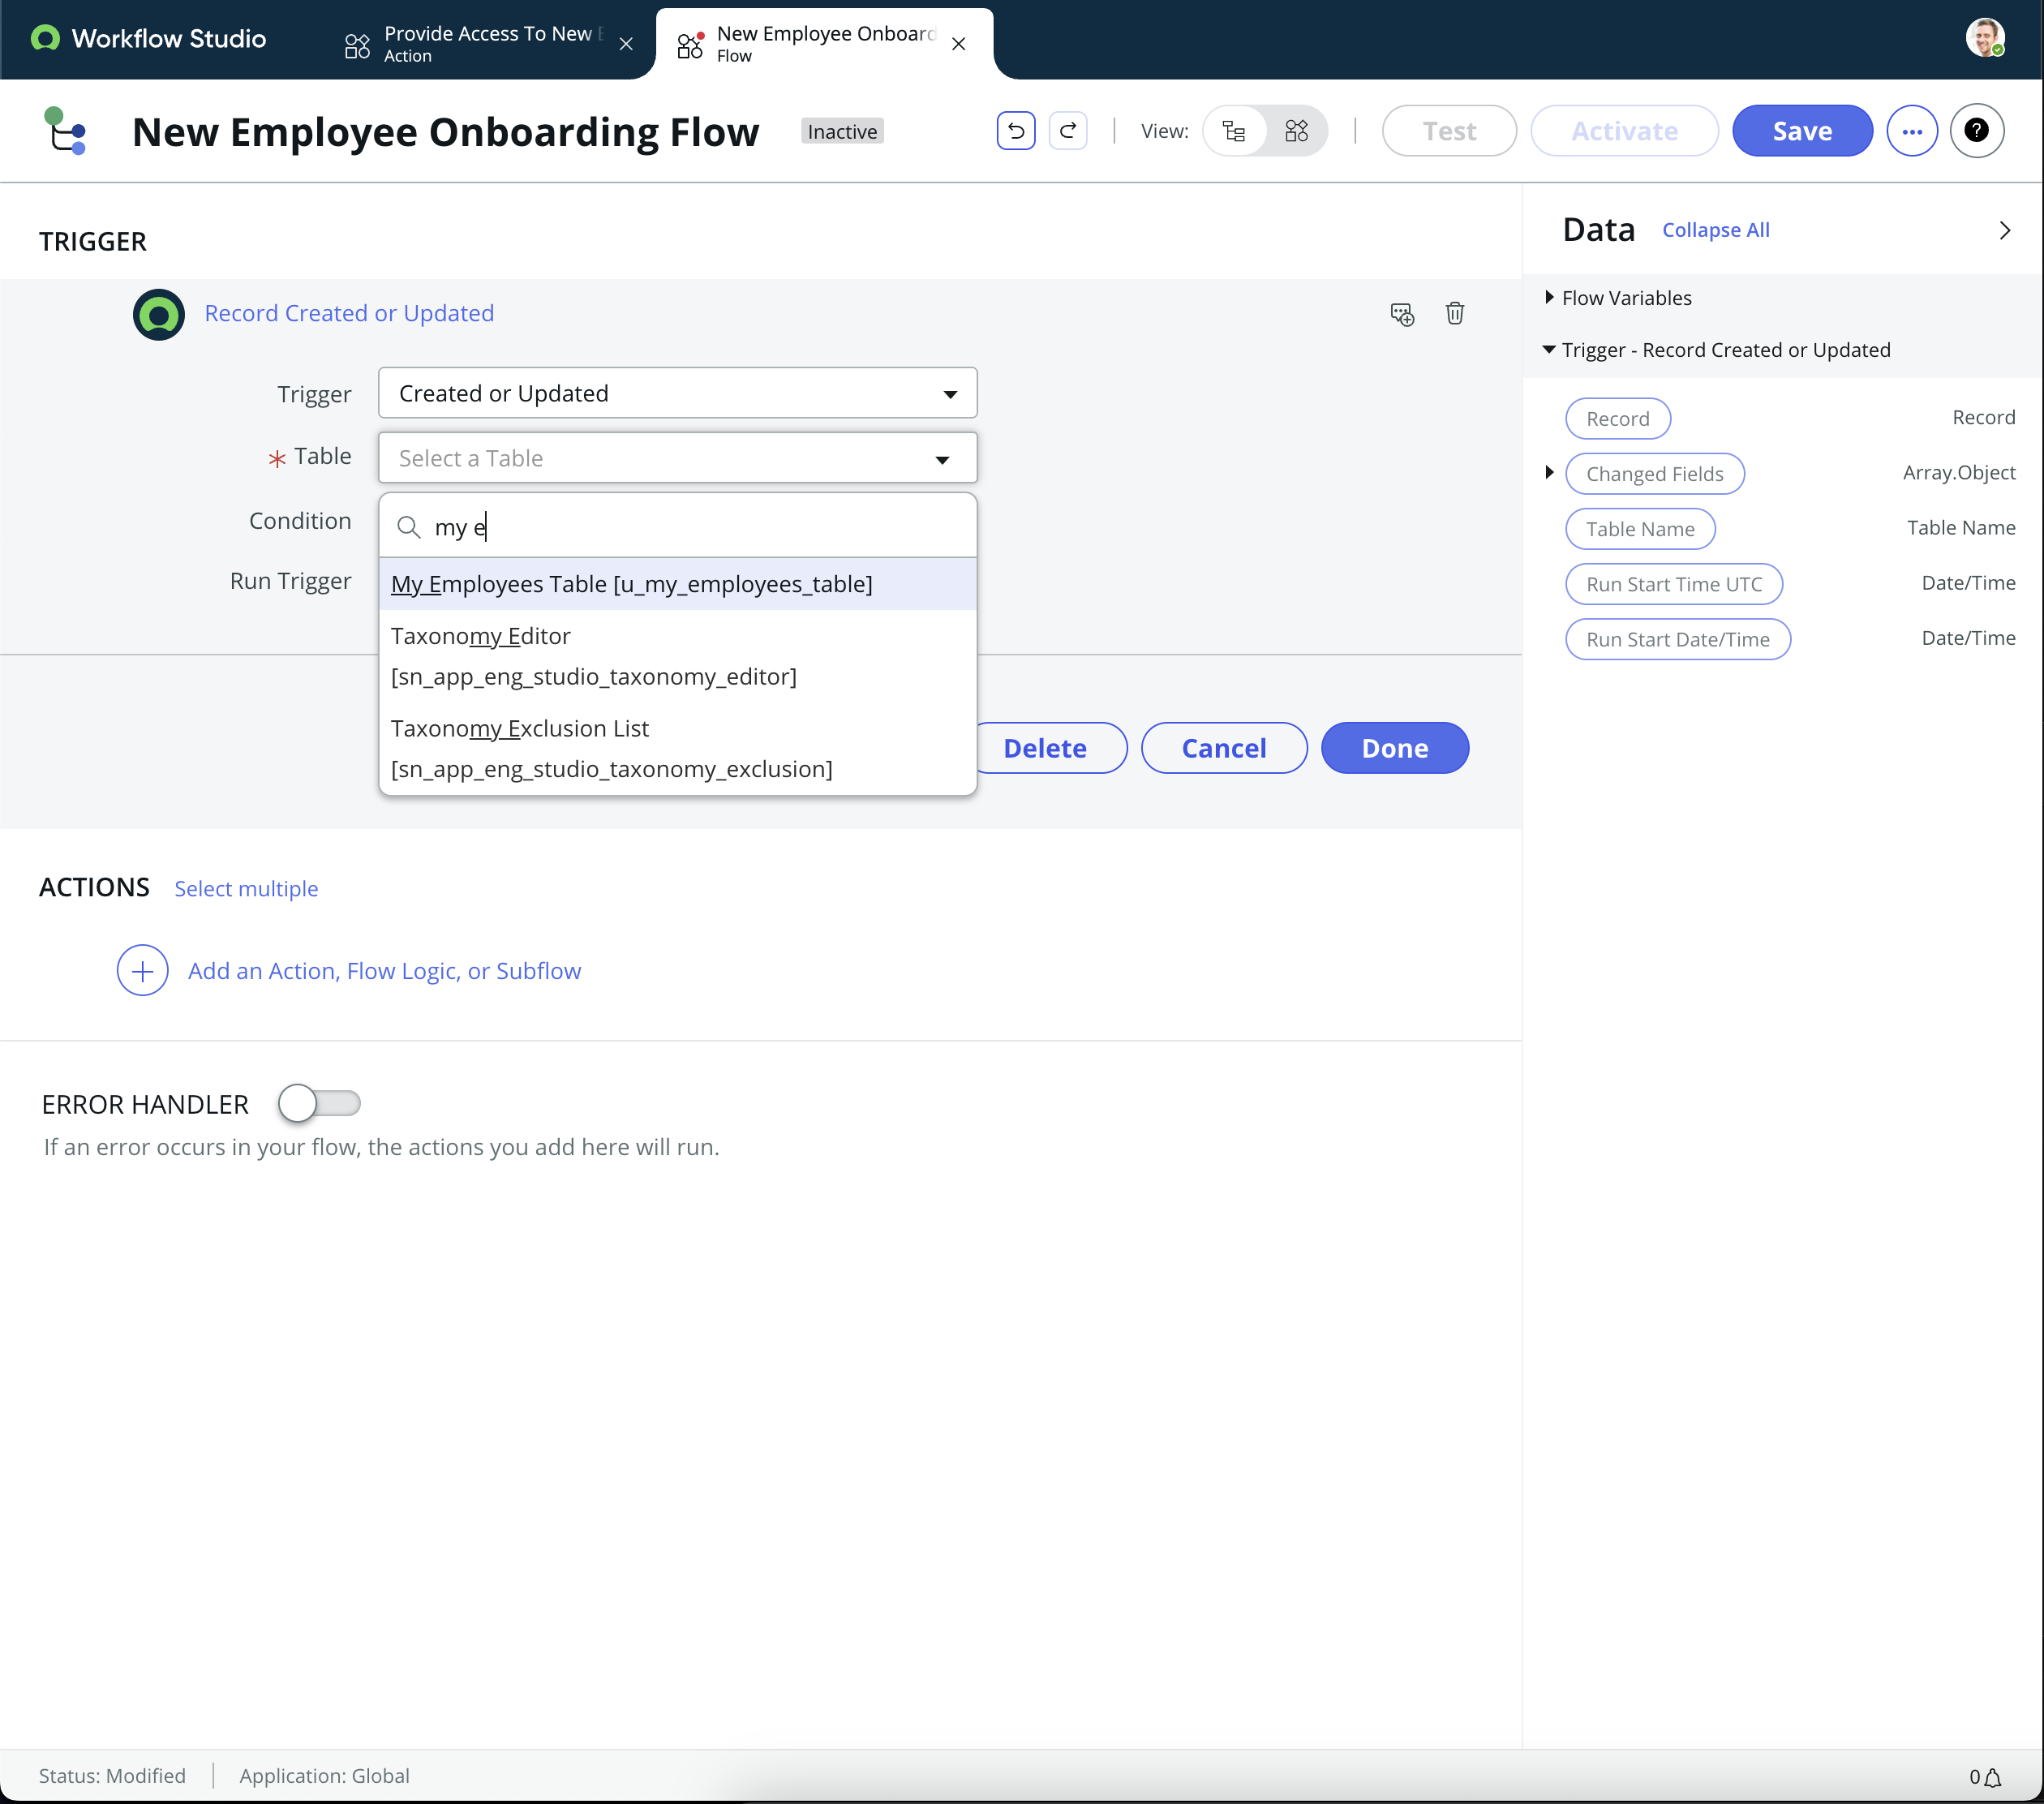
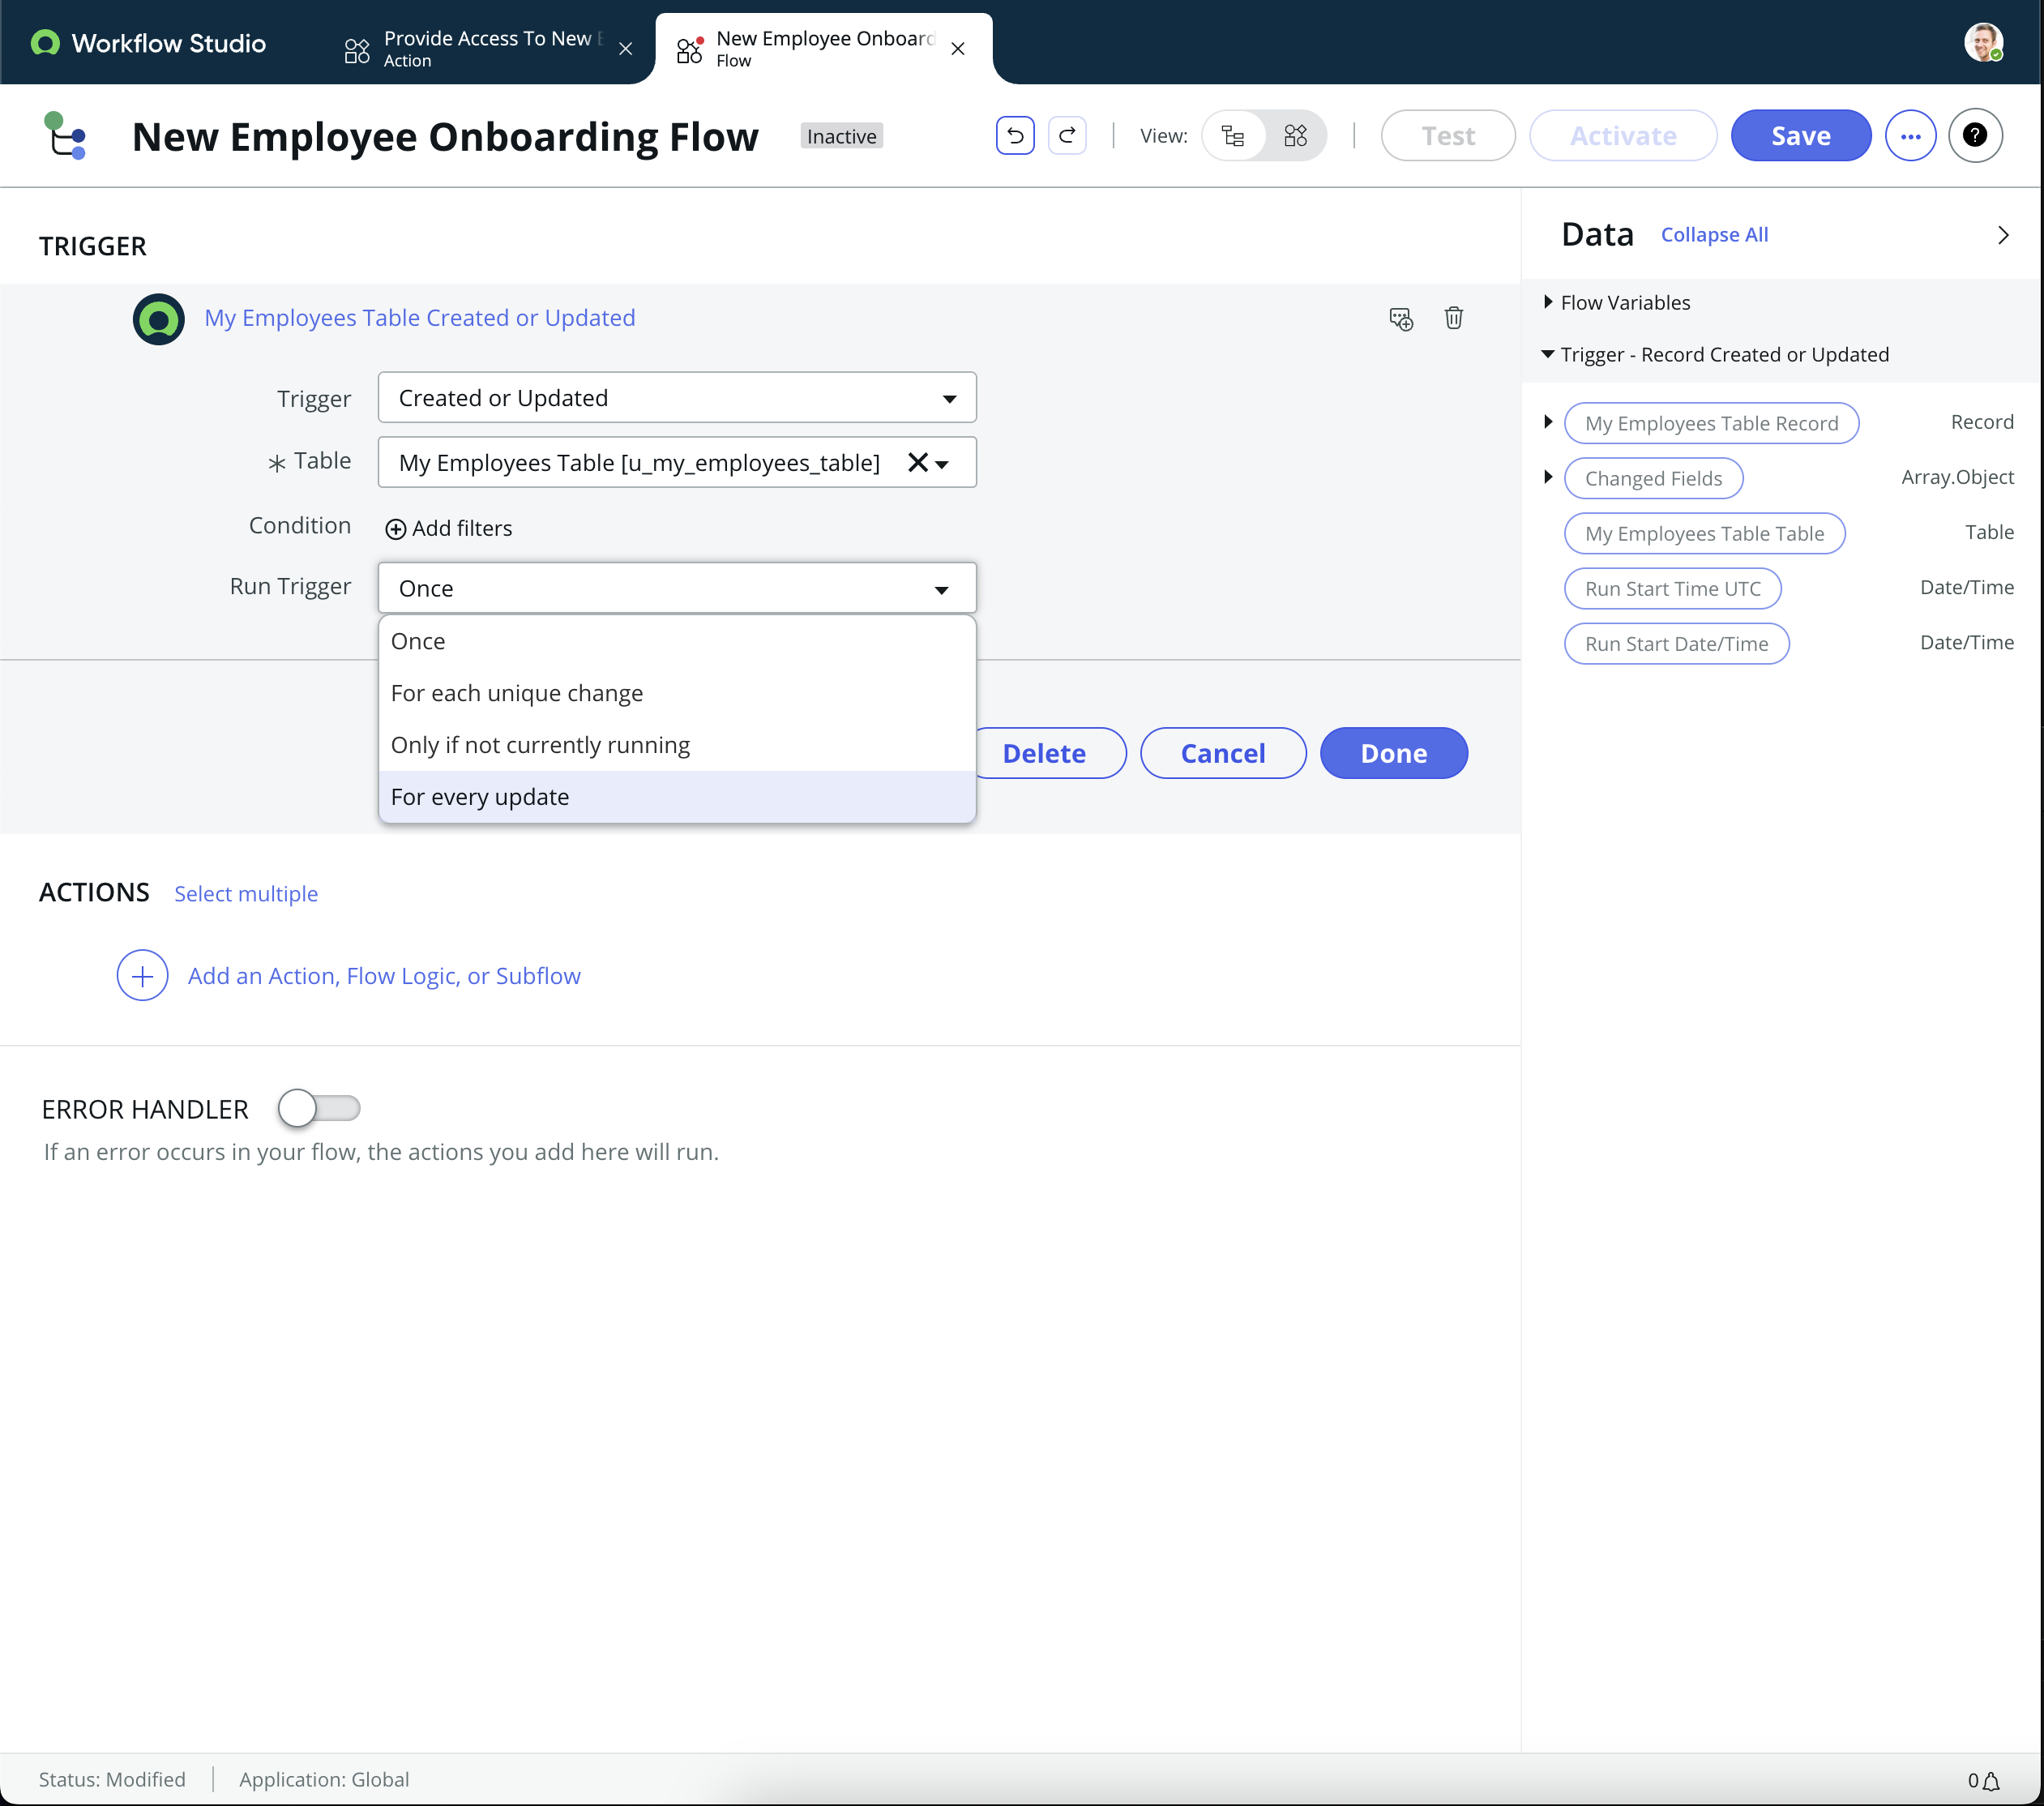
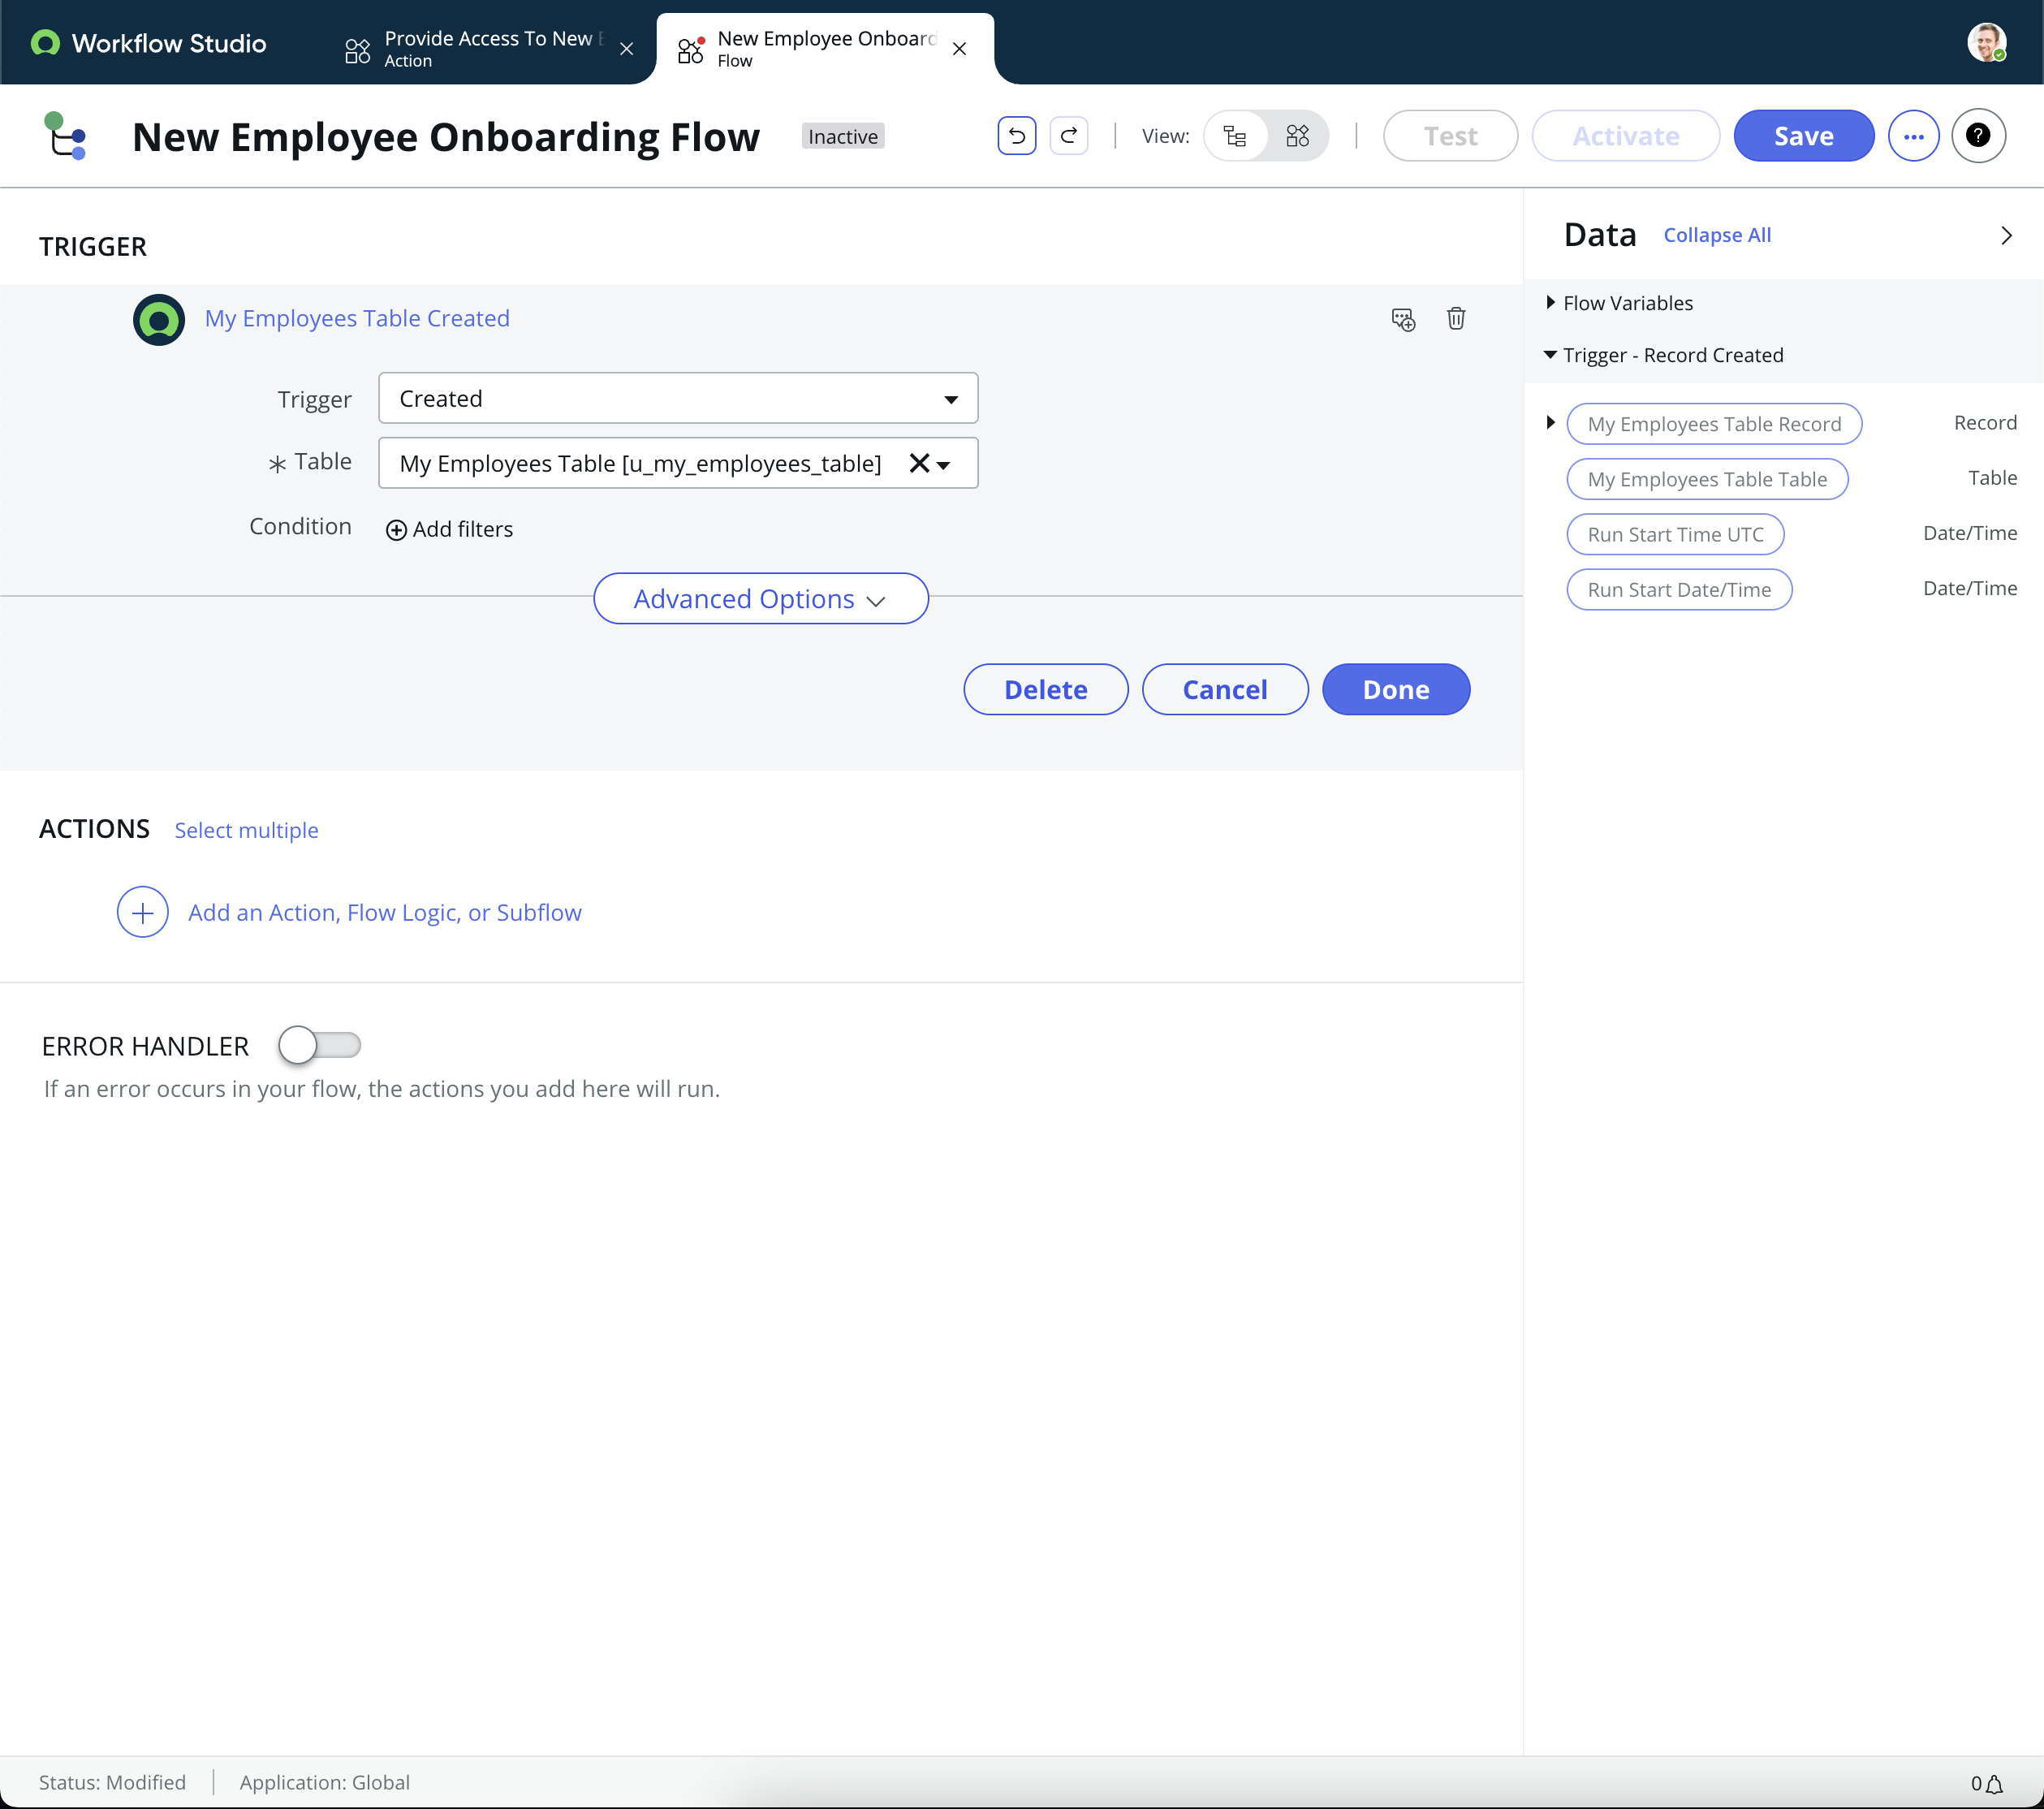
Step 3: Define the Trigger
- Every flow starts with a trigger—what event will cause this flow to run. Click on Add Trigger.
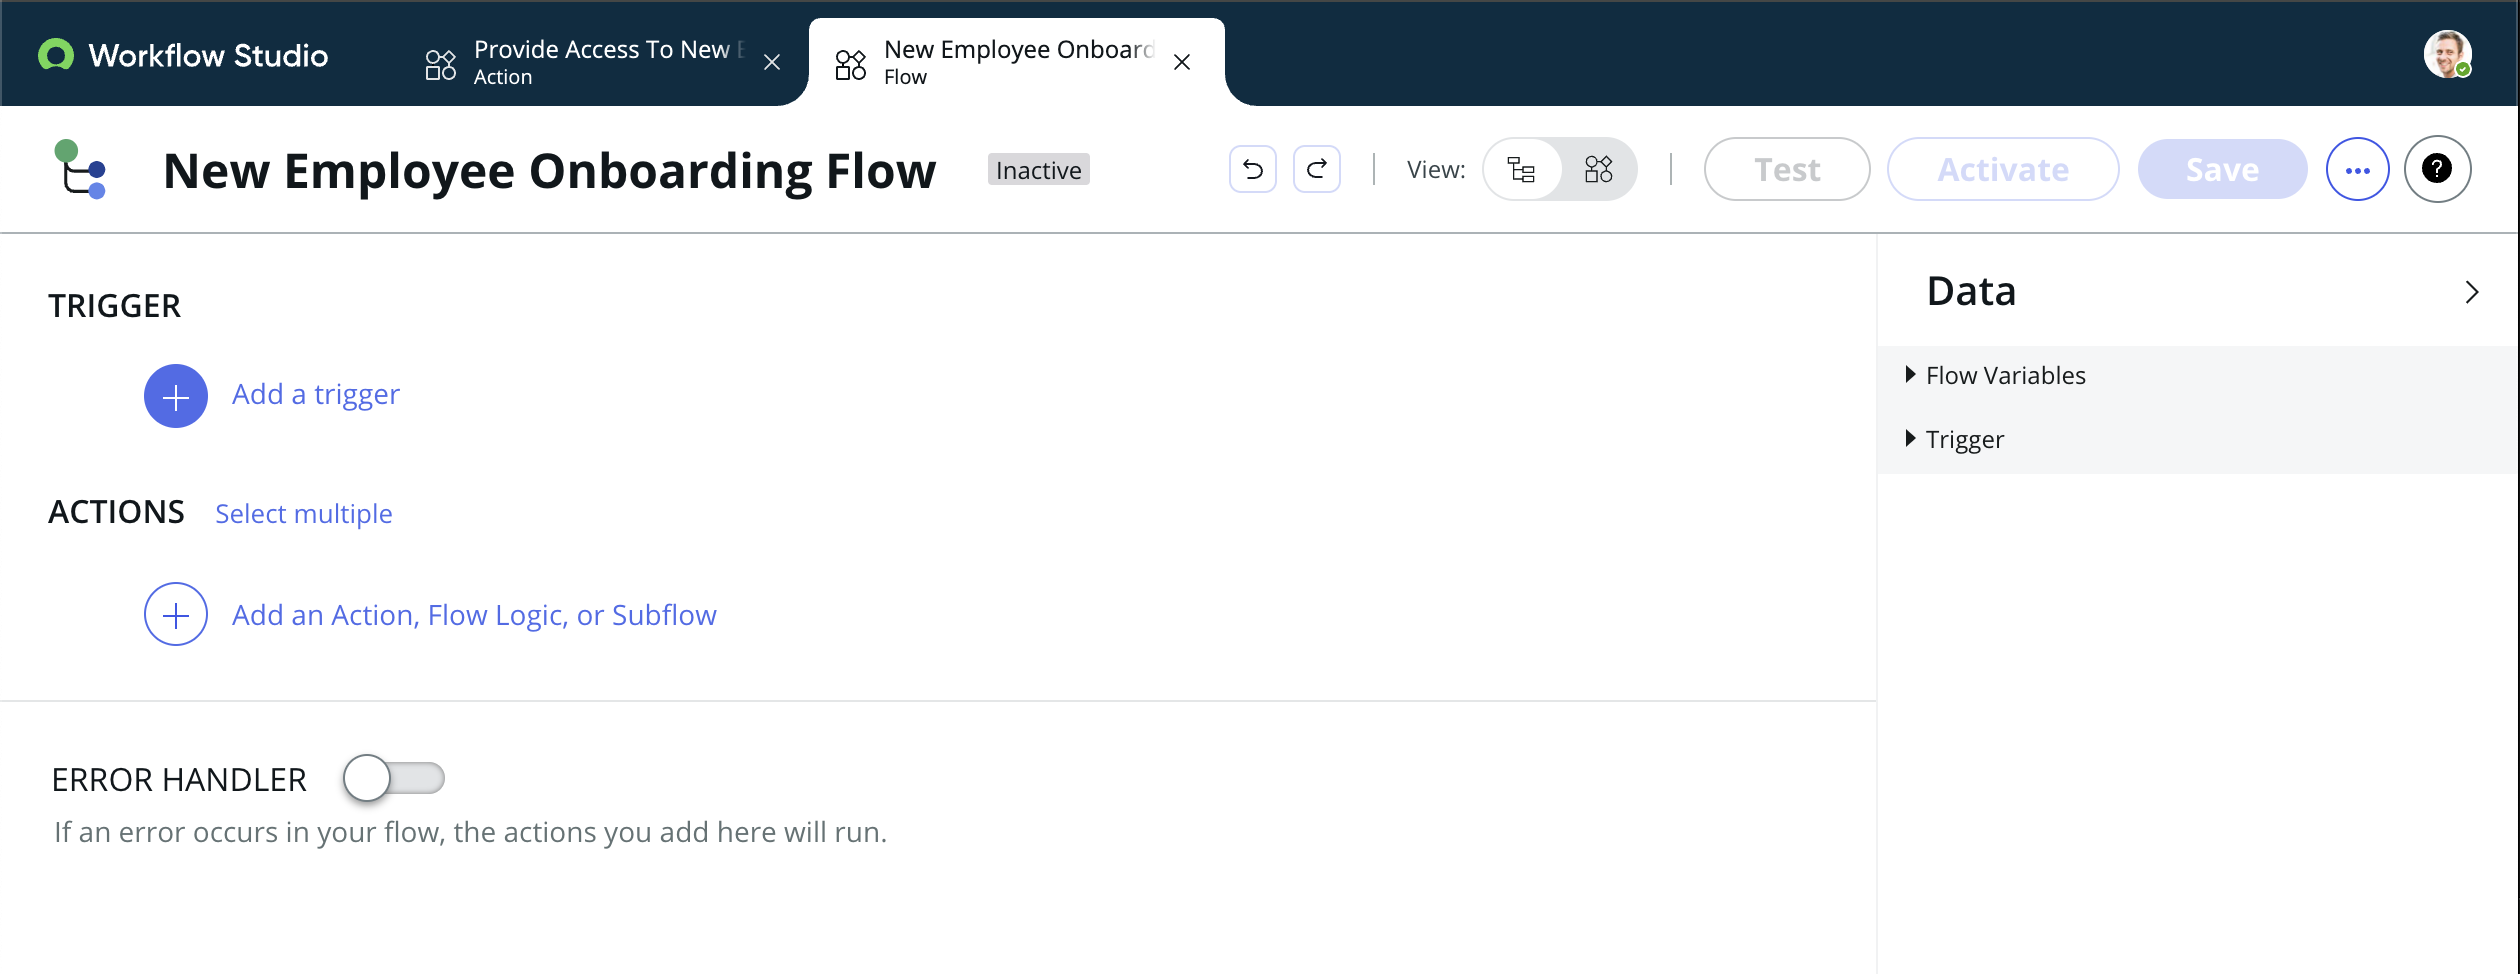
- Choose the type of trigger for your flow. Options typically include:
- Record: Triggers the flow when a record is created, updated, or deleted.
- Scheduled: Runs the flow at specified times.
- Event: Triggers the flow based on ServiceNow events.
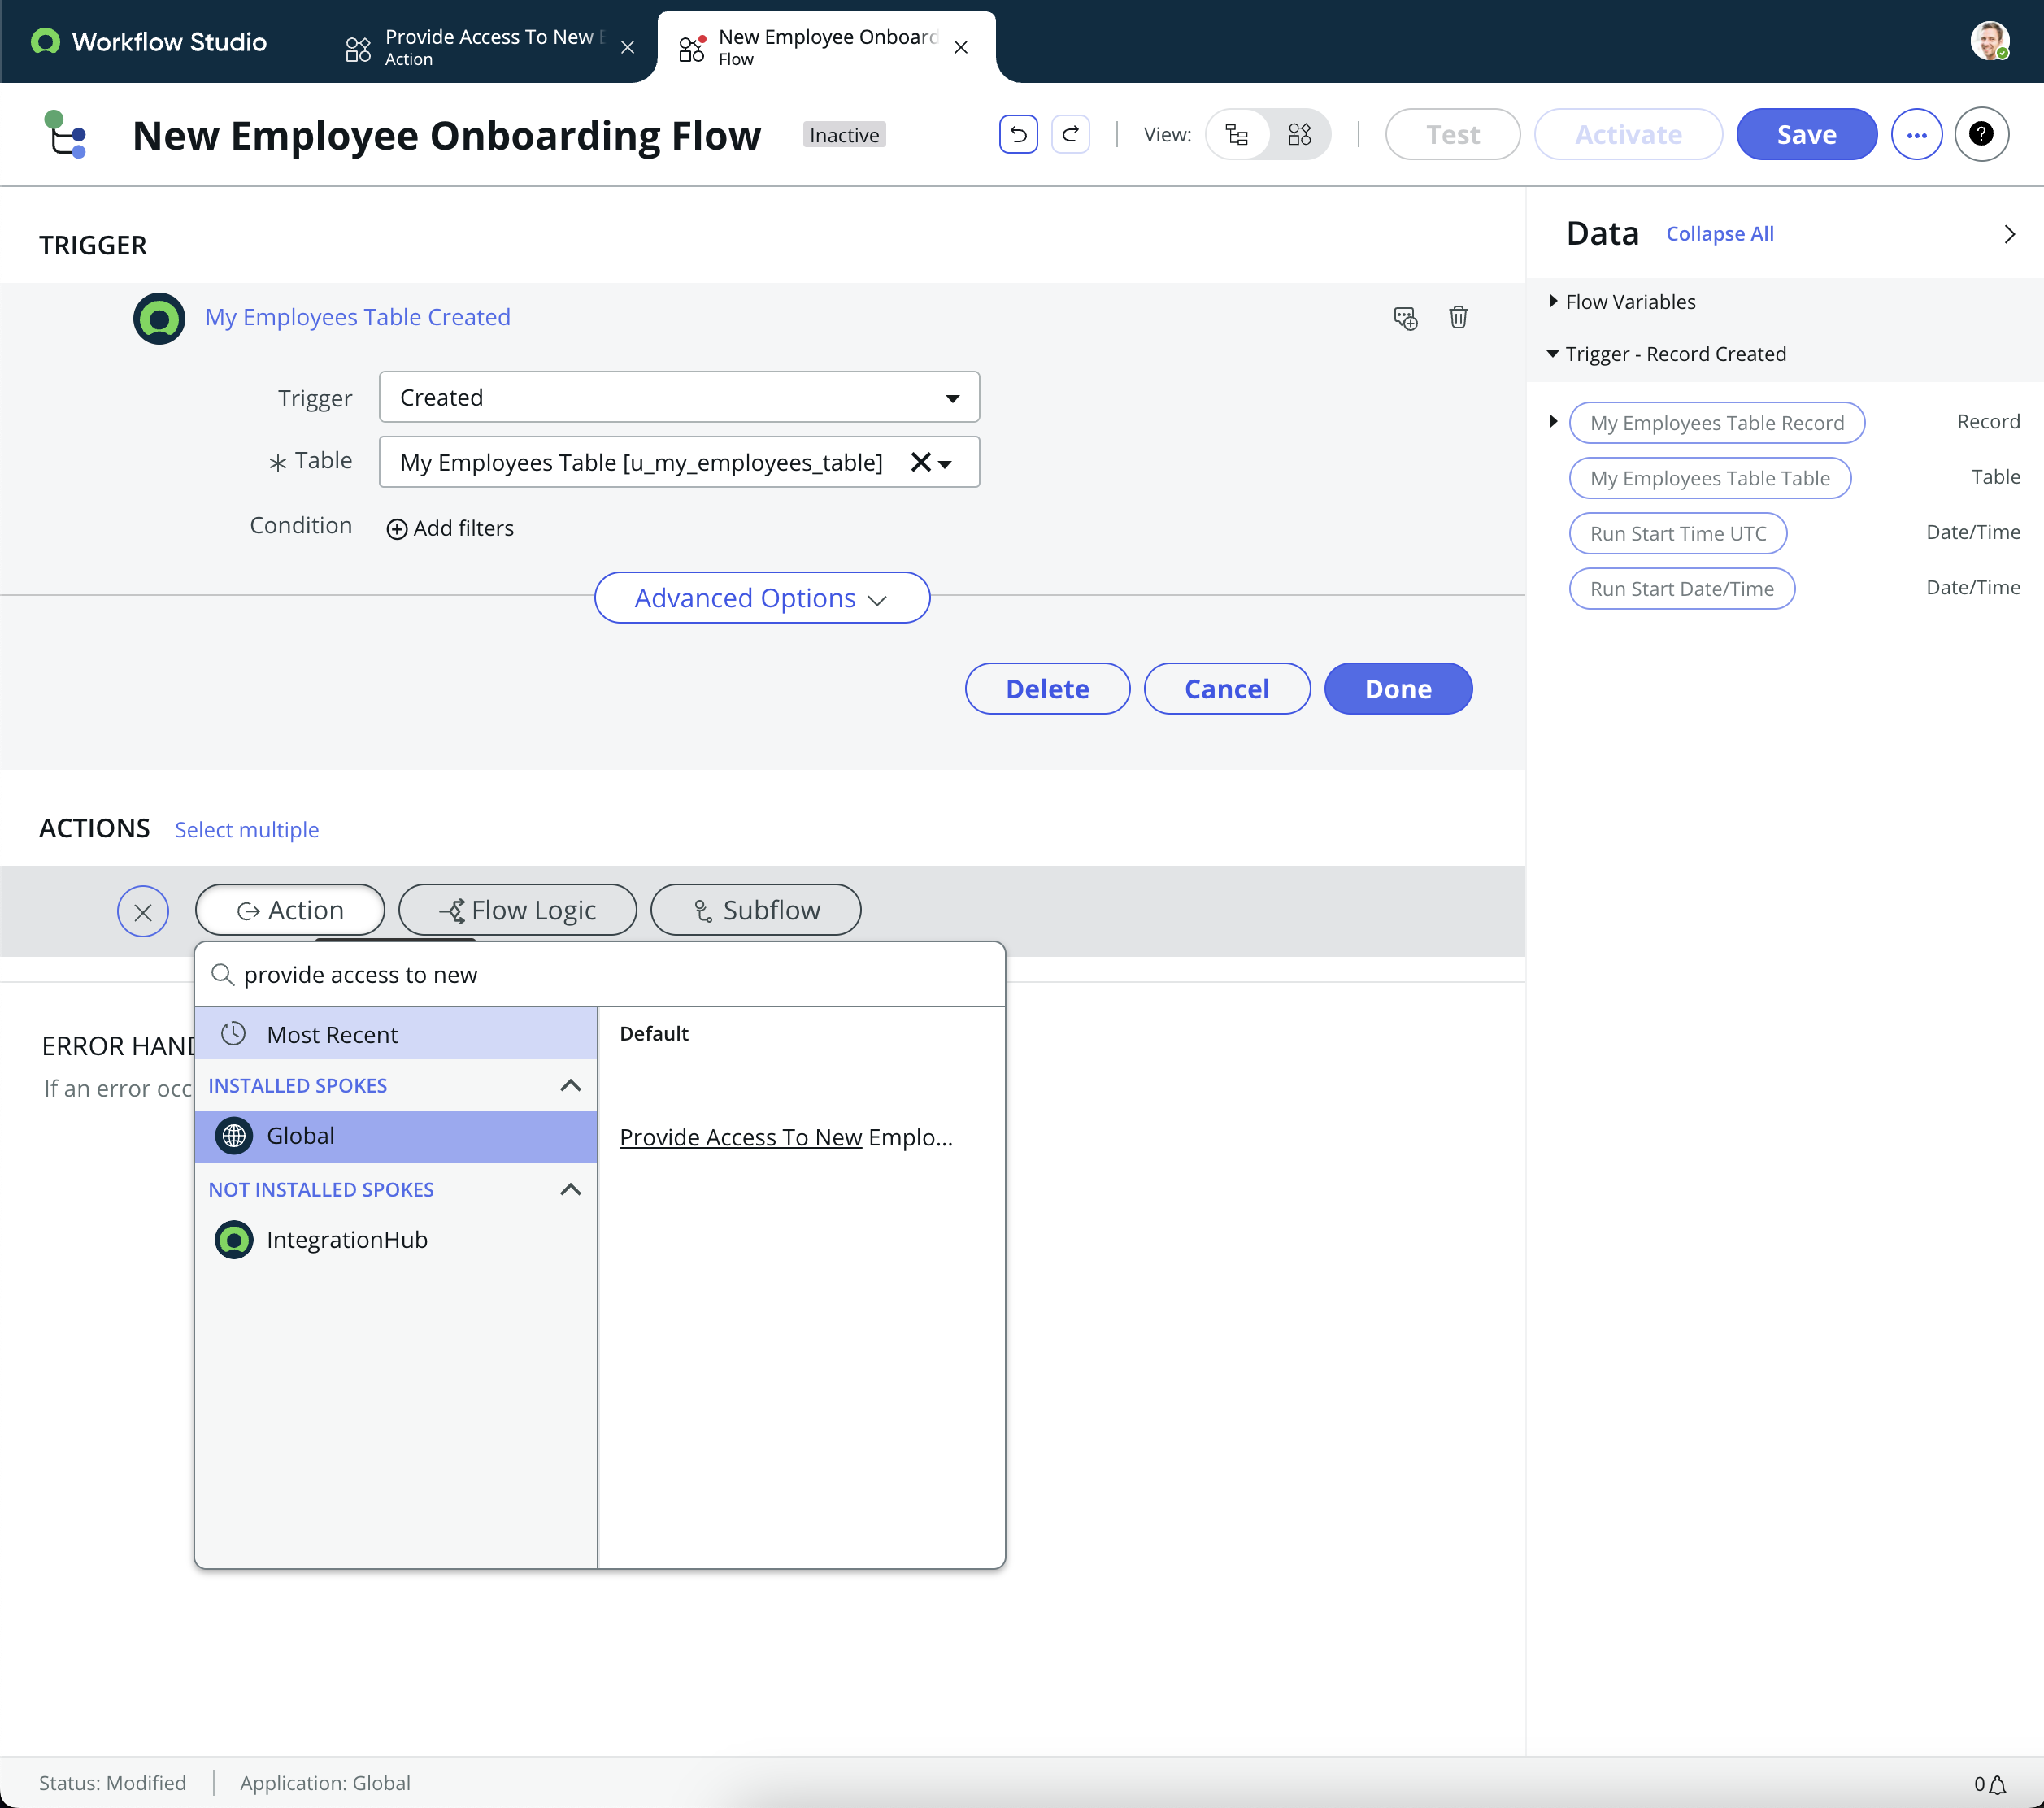
Step 4: Add Actions
- With your trigger defined, you can start adding actions that the flow will execute.
- Click on Add Action in the main flow canvas.
- Browse or search for the action you want to add.
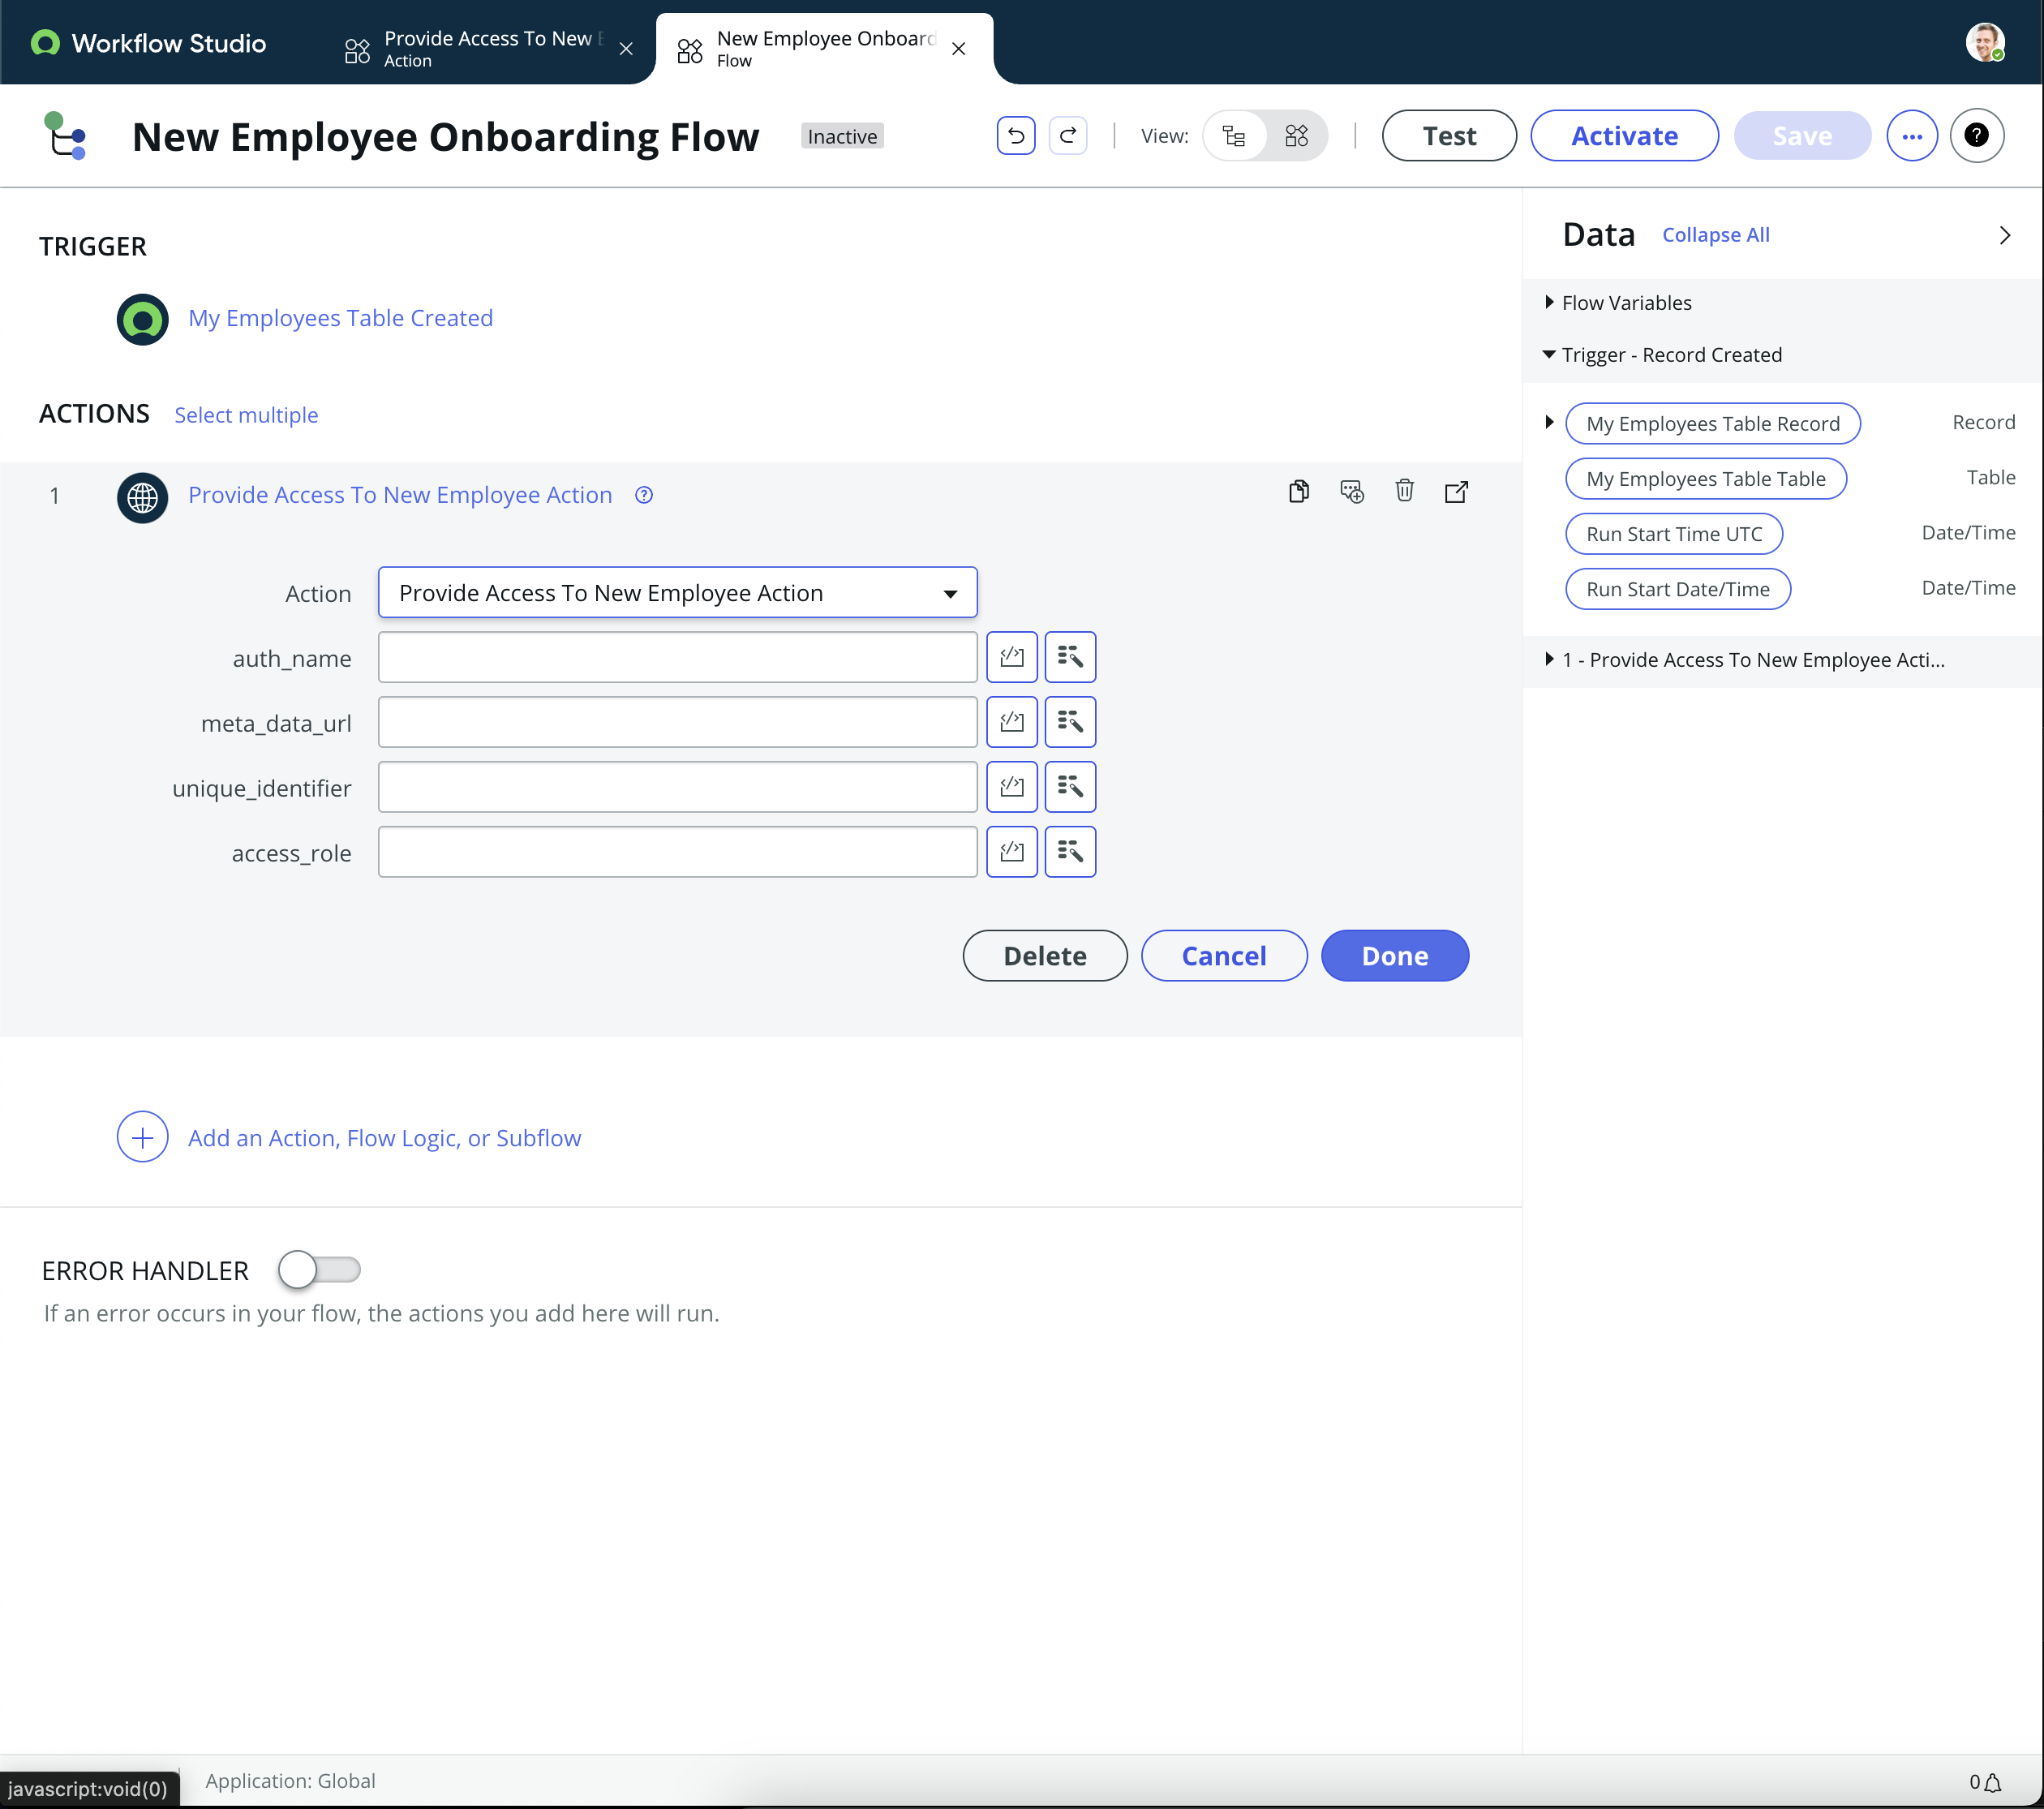
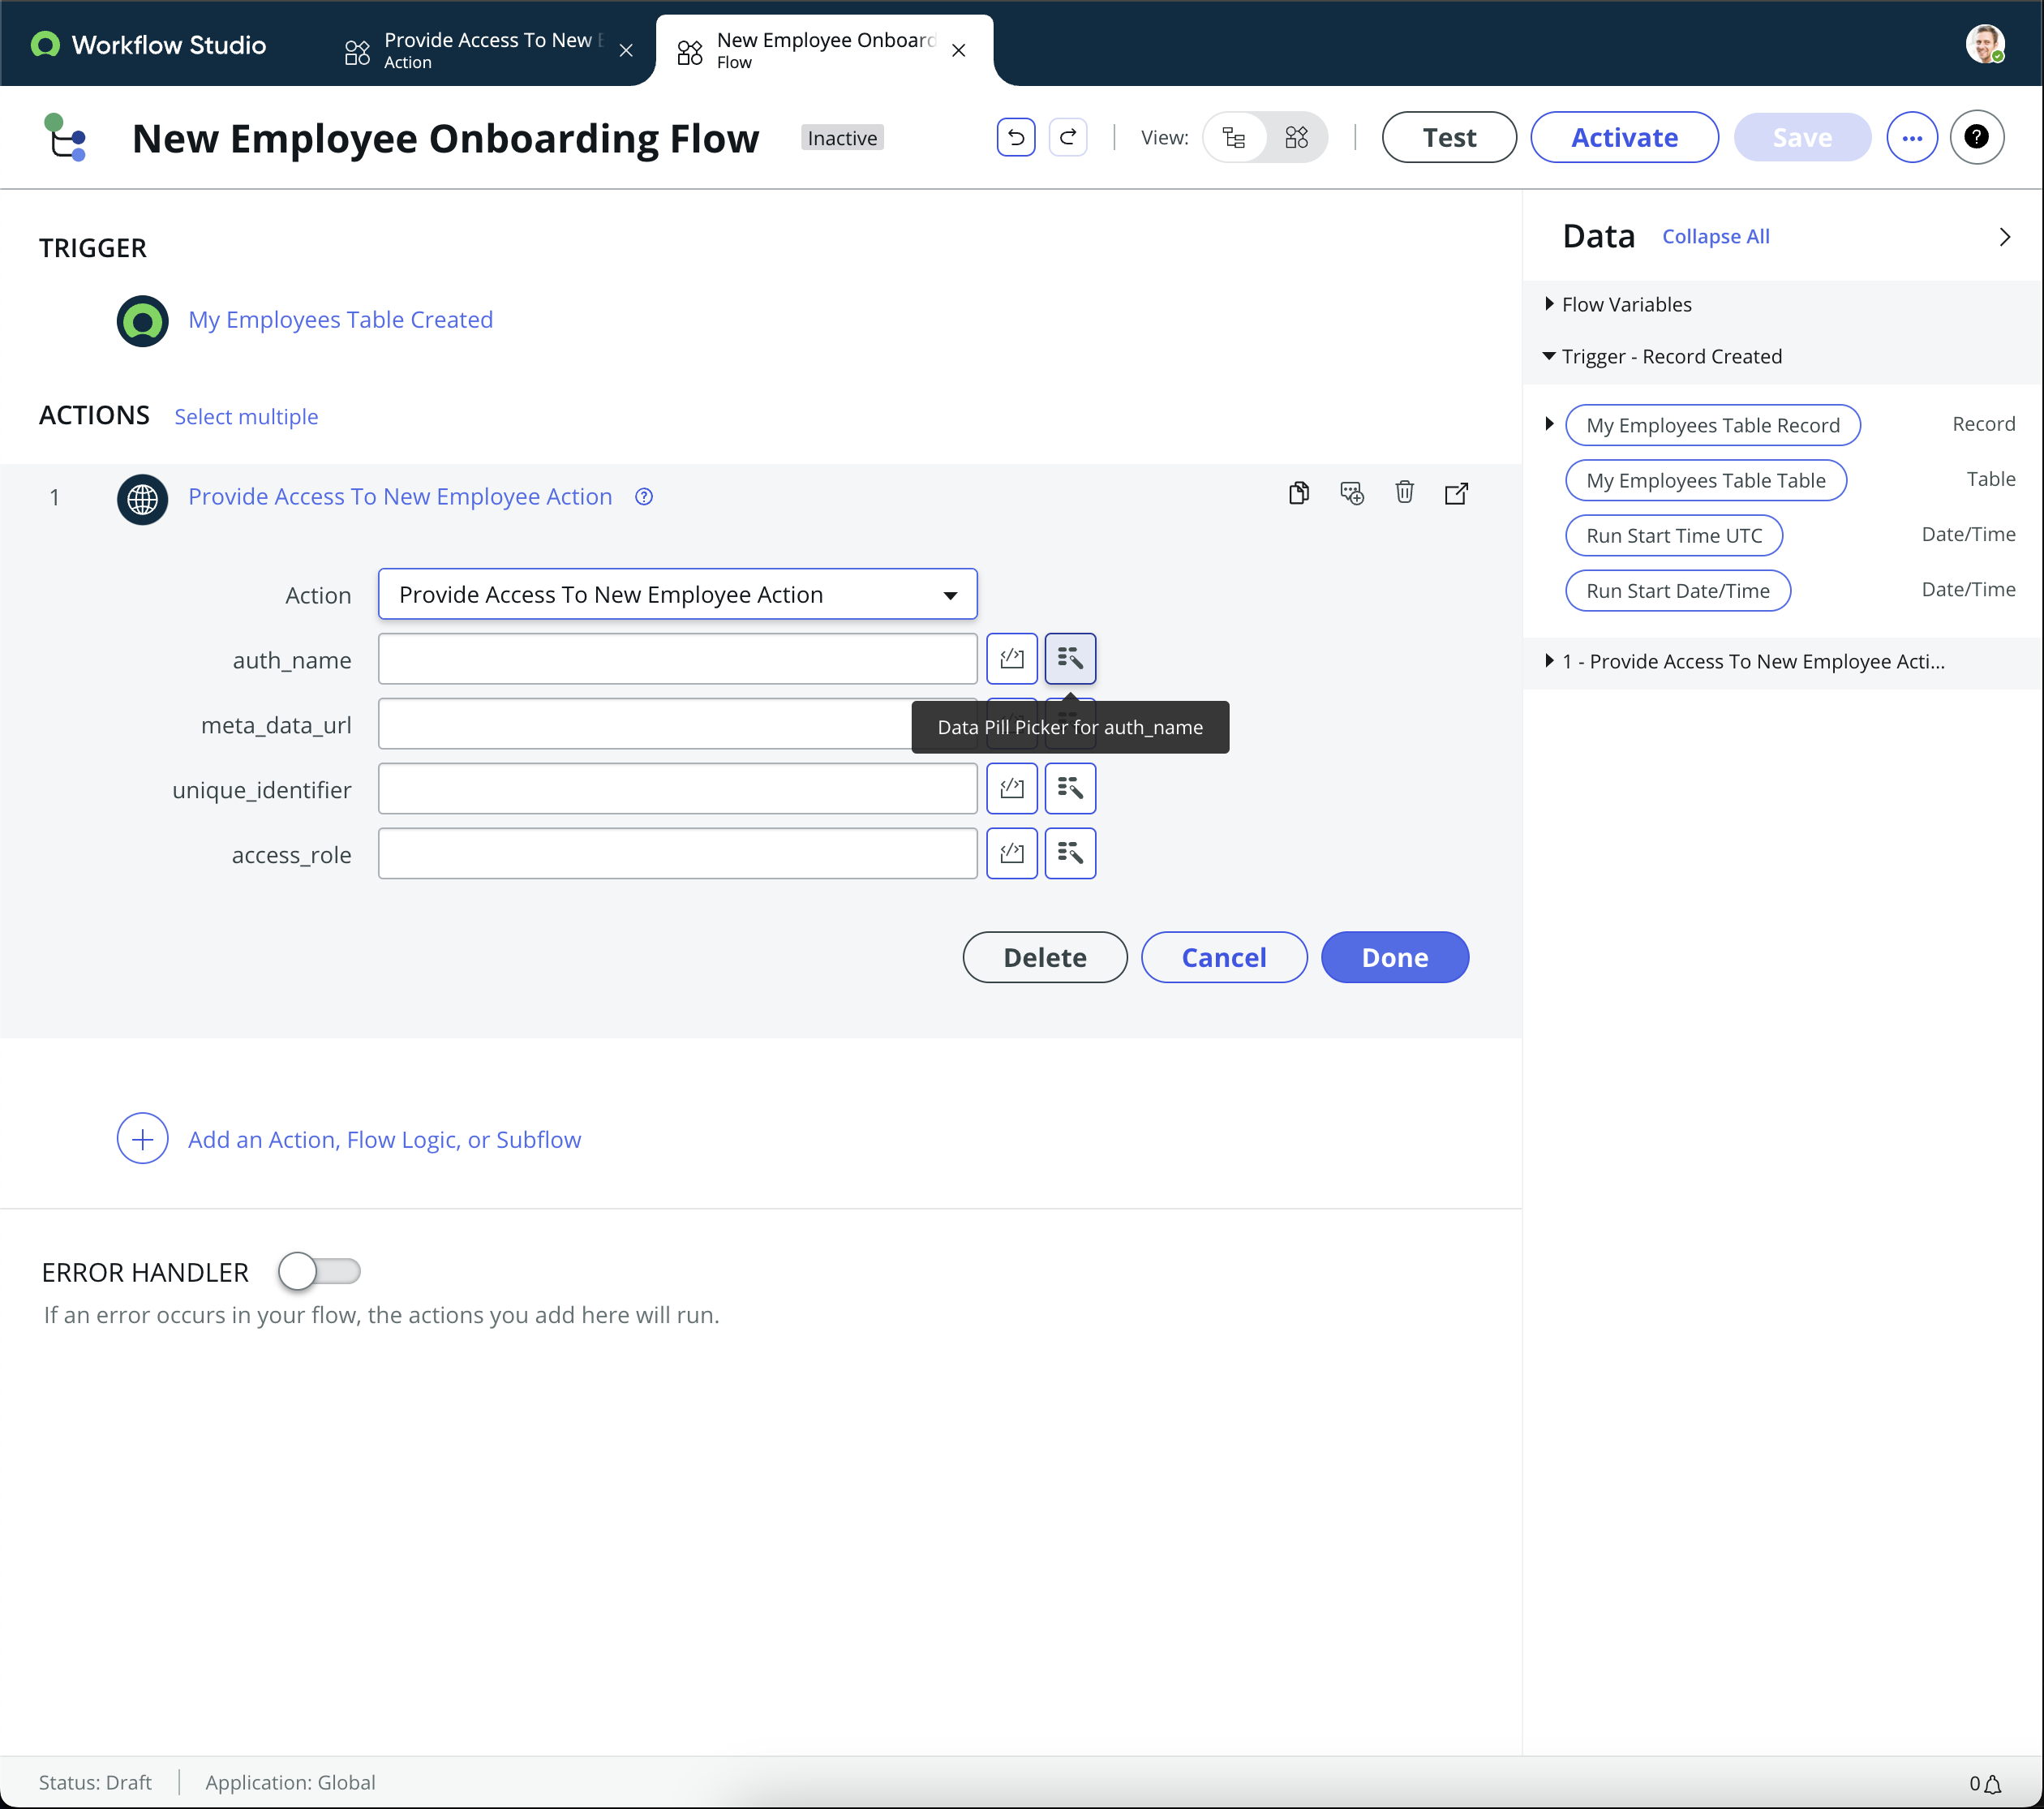
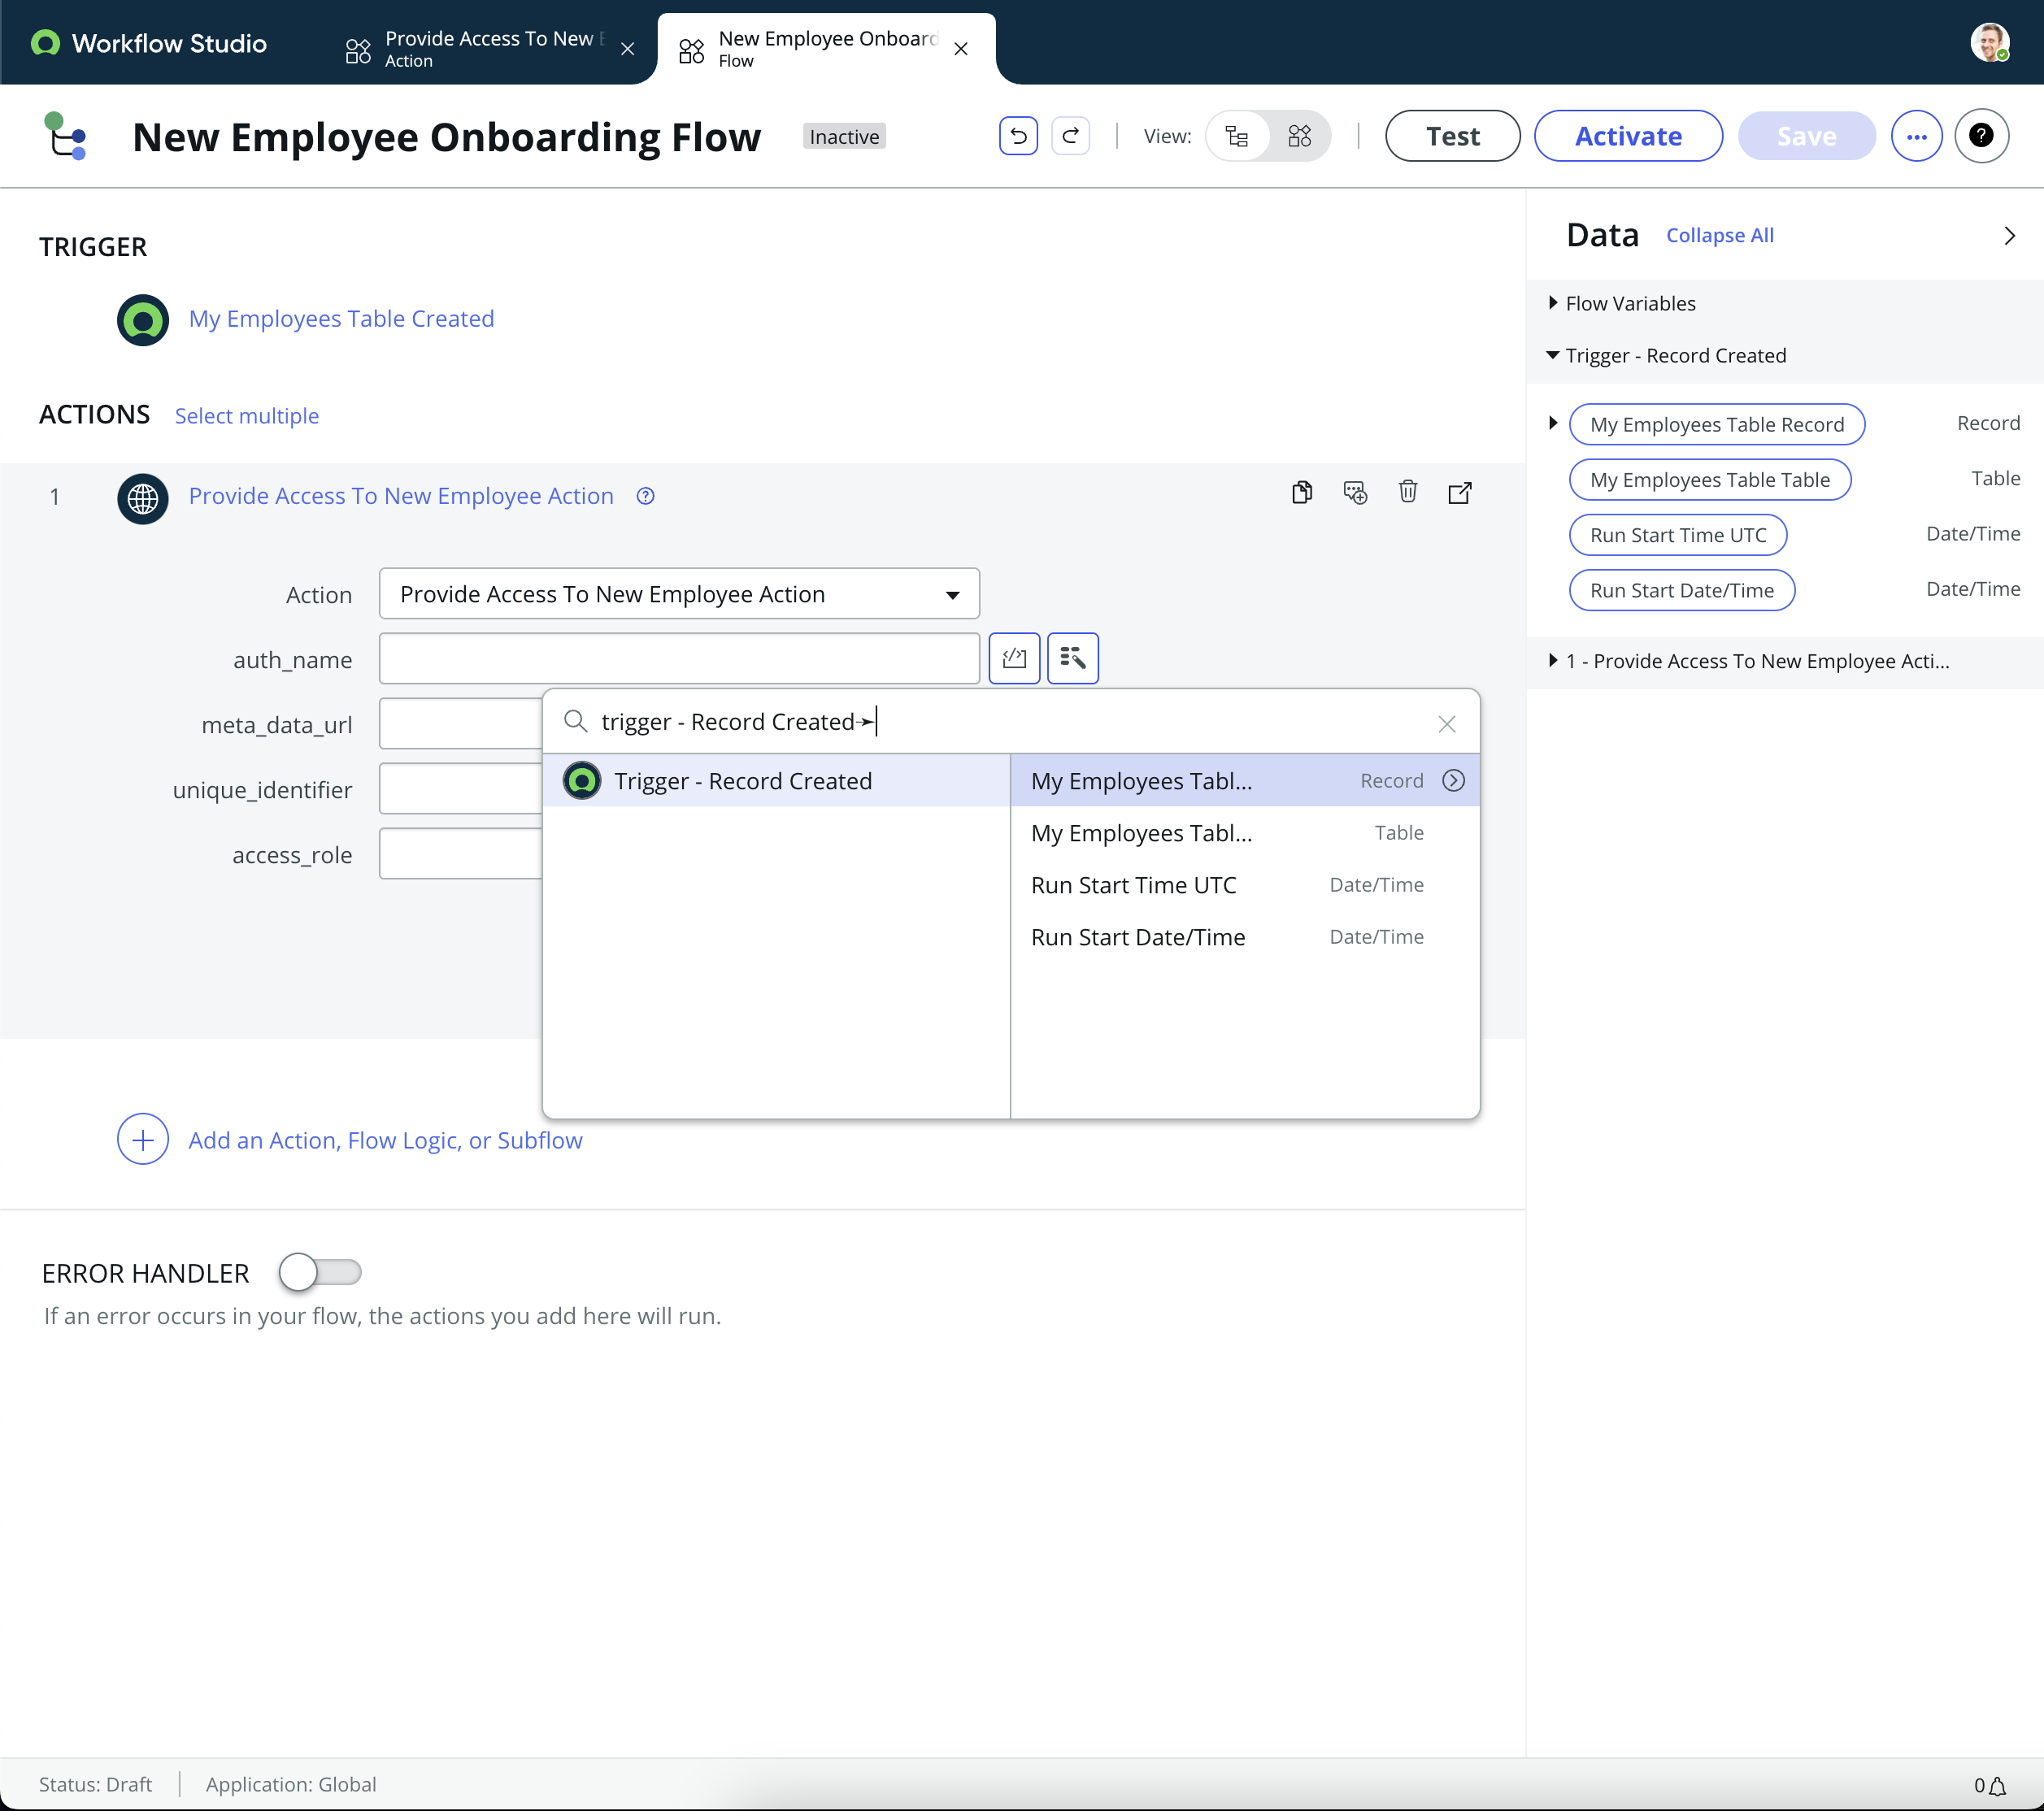
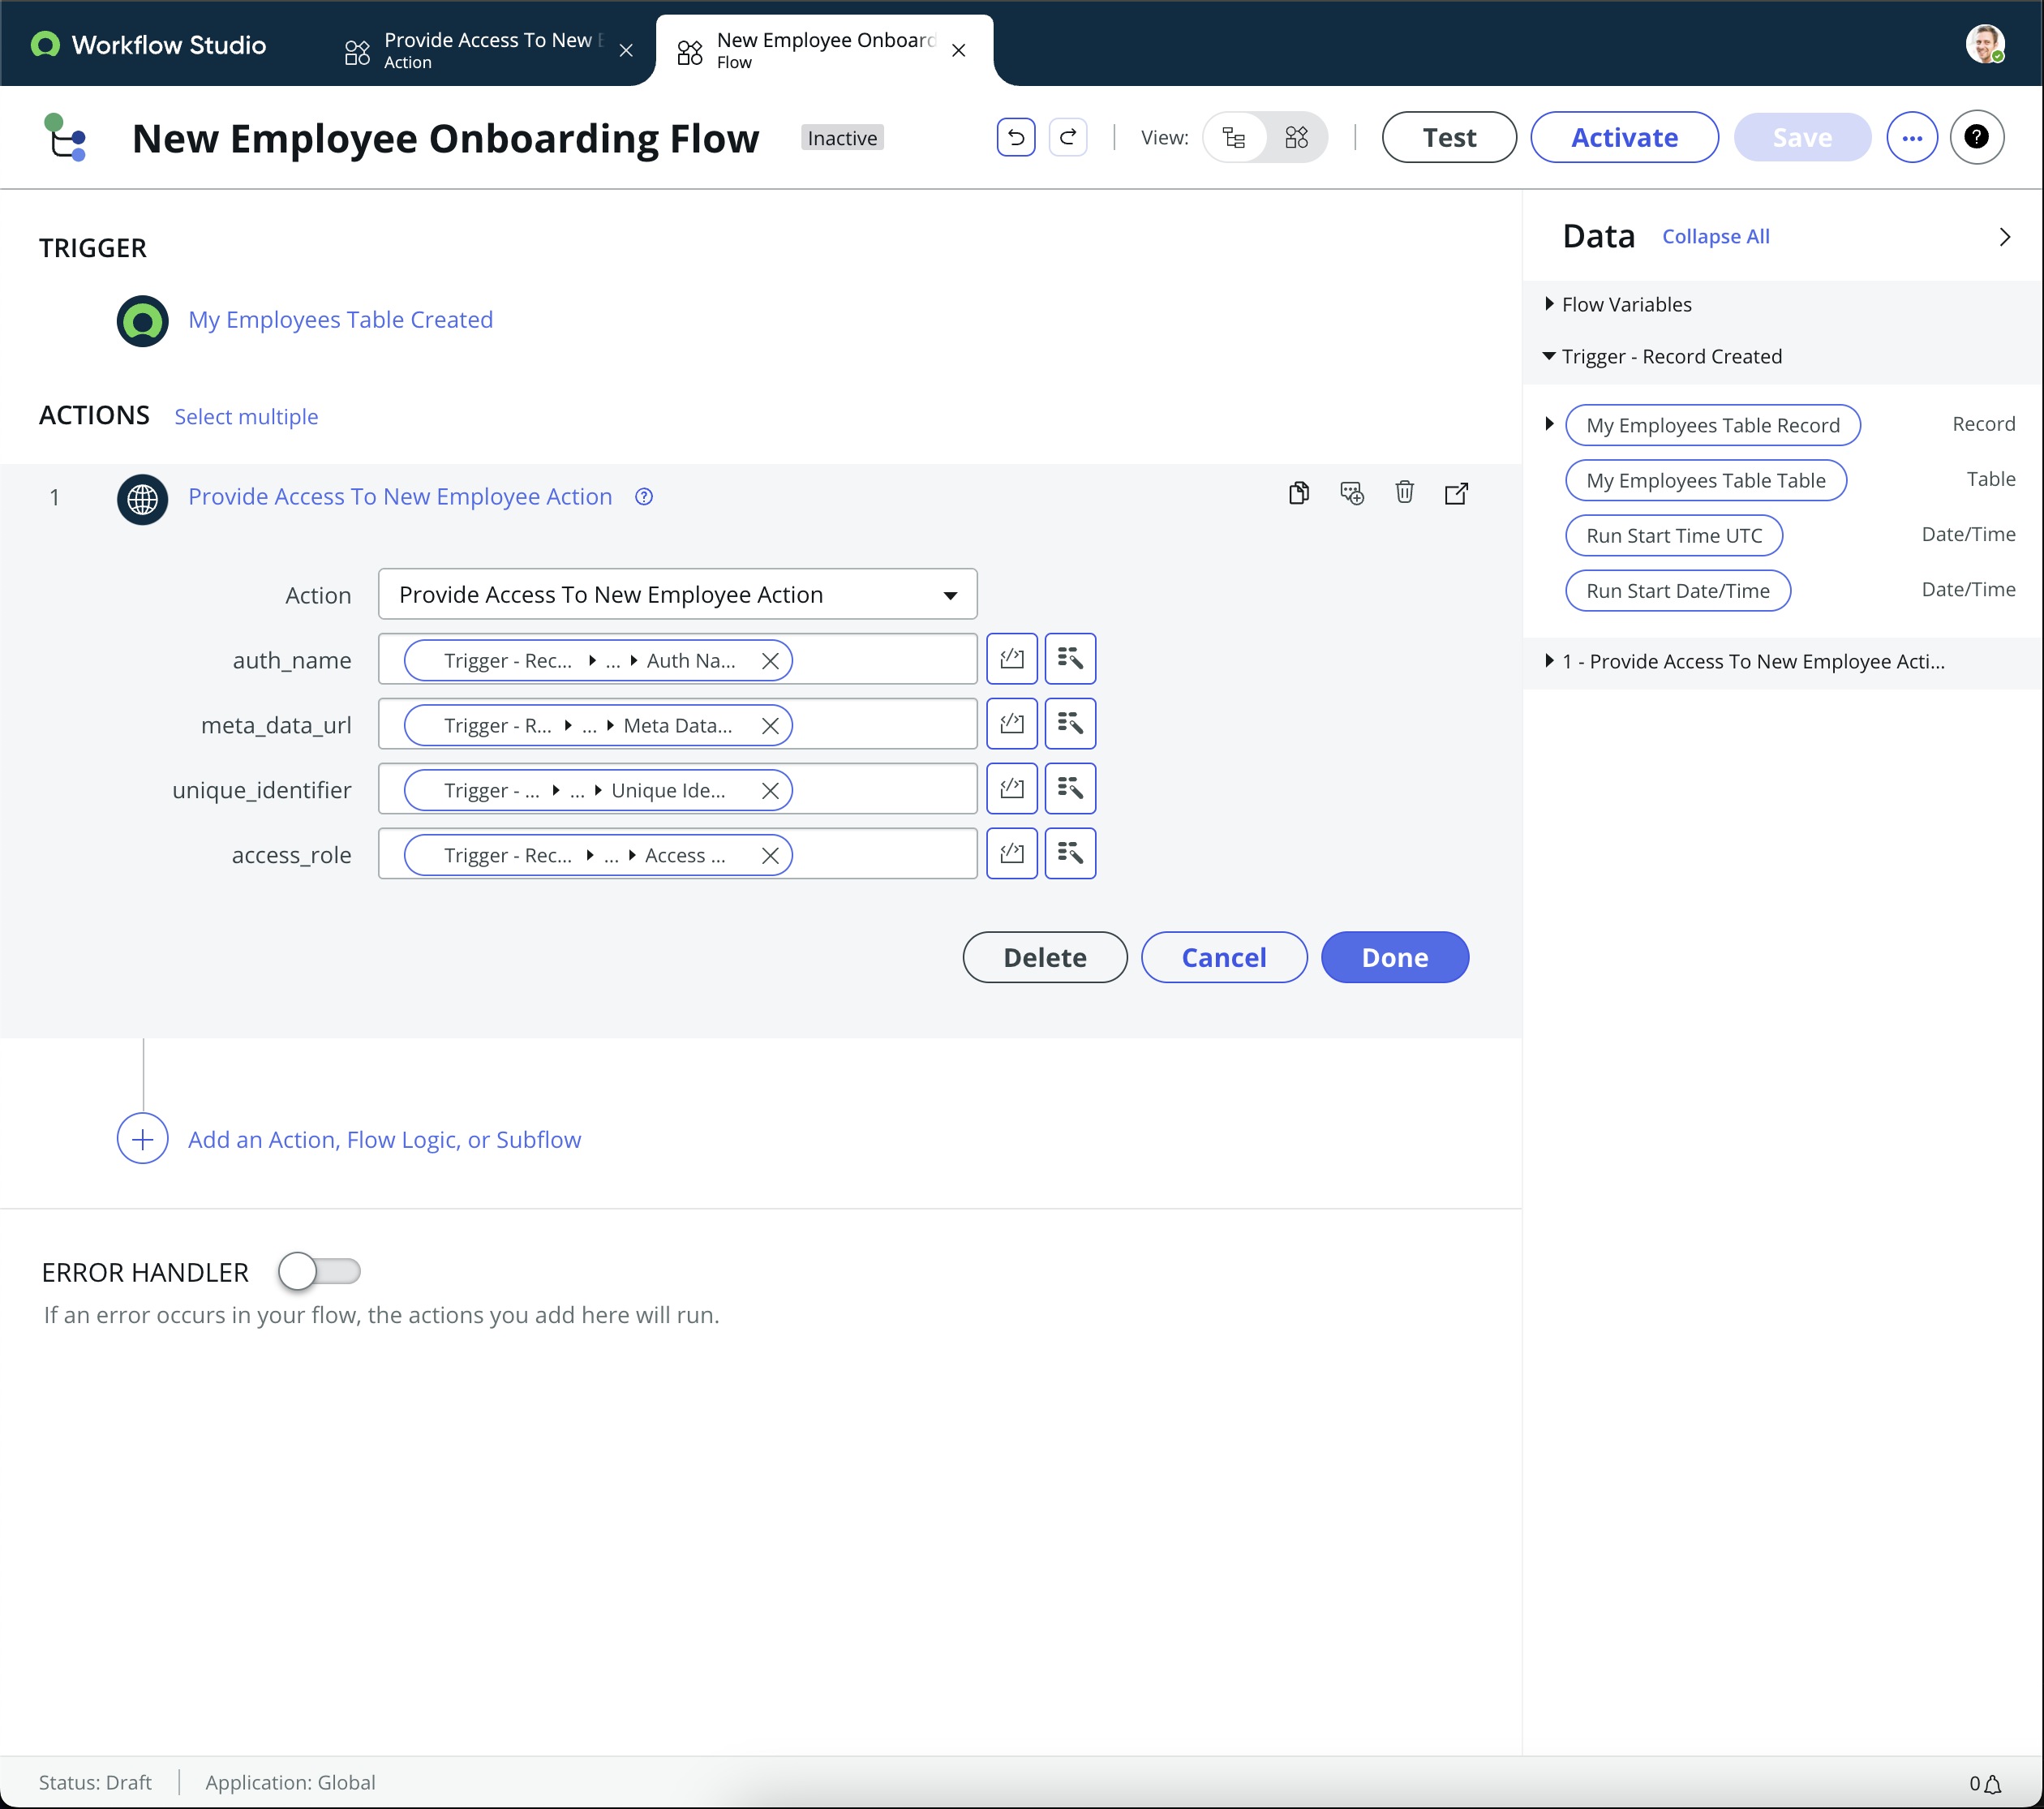
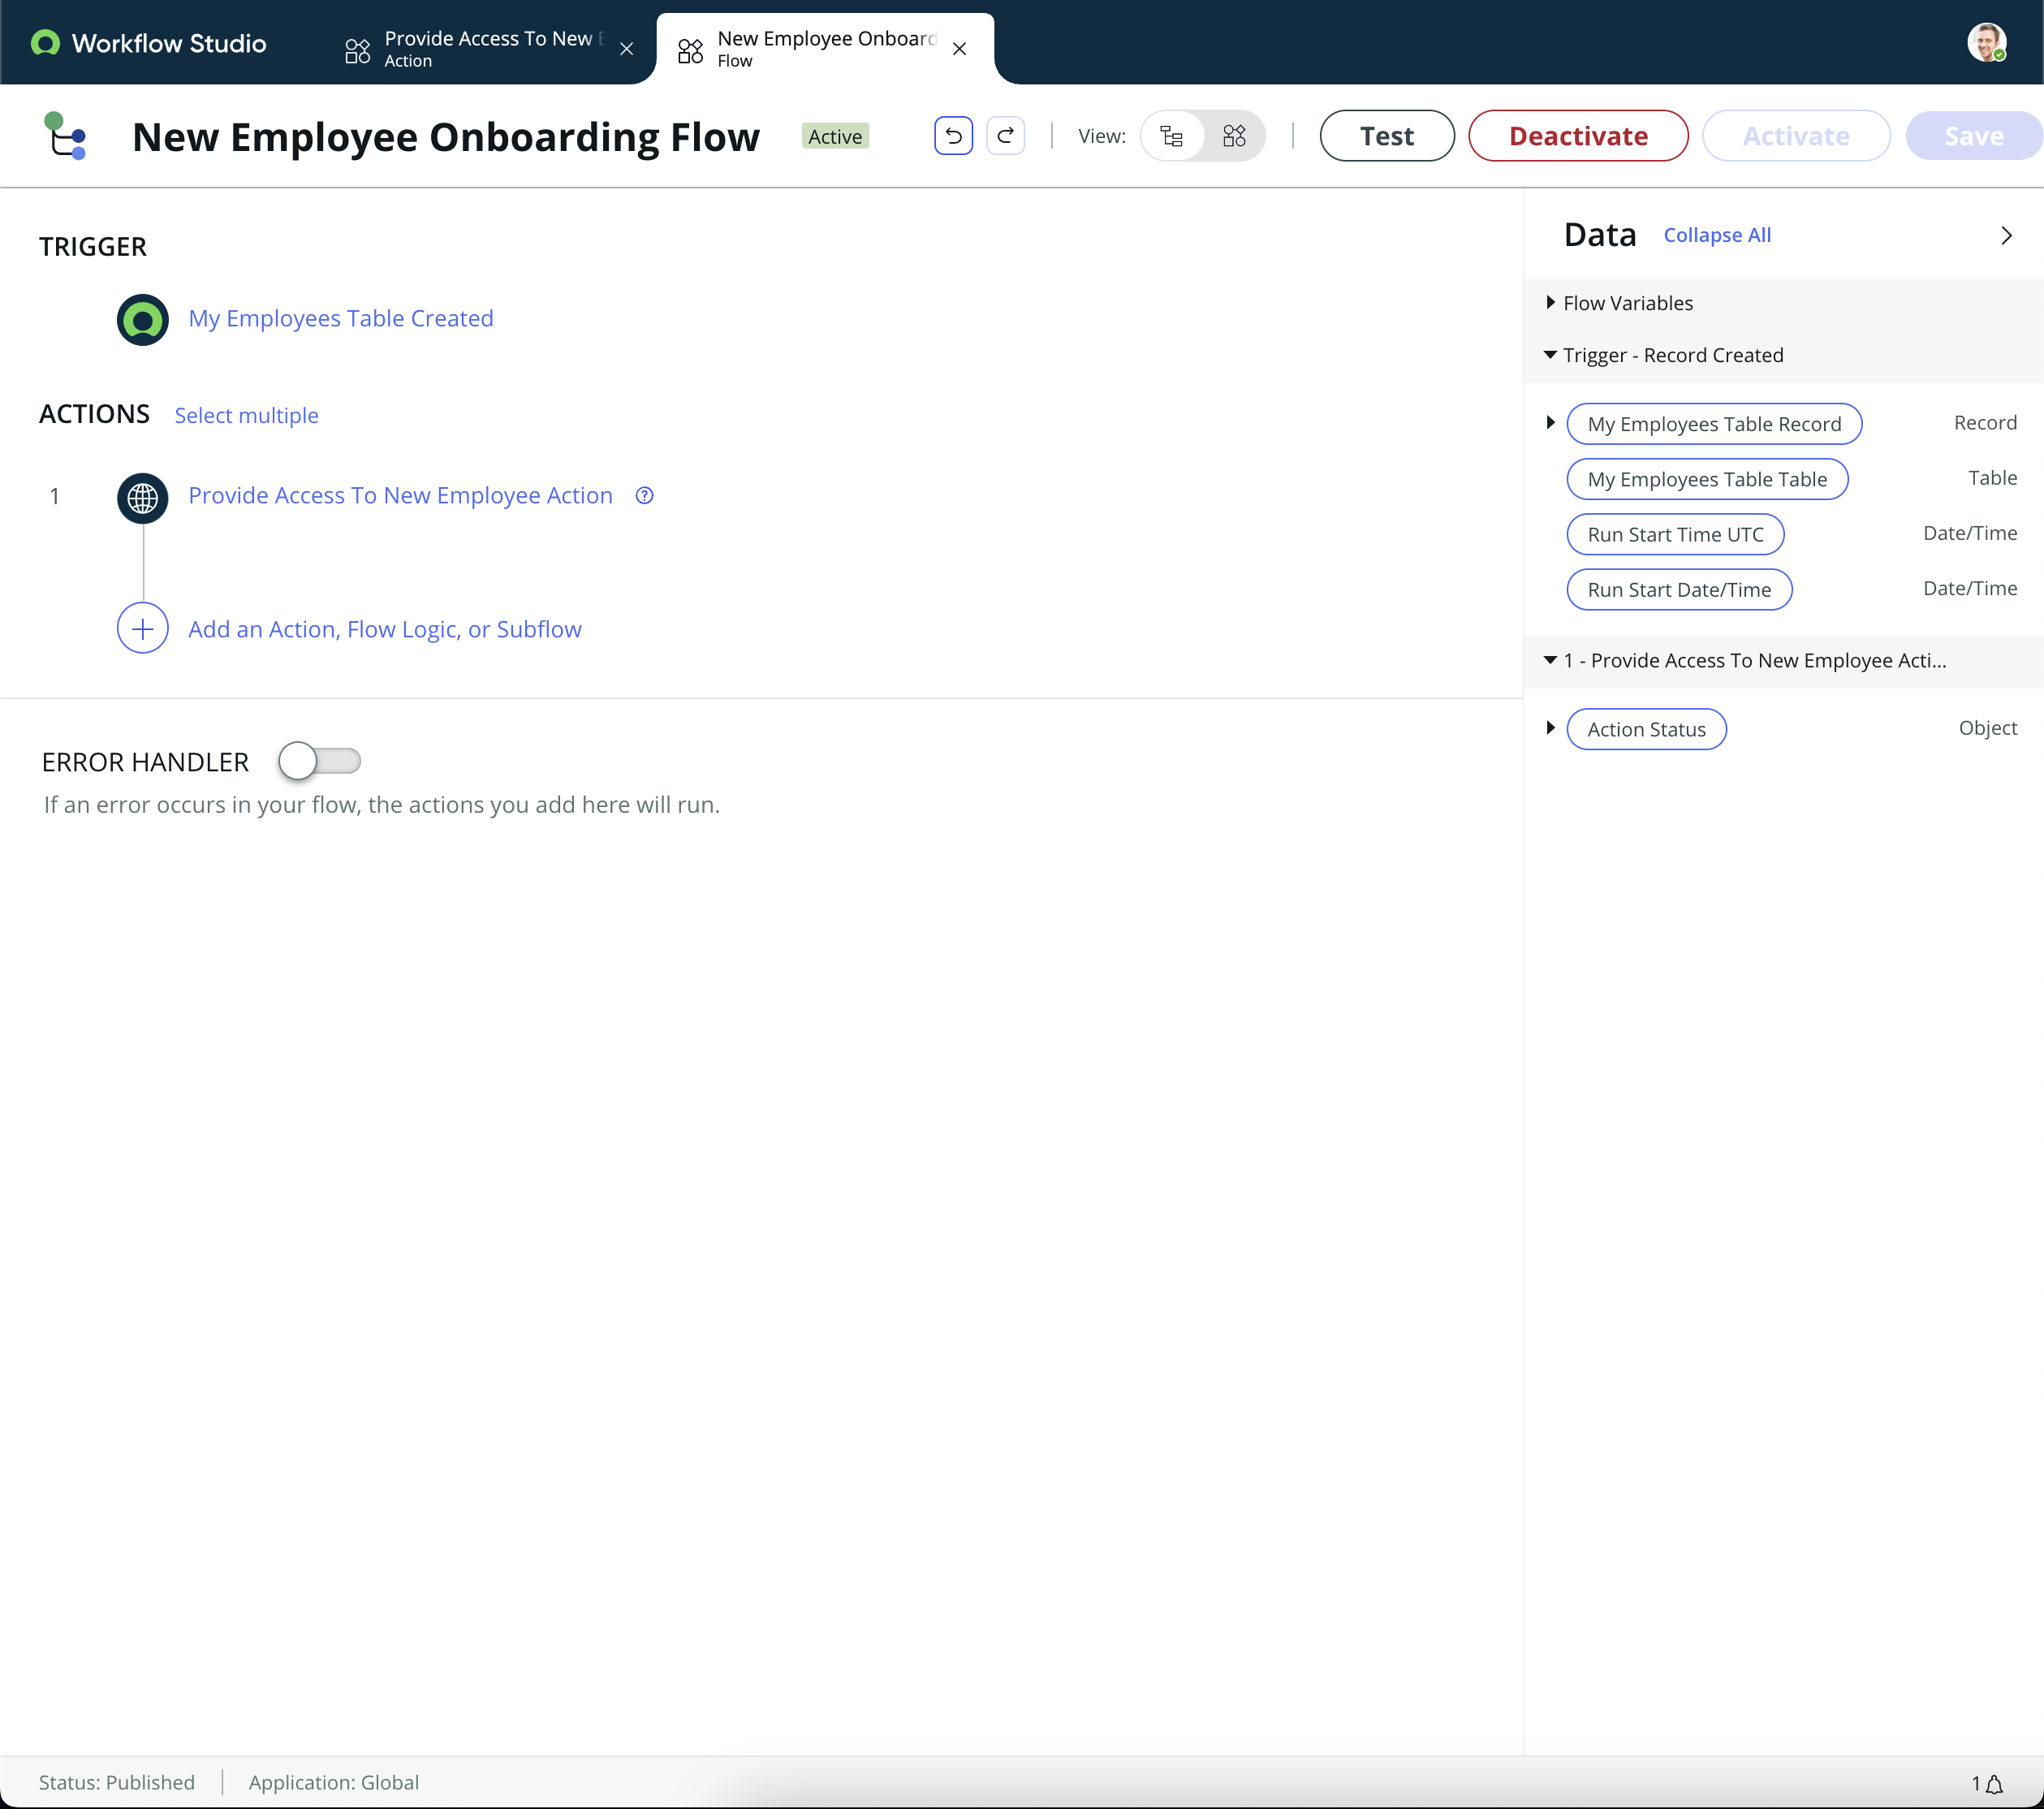
Step 5: Map Record Columns to Action Inputs
- With the action selected in your flow, look to the configuration panel on the right side of the screen. Here, you will see fields for each input of your action.
- Map each input to the corresponding column of the updated record by clicking on the input field. This opens a selection window where you can choose data pills.
- The data pills represent the fields of the record that triggered the flow. Drag and drop the appropriate data pill into the input field. For example, if you have an input named auth_name, find the Auth Name field from the list of available data pills (which represent the columns of the triggering record) and drop it into the auth_name input field.

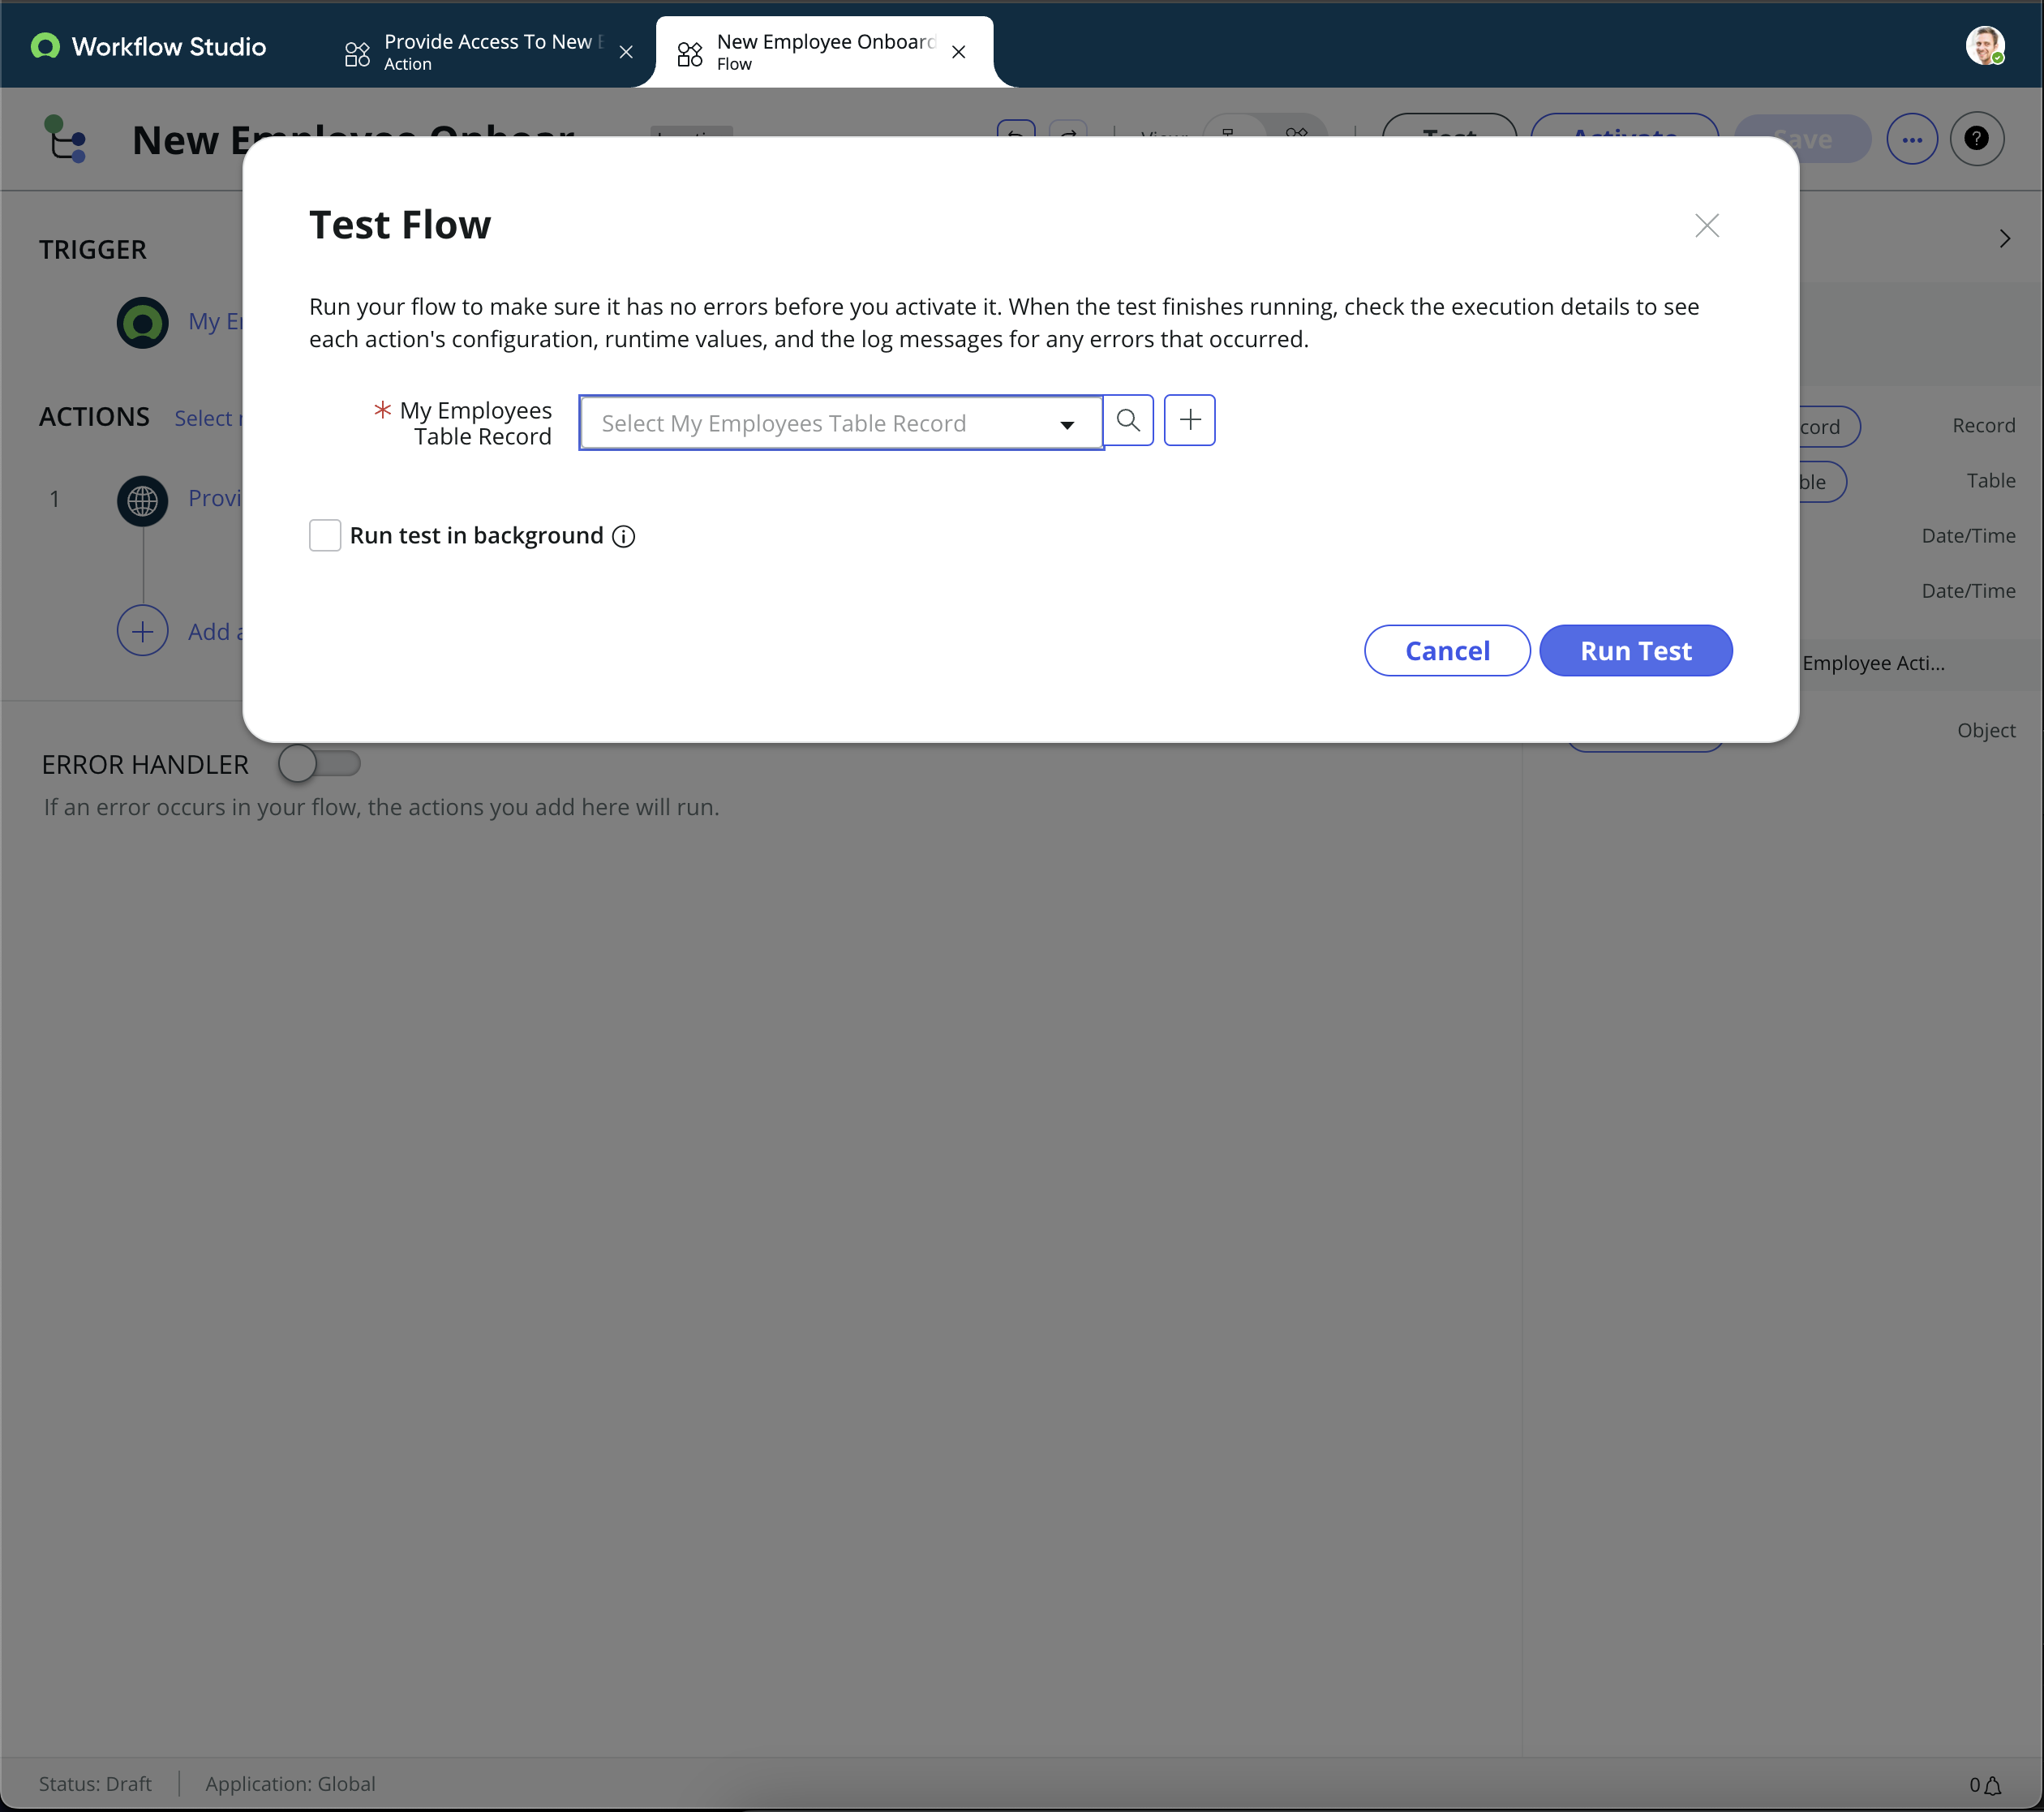
Step 6: Test Your Flow
- Before using your flow in a production environment, it's important to test it to ensure it behaves as expected.
- Use the Test feature in Flow Designer to run your flow in a controlled environment. You can simulate the trigger and inspect the outcomes of each action.
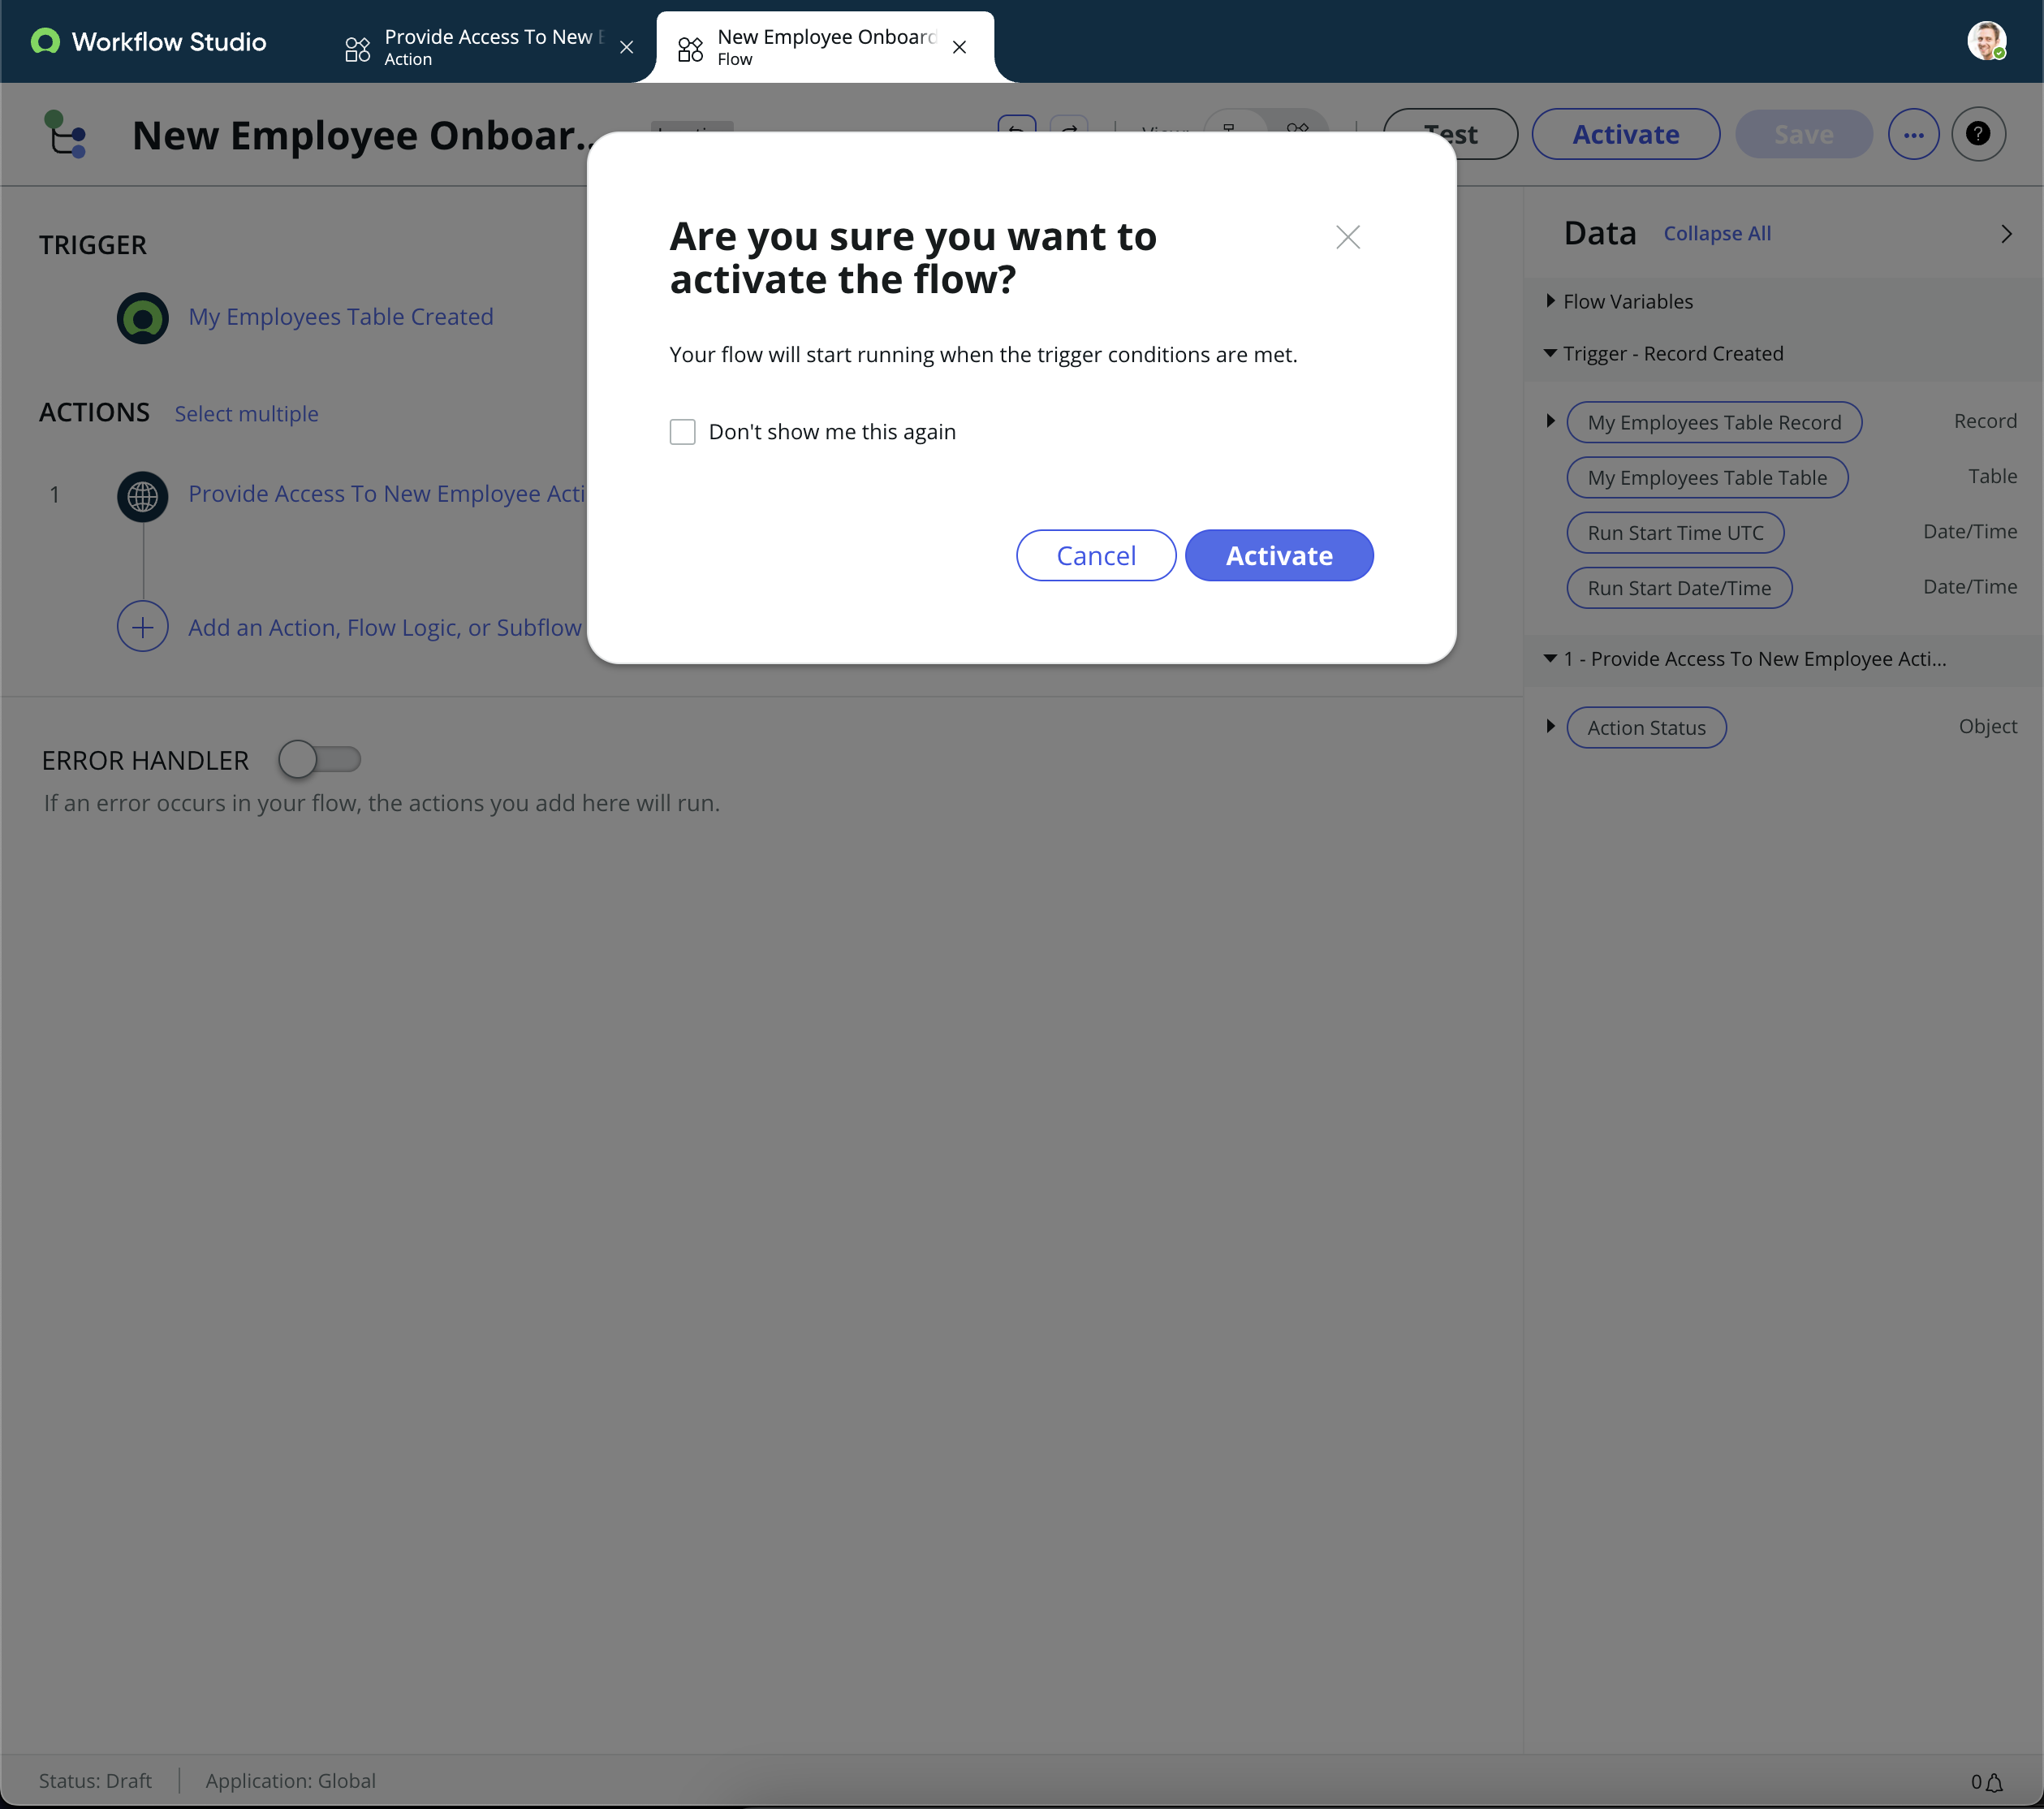
Step 7: Activate Your Flow
- Once you're satisfied with the flow's performance during testing, you can activate it. An active flow will run according to its trigger conditions within your ServiceNow environment.

Updated 5 months ago
Did this page help you?