Set Up a Flow in ServiceNow
Creating a flow in ServiceNow involves using the Flow Designer, a powerful tool that allows you to automate processes and tasks within your ServiceNow environment. Flows can streamline operations, enhance efficiency, and reduce manual errors by automating actions based on specific triggers and conditions. Here’s a detailed guide on how to create a flow in ServiceNow:
Step 1: Access Flow Designer
- Log In: Sign into your ServiceNow instance with an account that has the necessary permissions to access the Flow Designer. Typically, you'll need an admin or a role with flow designer privileges.
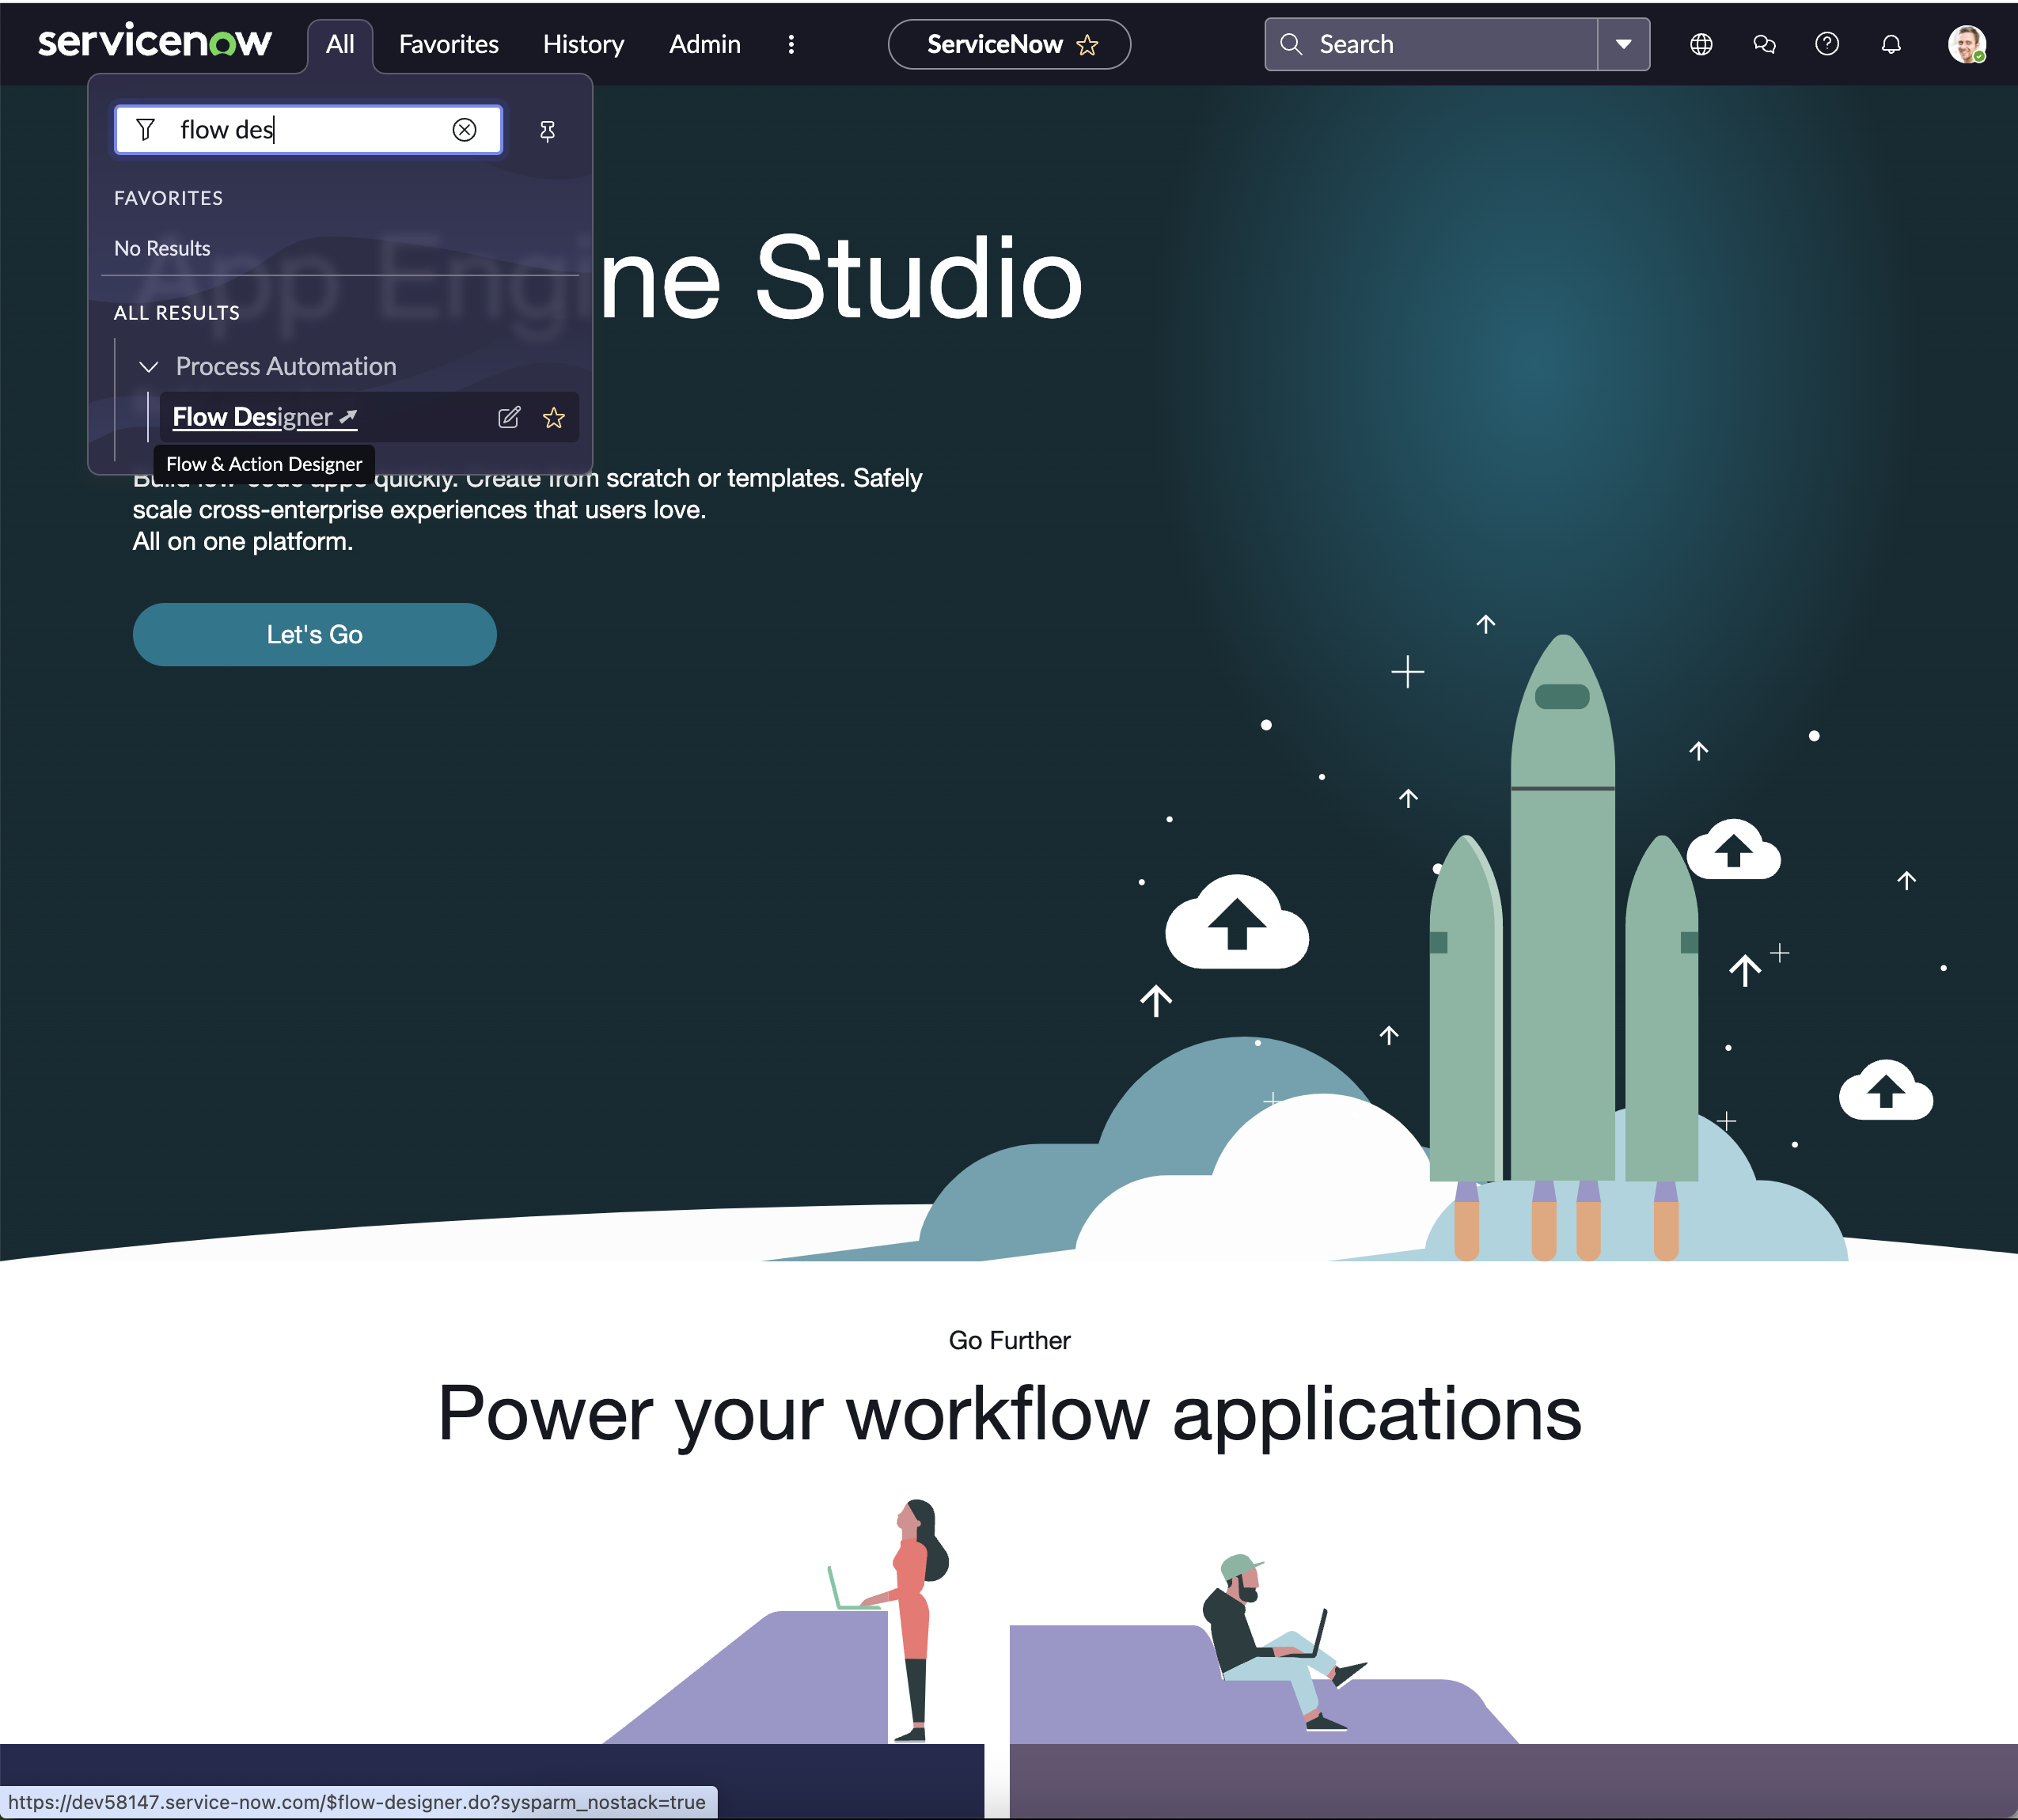
- Navigate to Flow Designer: In the Application Navigator on the left-hand side, type “Flow Designer” and select it from the search results to open the Flow Designer interface.
Step 2: Start a New Flow
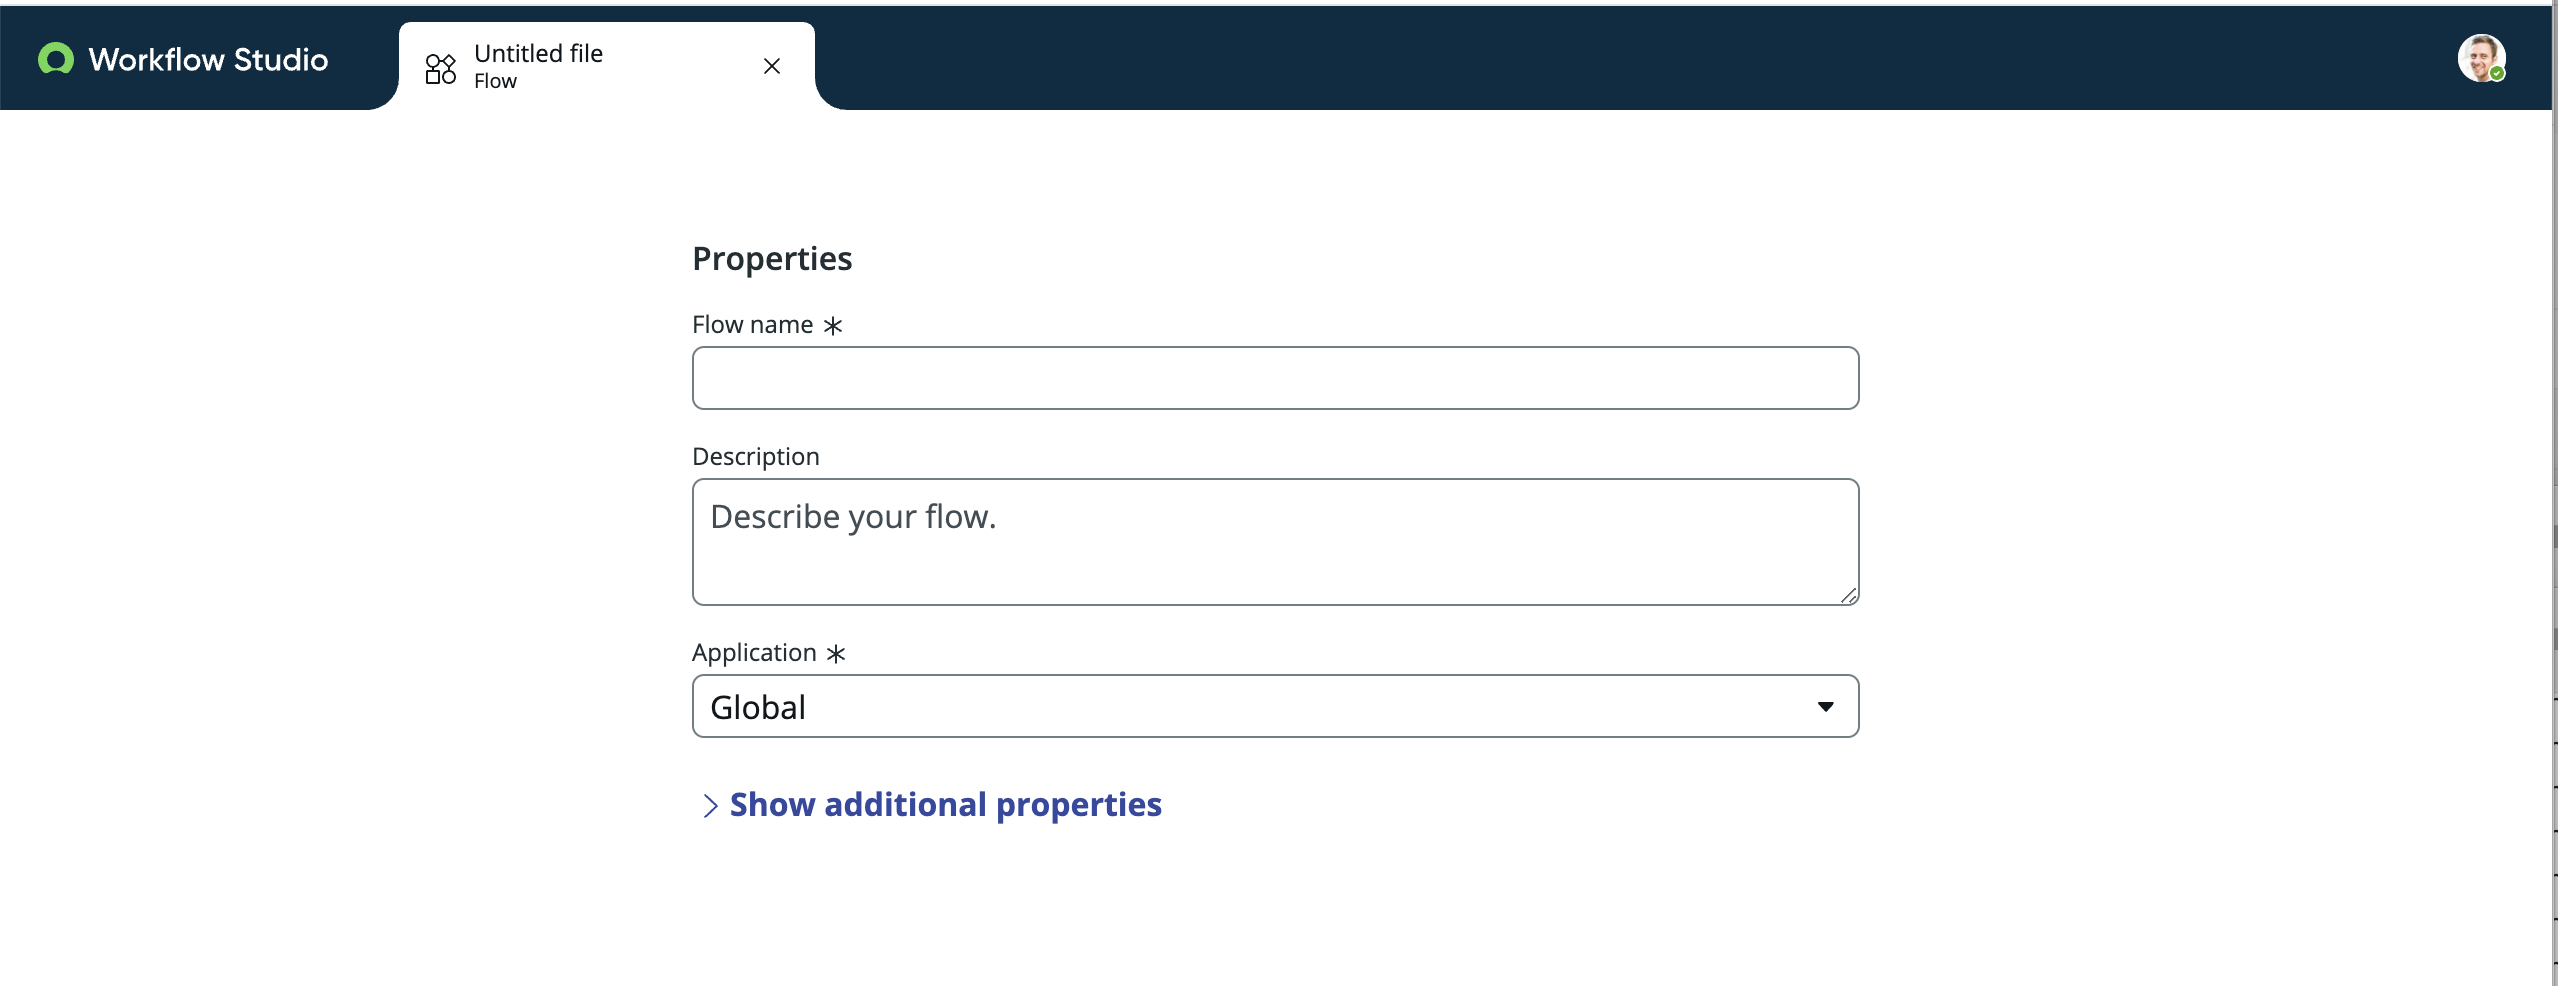
- Create New Flow: In the Flow Designer interface, look for an option to create a new flow. This could be a button labeled “New” or “Create New Flow.” Click on it to initiate the creation of a new flow.
- Name and Describe: You will be prompted to enter a name for your flow and optionally, a description. Choose a descriptive name that clearly indicates the purpose of the flow for easy identification later.
Step 3: Define the Trigger
- Select Trigger Type: Every flow starts with a trigger, which is the event that initiates the flow. ServiceNow allows you to choose from various trigger types, such as record creation or update, scheduled times, or external triggers. Select the trigger type that best suits your workflow.
- Configure Trigger Details: Depending on the trigger type you select, you’ll need to provide additional details. For example, if your trigger is based on a record being created or updated, you’ll need to specify the table and conditions under which the flow should be triggered.
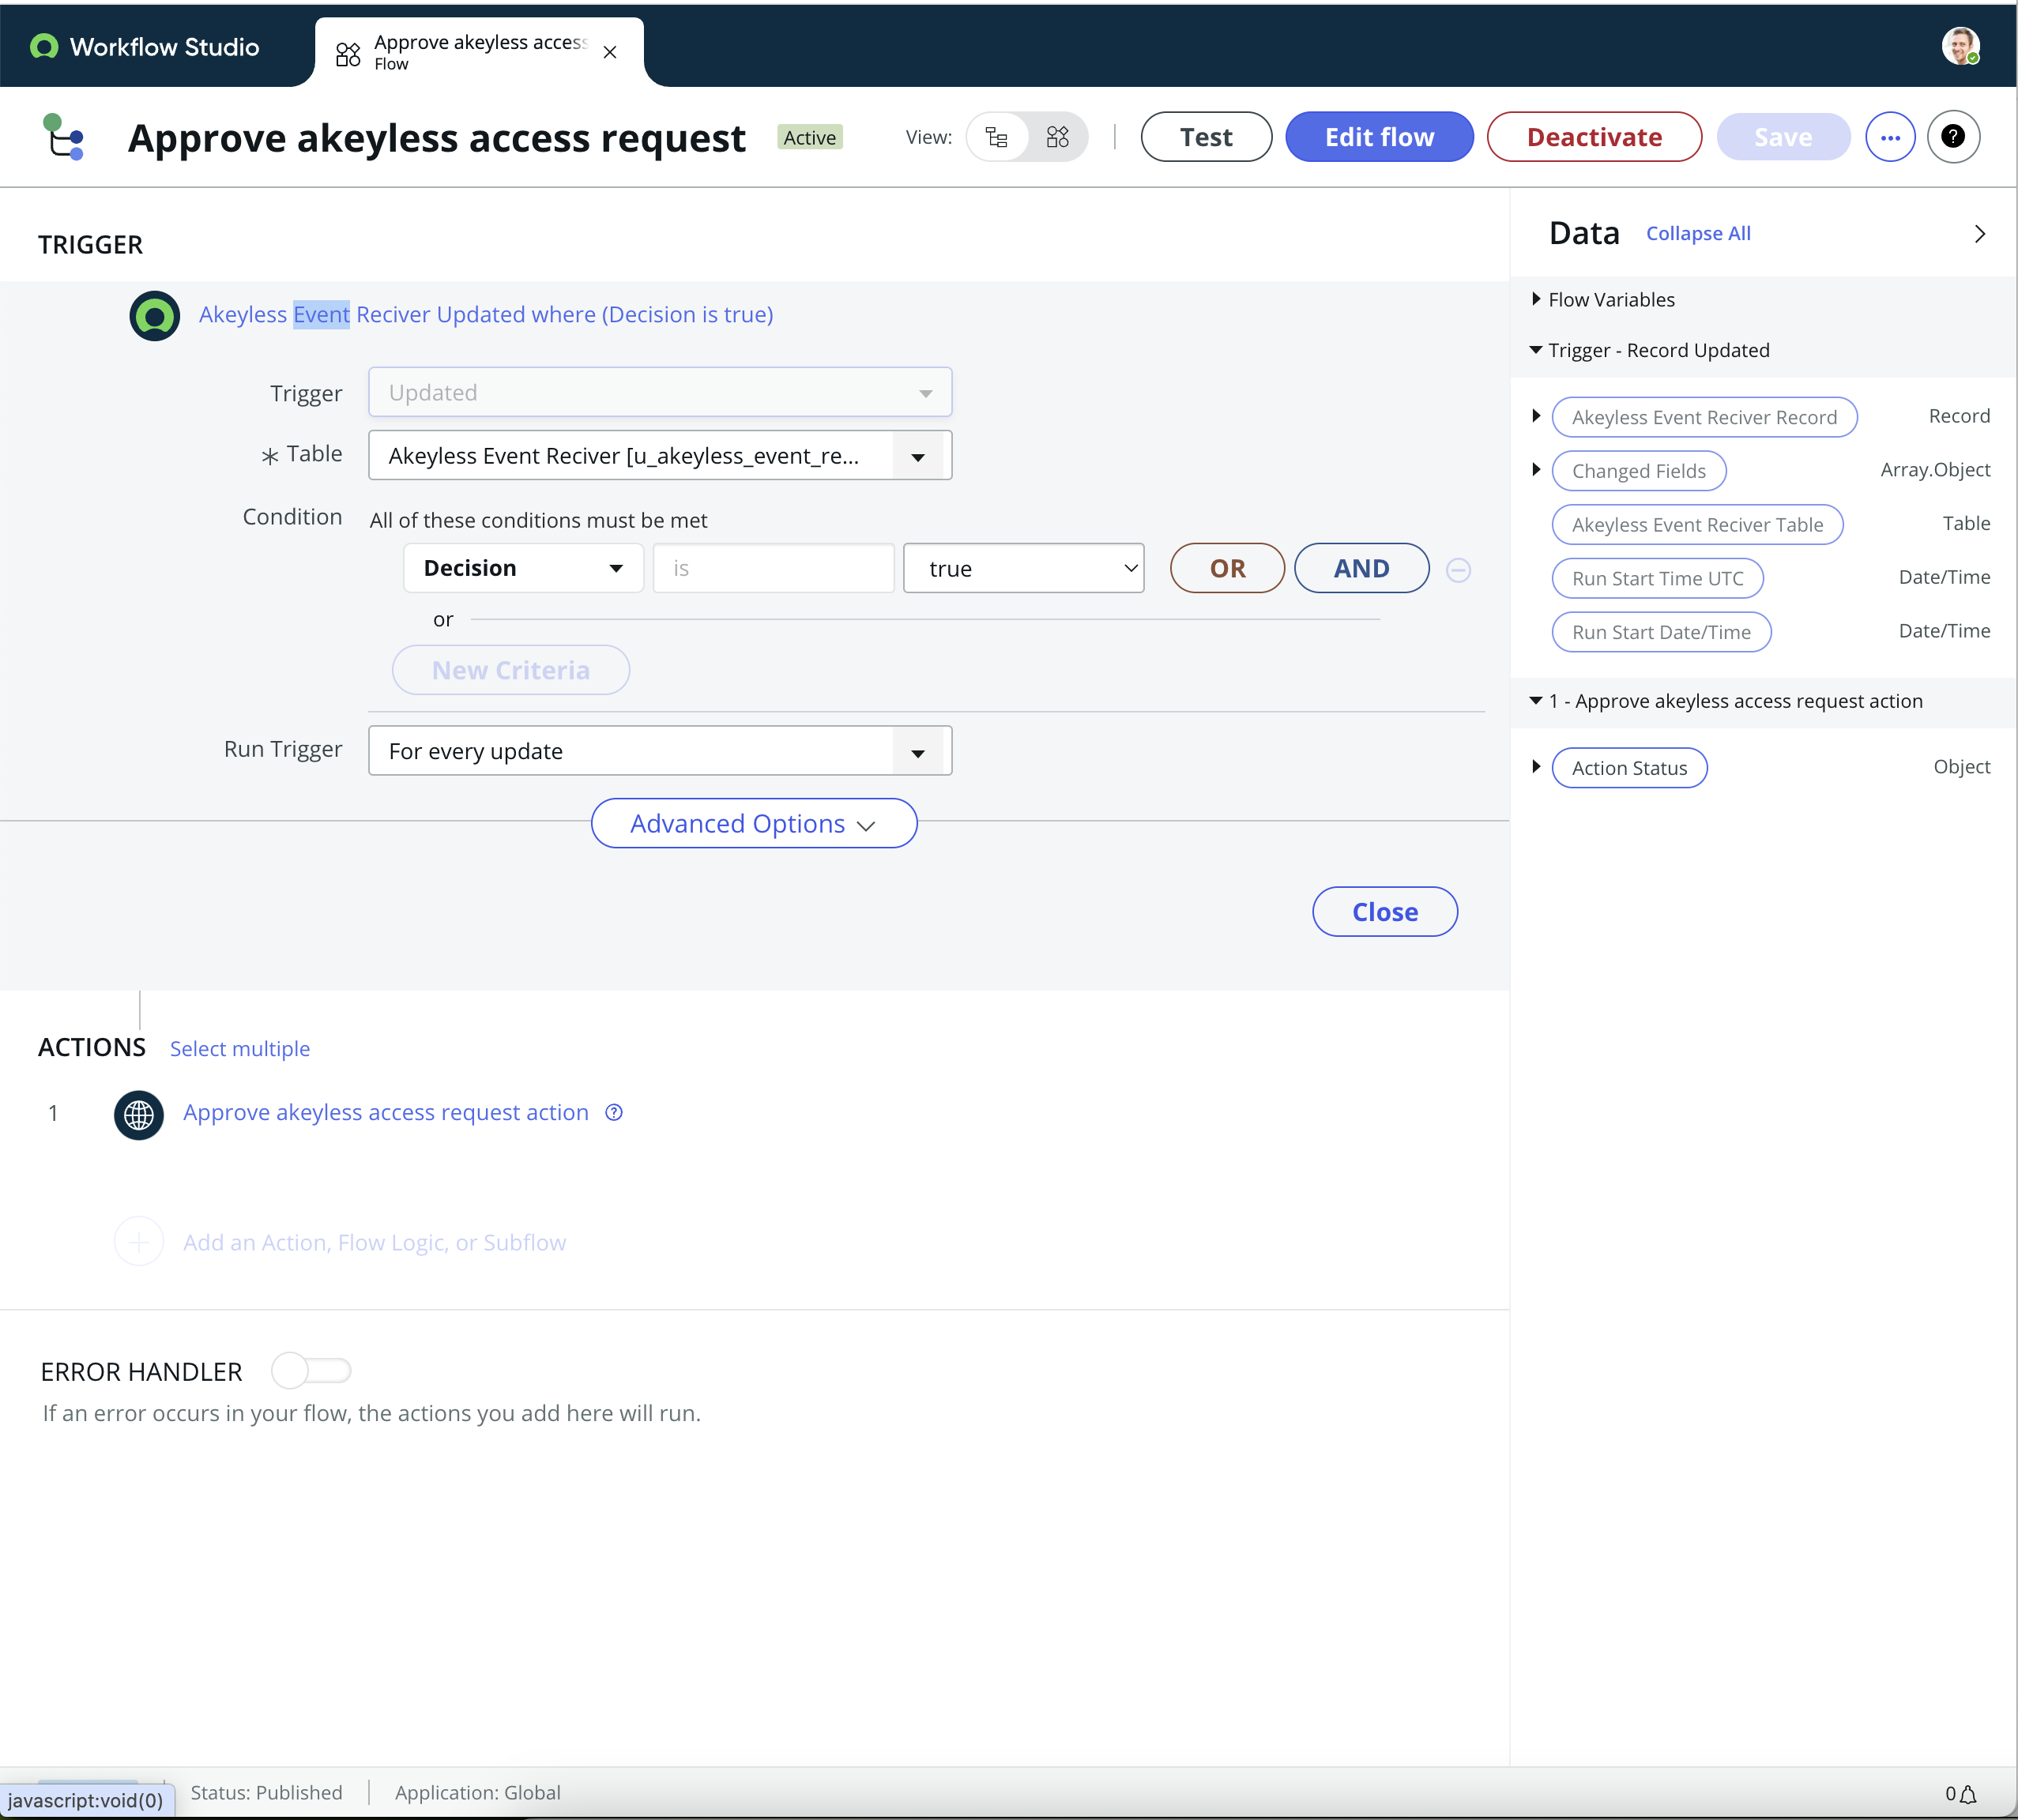
- In our scenario, the flow is triggered when the status in our events table column changes to "true" or "false".
Step 4: Add Actions
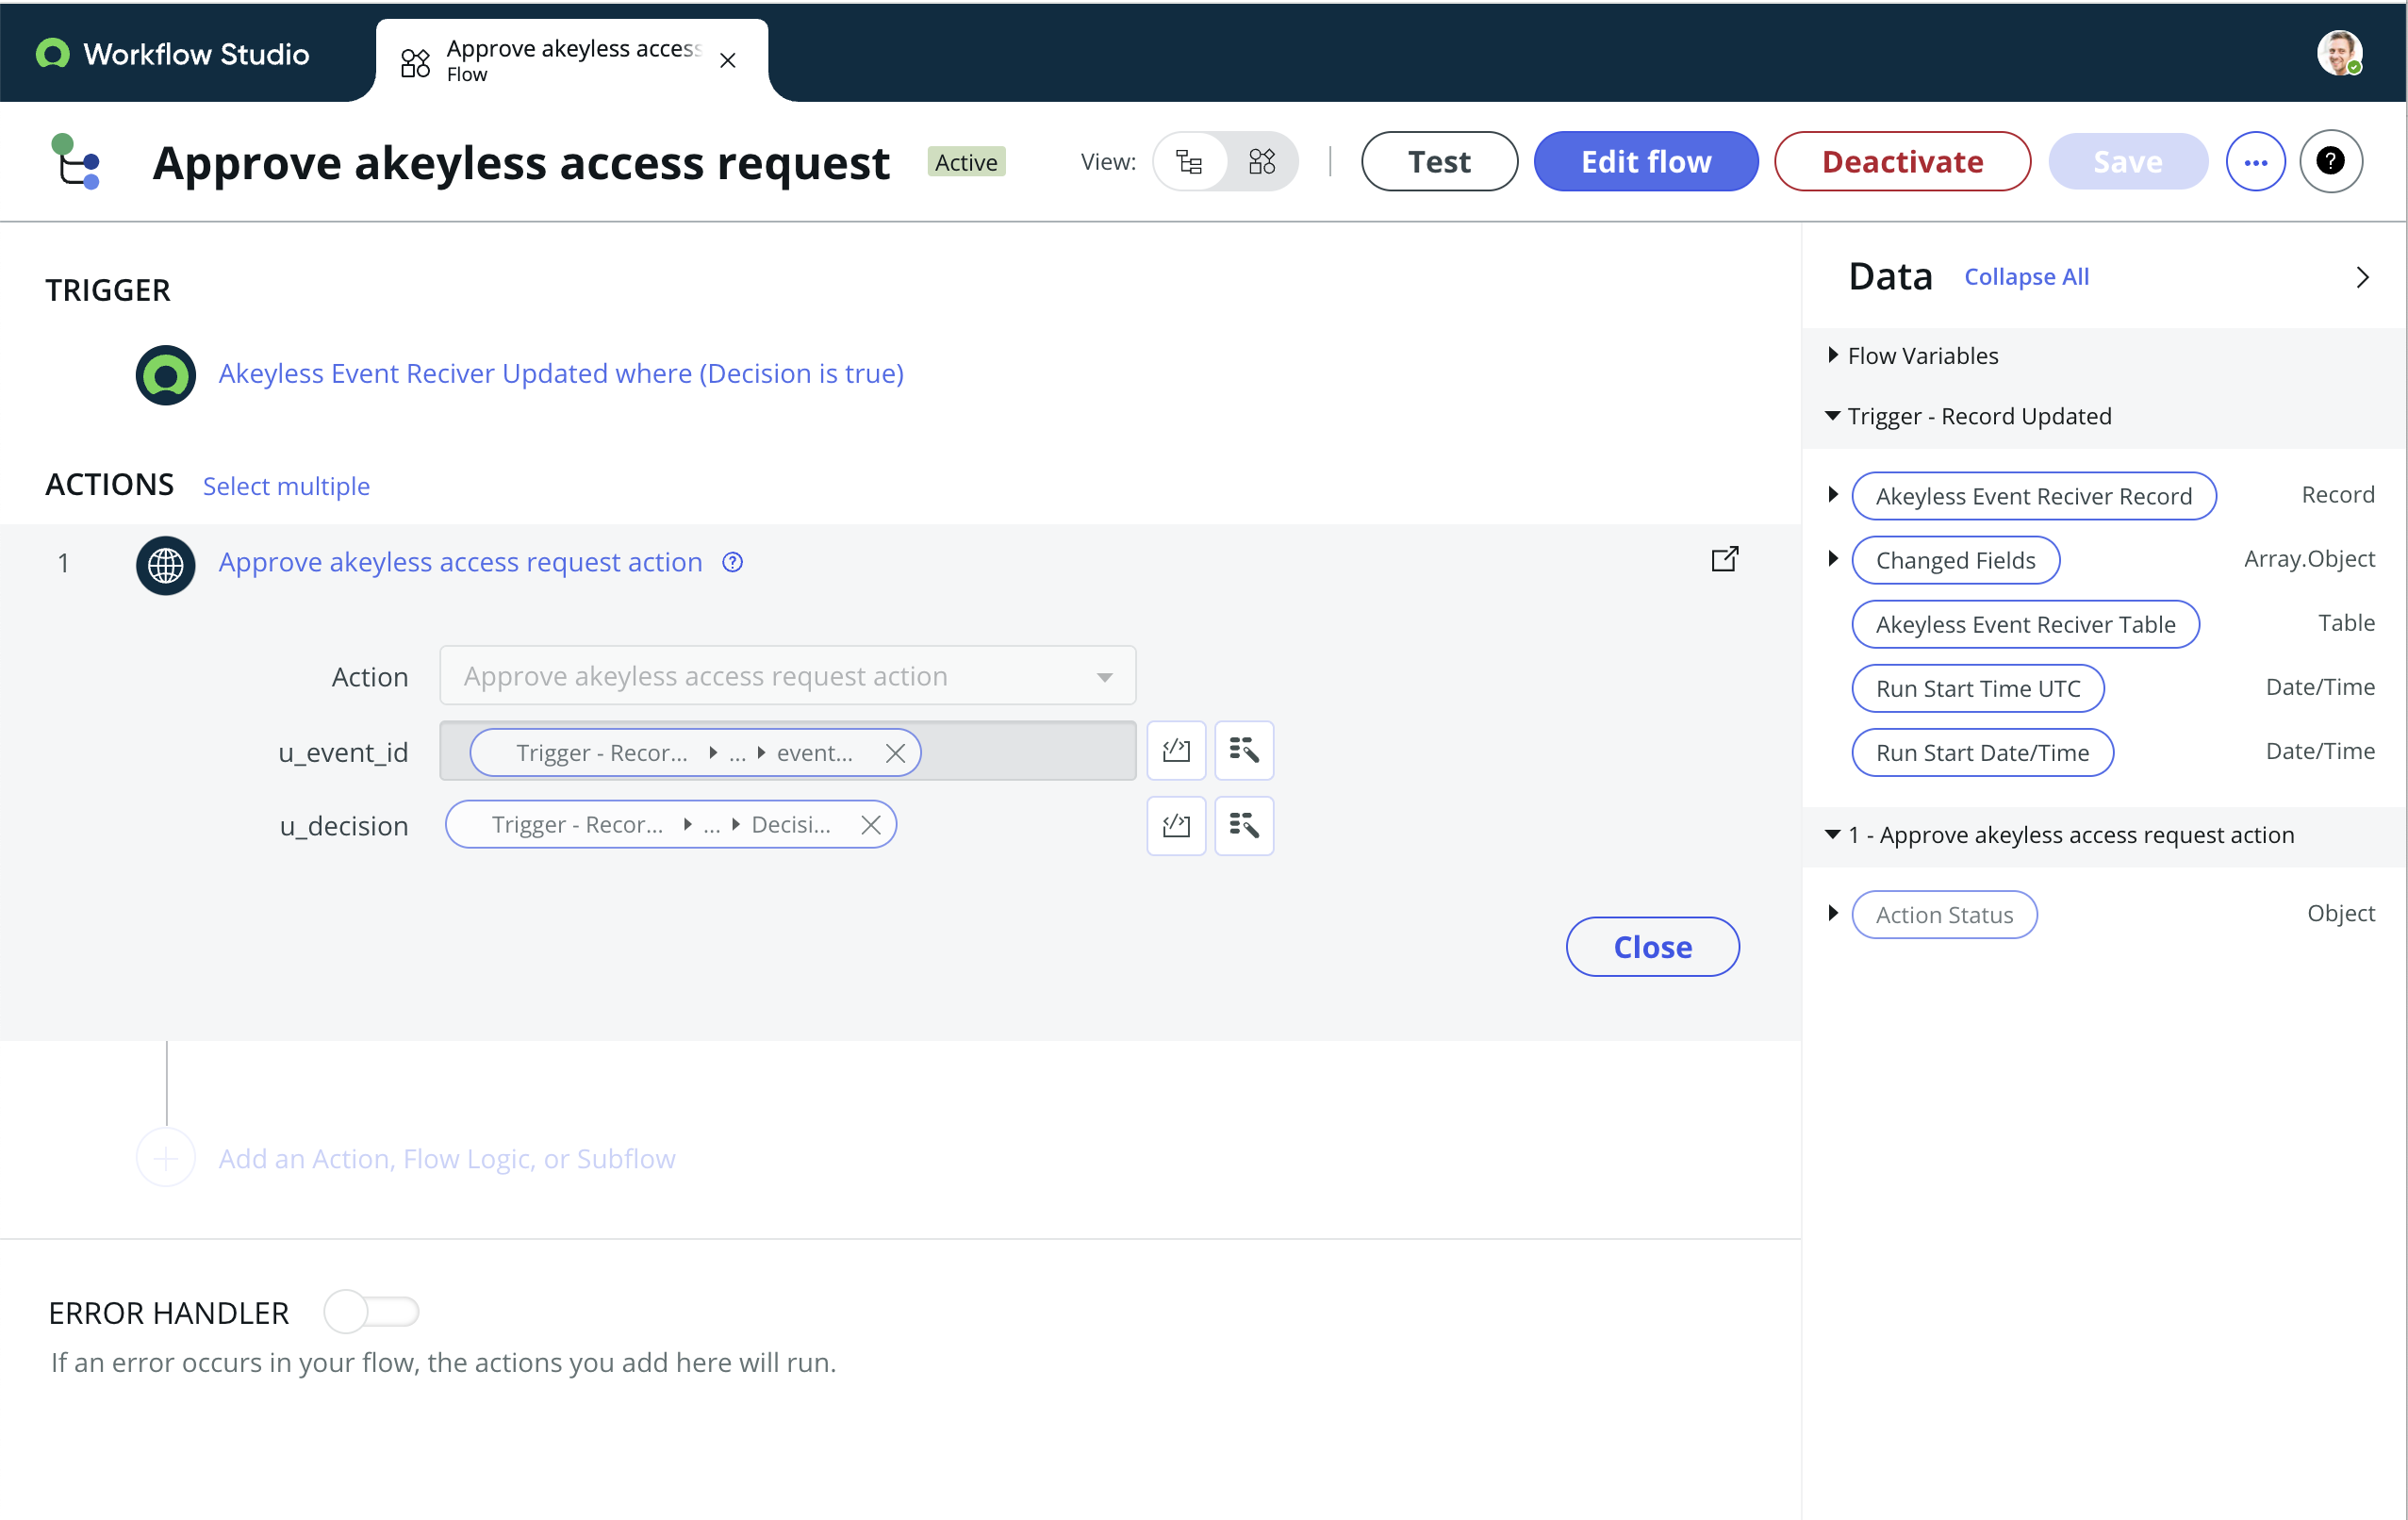
- Insert Actions: After defining the trigger, you can start adding actions that the flow should perform. Click on “Add Action” or a similarly labeled button to explore the available actions.
- Configure Actions: For each action you add, fill in the required fields and configure its settings. Actions can range from updating a record, sending notifications, creating tasks, or even calling external APIs. You can add multiple actions and arrange them in the order they should be executed.
Step 5: Add Logic (Optional)
- Use Logic Elements: ServiceNow Flow Designer also allows you to add logic elements to your flow, such as conditions, loops, and decision branches. This enables you to create more complex and dynamic workflows. For instance, you might add a decision that branches the flow based on the value of a record field.
Step 6: Save and Test Your Flow
- Save Flow: Once you’ve configured the trigger and actions, save your flow. You may also have options to validate the flow to check for any issues.
- Test Flow: It’s important to test your flow to ensure it works as expected. ServiceNow provides tools to test flows in a controlled environment. Make adjustments as necessary based on the test results.
Step 7: Activate Your Flow
- Activate Flow: With your flow tested and ready, the final step is to activate it. Look for an “Activate” button or switch within the Flow Designer. Once activated, the flow will start running according to its trigger conditions.

Updated 5 months ago
Did this page help you?