Create a Gateway in Akeyless System
Creating a gateway within the Akeyless system is a fundamental step for leveraging the event forwarder functionality, as it enables secure communication between Akeyless and external systems or applications. Here's a detailed guide on how to set up a gateway in the Akeyless system:
Step 1: Log Into Akeyless Console
- First, you need to access the Akeyless management console. Navigate to the Akeyless website and log in with your credentials. If you don't have an account yet, you'll need to create one.
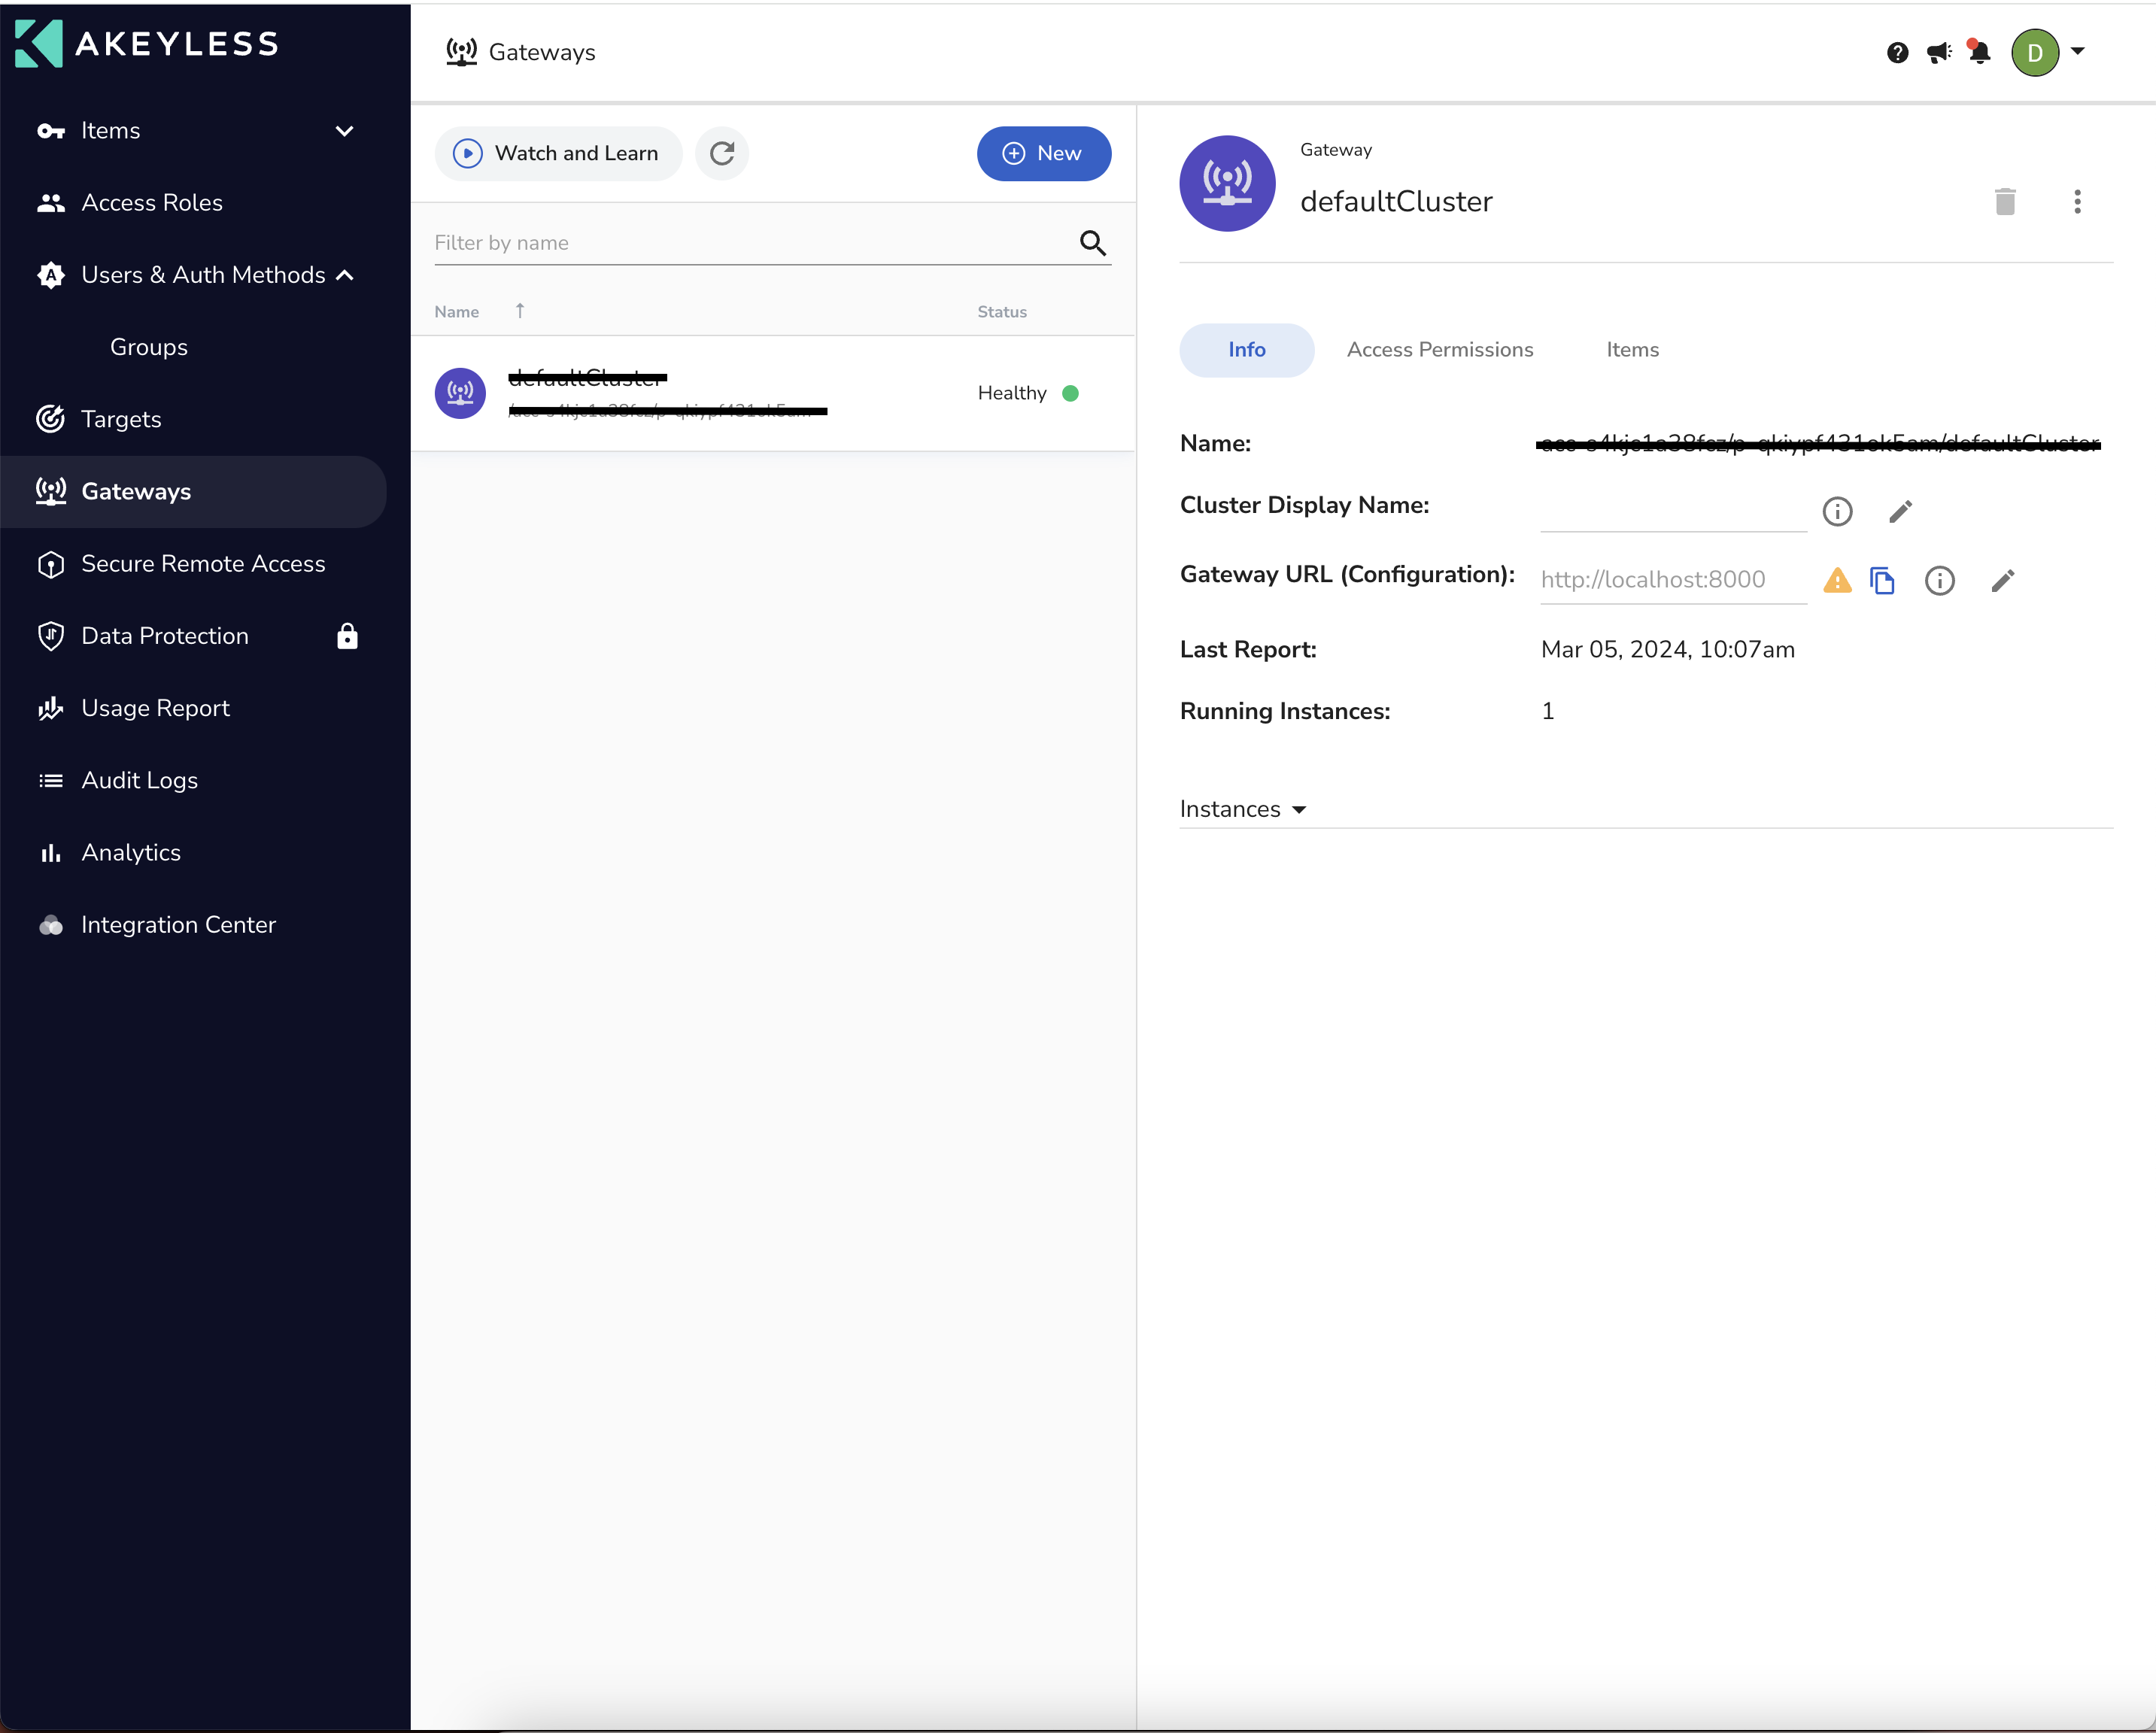
Step 2: Navigate to Gateways
- Once logged in, look for the navigation panel or menu that allows you to manage different aspects of the Akeyless service. Find and click on the section labeled “Gateways” or something similar, depending on the console's version or layout.
Step 3: Create a New Gateway
- In the Gateways section, you will see an option to create new Gateway by clicking the New Button. Click on this to start the process of setting up a new gateway.
- You will be prompted to installation guide:
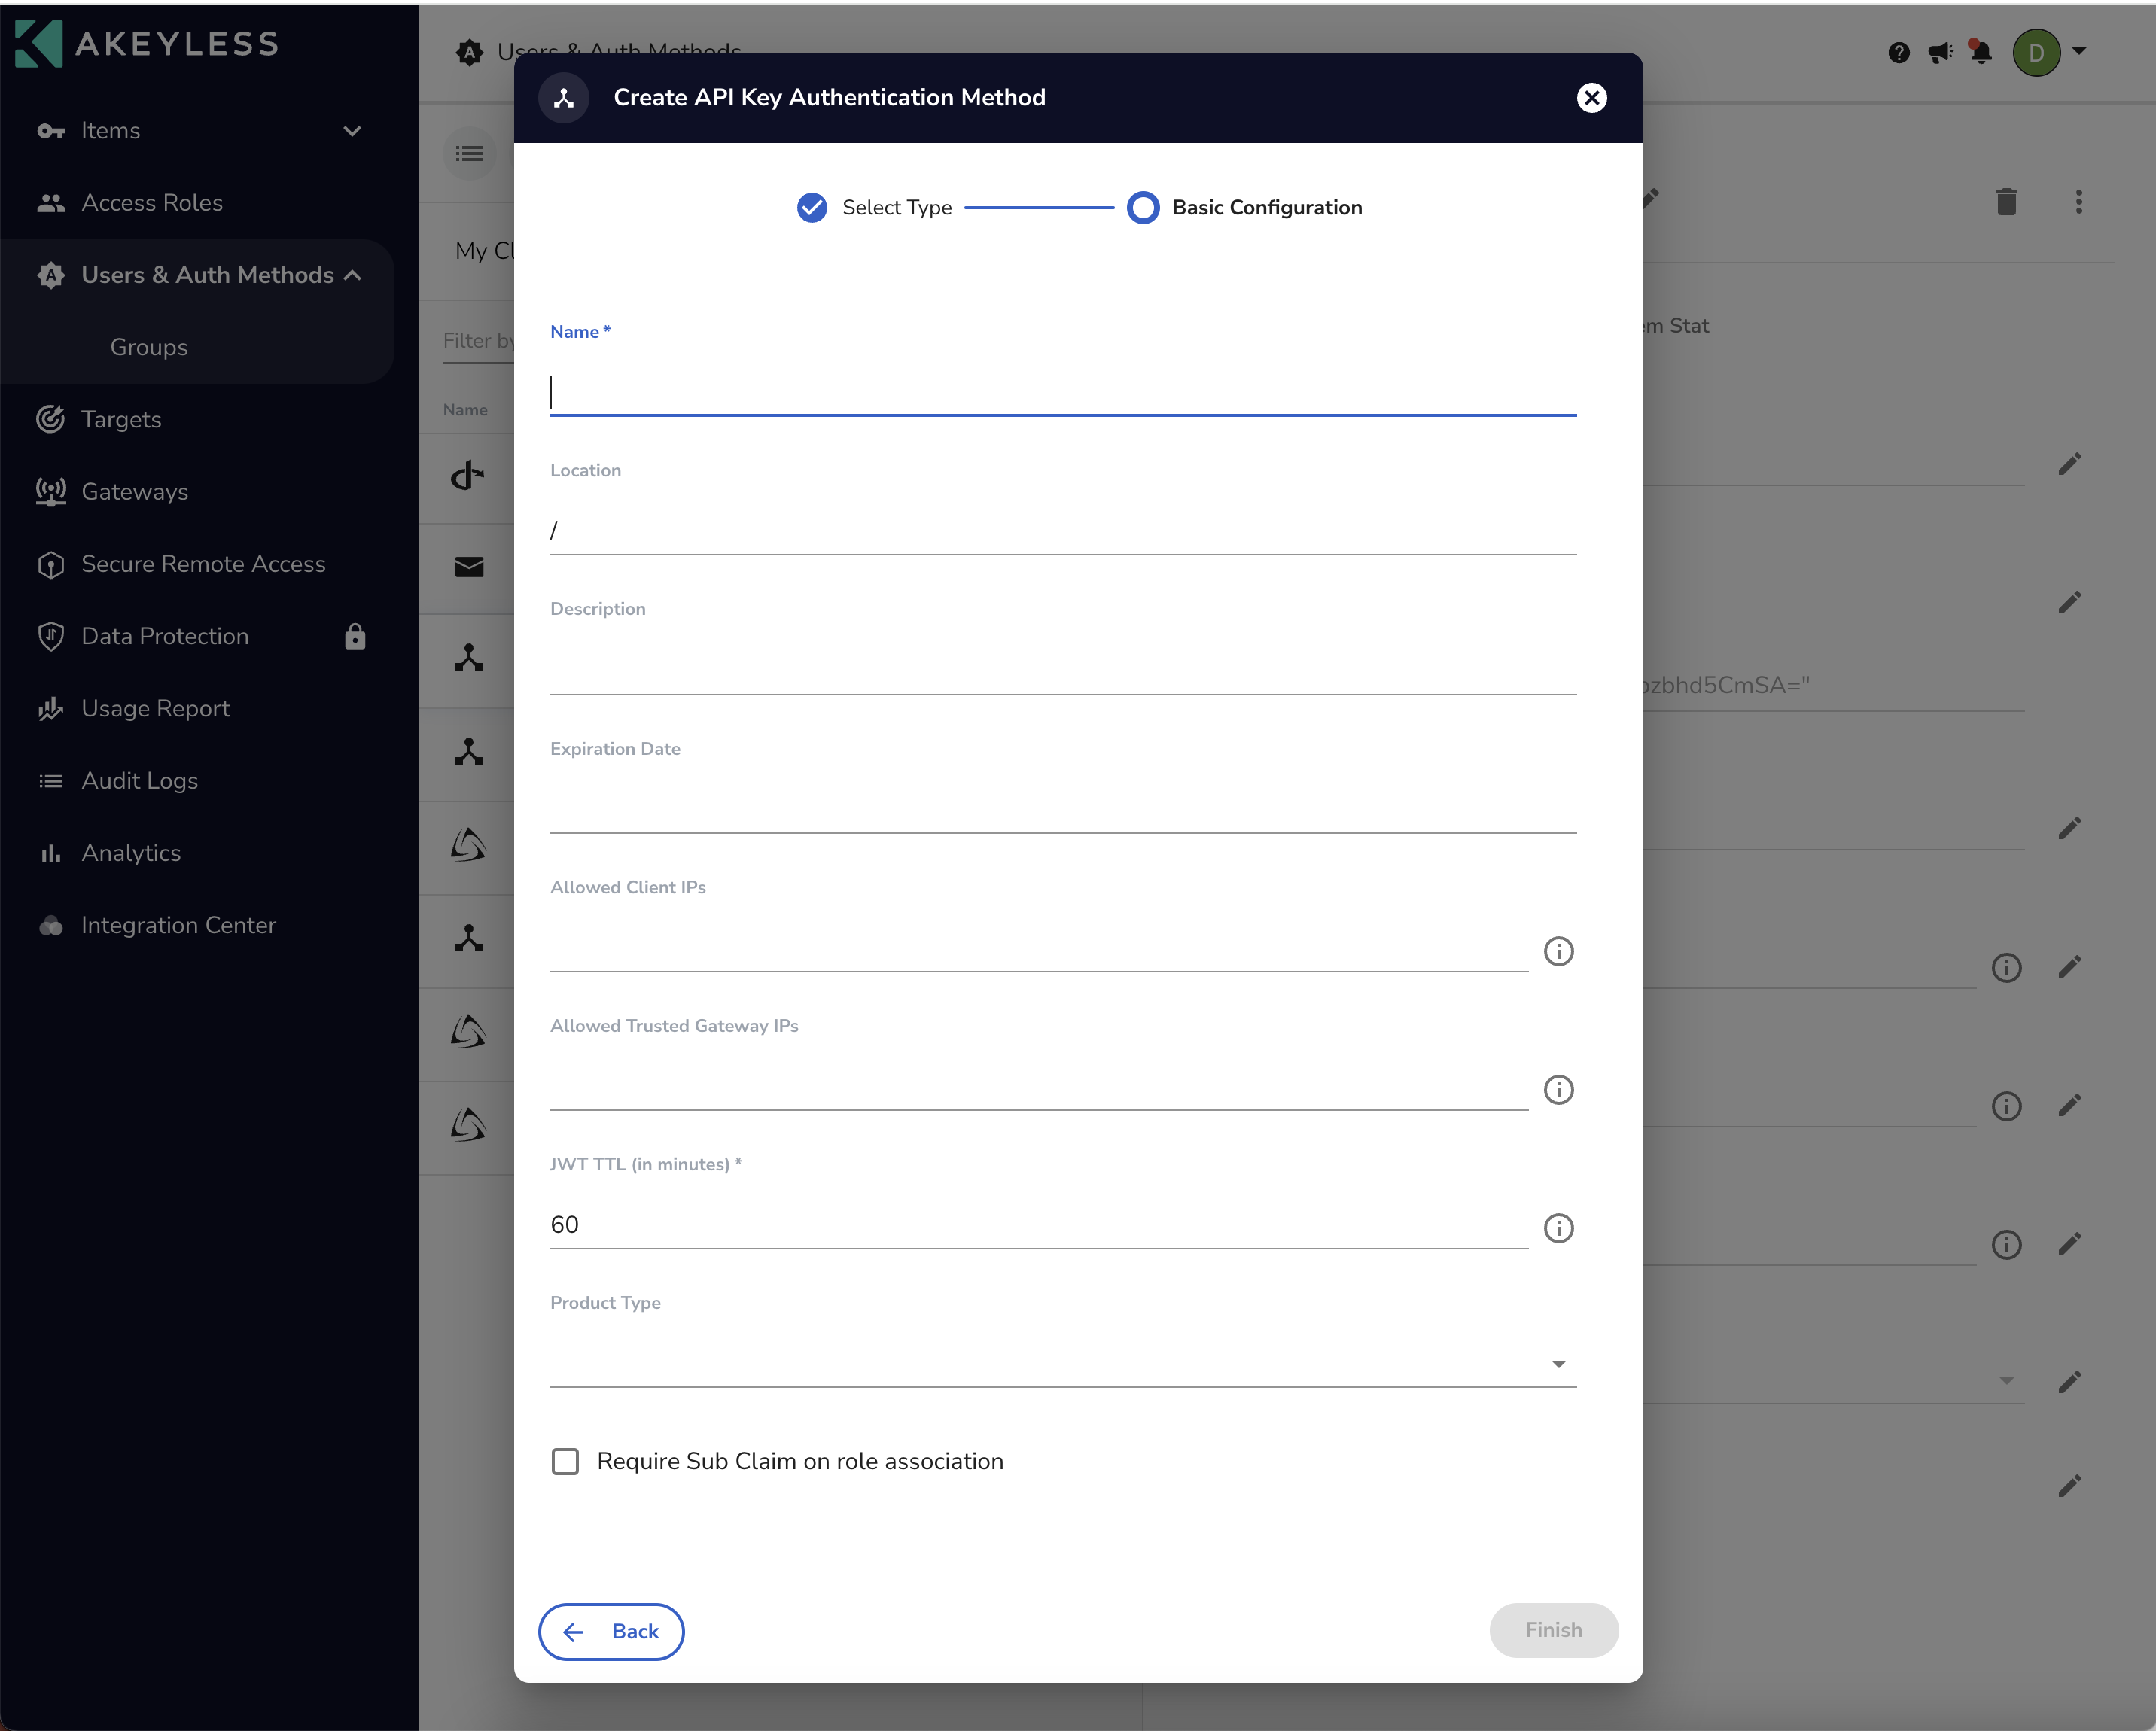
Step 4: Creating Gateway Credentials
- Log In: Access the Akeyless Console and log in with your admin account.
- Create API Key: Click on the option to create or generate a new API Key.

- Enter a name for the key and assign the necessary permissions.
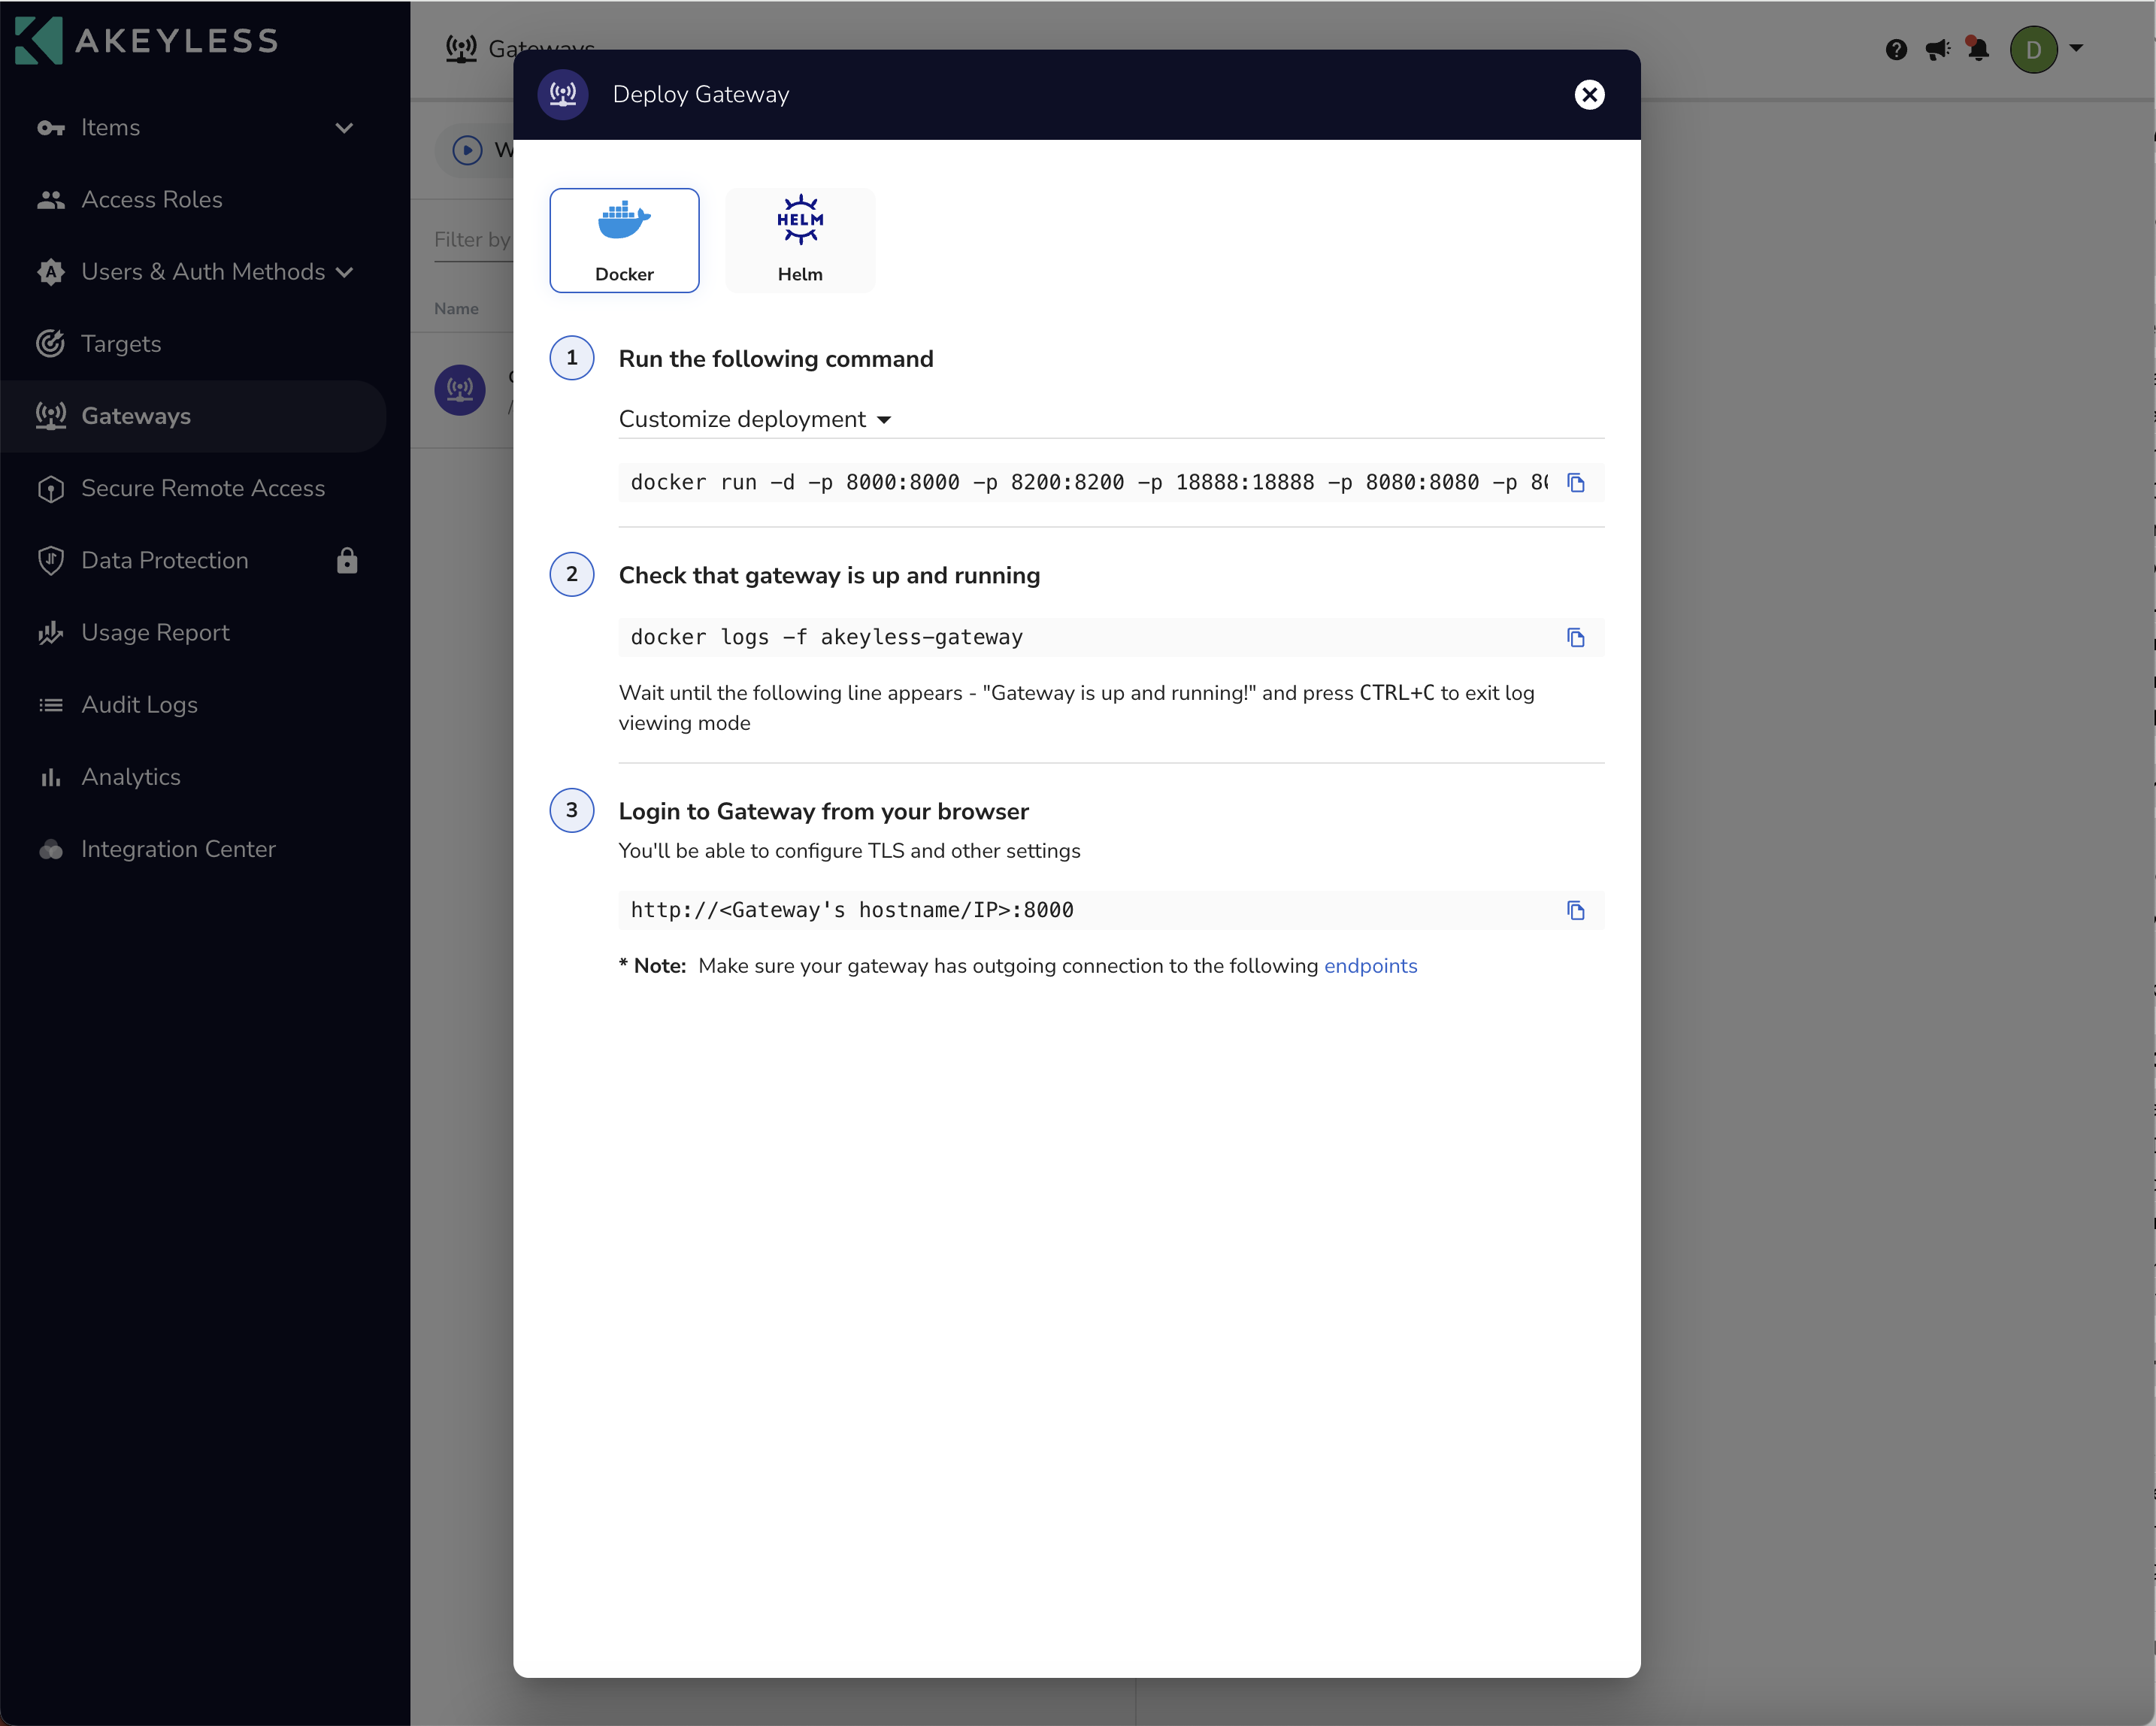
Step 5: Deploy the Gateway
Step 6: Verify Gateway Operation
- After deploying the gateway, it’s important to ensure it's operational. You can verify this by checking the gateway's status in the Akeyless Console. There should be indications or a status update showing that the gateway is active and connected.
Updated 5 months ago
Did this page help you?