Linked Target
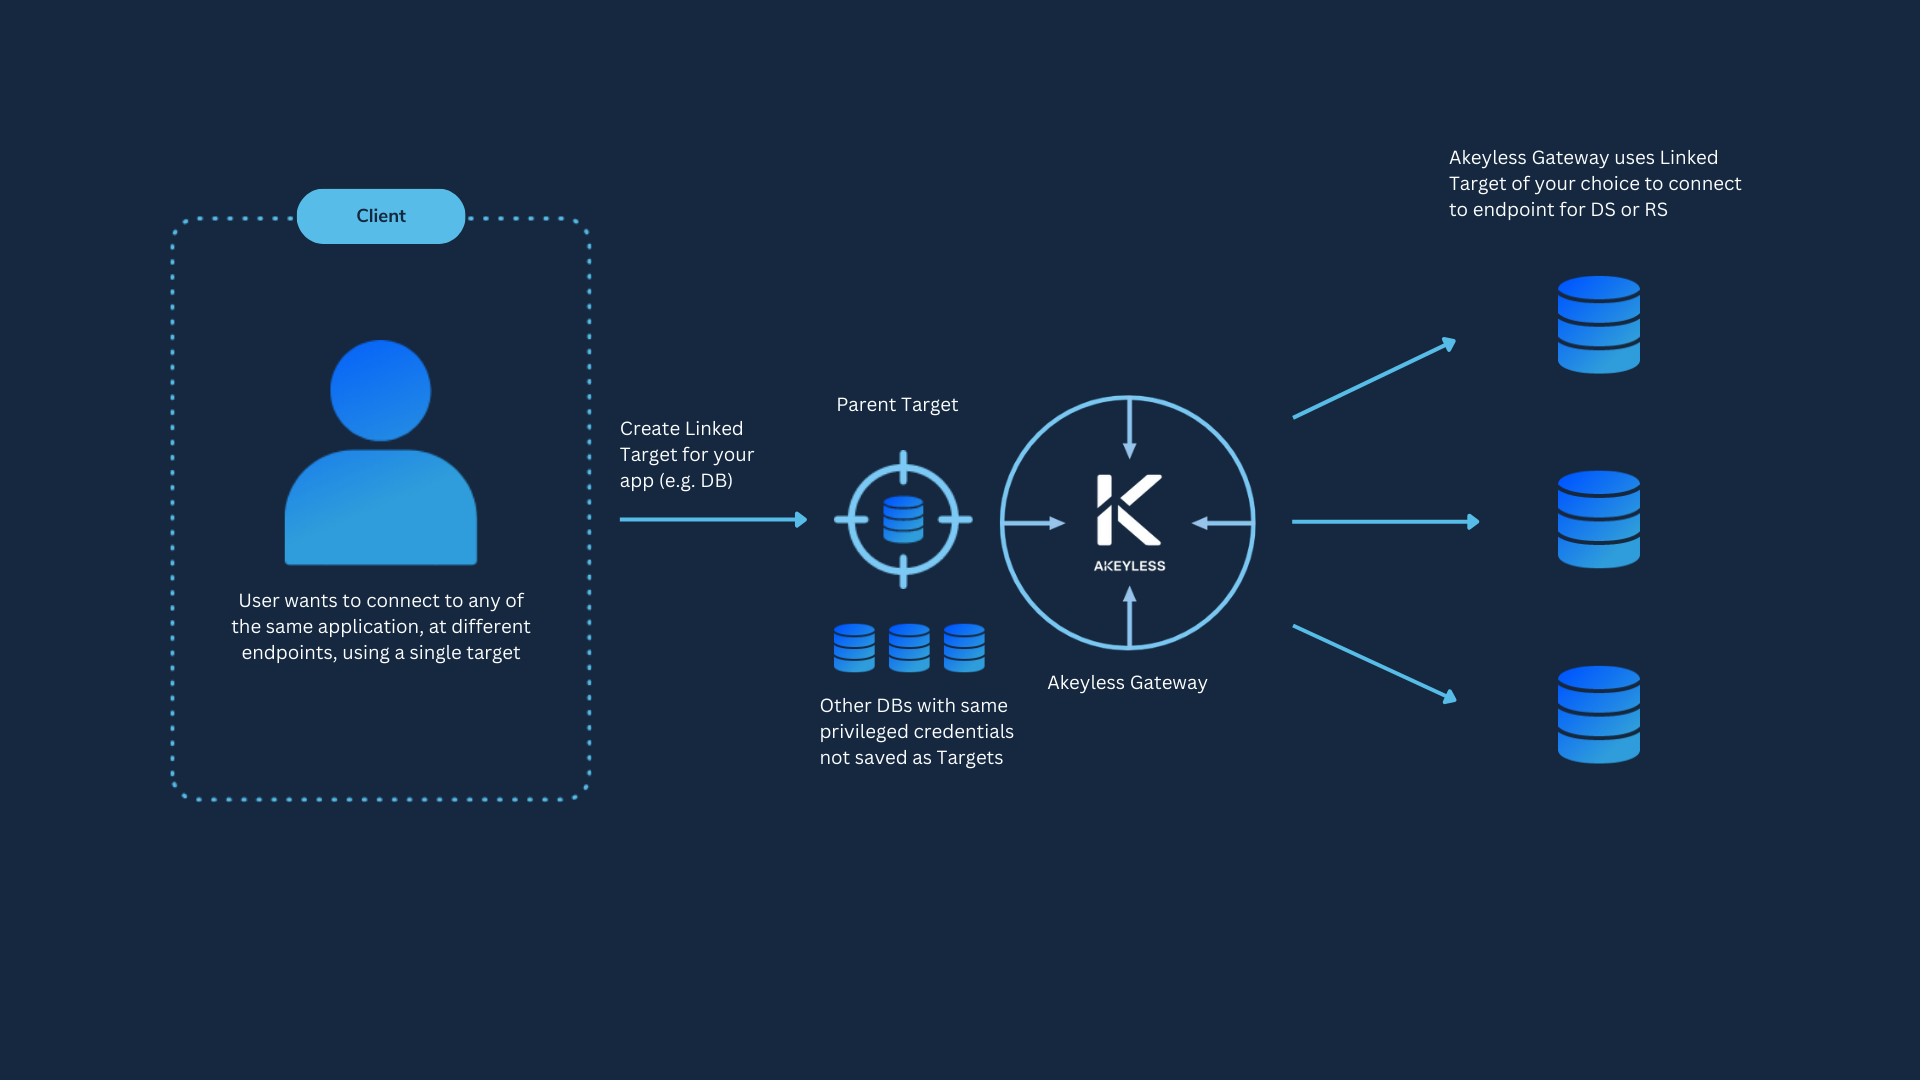
A Linked Target is an item that represents a collection of hosts that are considered equivalent for access control while sharing privileged credentials.

For example, a Dynamic Secret that is used for Secure Remote Access can be created with a Linked Target that uses the privileged credentials which are stored within a standard Target, where users that are sharing the same access level can use a single Dynamic Secret item to generate JIT credentials to establish a remote session using Akeyless Secure Remote Access solutions to different endpoints while ensuring the privileged credentials are rotated periodically.
Linked Targets can inherit credentials from a designated Parent Target, thus giving the hosts of the Linked Target the option to authenticate with any service tied to their Parent Target. Based on the Parent Target type, the Linked Target item can be used for the relevant Dynamic Secret type. Otherwise, when no Parent Target is selected, the Linked Target object can hold a collection of hosts, that might be used for Secure Remote Access cases like SSH and more.
Working With Linked Targets with the CLI
These commands are unique to Linked Targets and do not apply to standard Targets.
Create a Linked Target with the CLI
To create a Linked Target, use the following command:
akeyless target create linked \
--name <linked target name> \
--parent <parent target> \
--hosts <hosts>
Where:
-
name: A unique name for the Linked Target. The name can include the path to the virtual folder where you want to create the new Linked Target, using slash/separators. If the folder does not exist, it will be created together with the Linked Target. -
parent-target-name: The name of an existing parent target from which to inherit credentials. -
hosts: A comma-separated list of server hosts and server descriptions joined by a semicolon;(for example,server-dev.com;My Dev server,server-prod.com;My Prod server description).
You can find the complete list of parameters for this command in the CLI Reference - Akeyless Targets section.
NoteAll Linked Target hosts will be added to the Secure Remote Access hosts lists automatically
Update a Linked Target with the CLI
To update an existing linked target use the following command:
akeyless update-linked-target --name <linked target name> --new-name <new name>\
--parent <parent target> --hosts <hosts>
Inserting new values in the hosts or parent target parameters will change their values, but the name must be changed by way of the new-name parameter.
Working With Linked Targets in the Console
Create a Linked Target in the Console
To create a Linked Target follow these steps:
-
Log in to the Akeyless Console, and go to Targets > New > Infra (Linked).
-
Define a Name for the Linked Target, and specify the Location as a path to the virtual folder where you want to create the new Linked Target, using slash
/separators. If the folder does not exist, it will be created together with the Linked Target. -
Select a Protection key with a Customer Fragment to enable Zero-Knowledge and click Next. For more information, read here.
-
Fill in these parameters:
- Parent Target: Select an existing target from which to inherit credentials.
- Hosts: Select the + Add Host(s) button and insert host information. To add more than one host, select the + to the left of the hostname in order to open another row. After finishing, select Confirm.
-
Click Finish.
Update a Linked Target
To change any information find the Linked target in your Targets tab and select edit.
Parent-less Linked Target
While the main advantage of a Linked Target item is the ability to share and utilize the same privileged credentials from its Parent Target, a Linked Target item without a Parent will represent a collection of hosts for easier and more convenient management of SSH certificates by using parent-less Linked Targets for SSH Cert Issuers with multiple hosts, eliminating the need to manage all those hosts across different items inside the Akeyless Platform.
To use a parent-less Linked Target, simply add hosts leaving the Parent Target set to "None".
Updated 20 days ago
