Build Your Chain of Trust
Akeyless offers the creation of a private certificate authority, in which you can use your certificate authority to sign intermediate certificates, which will sign server/client certificates, which is also called, Chain of Trust.
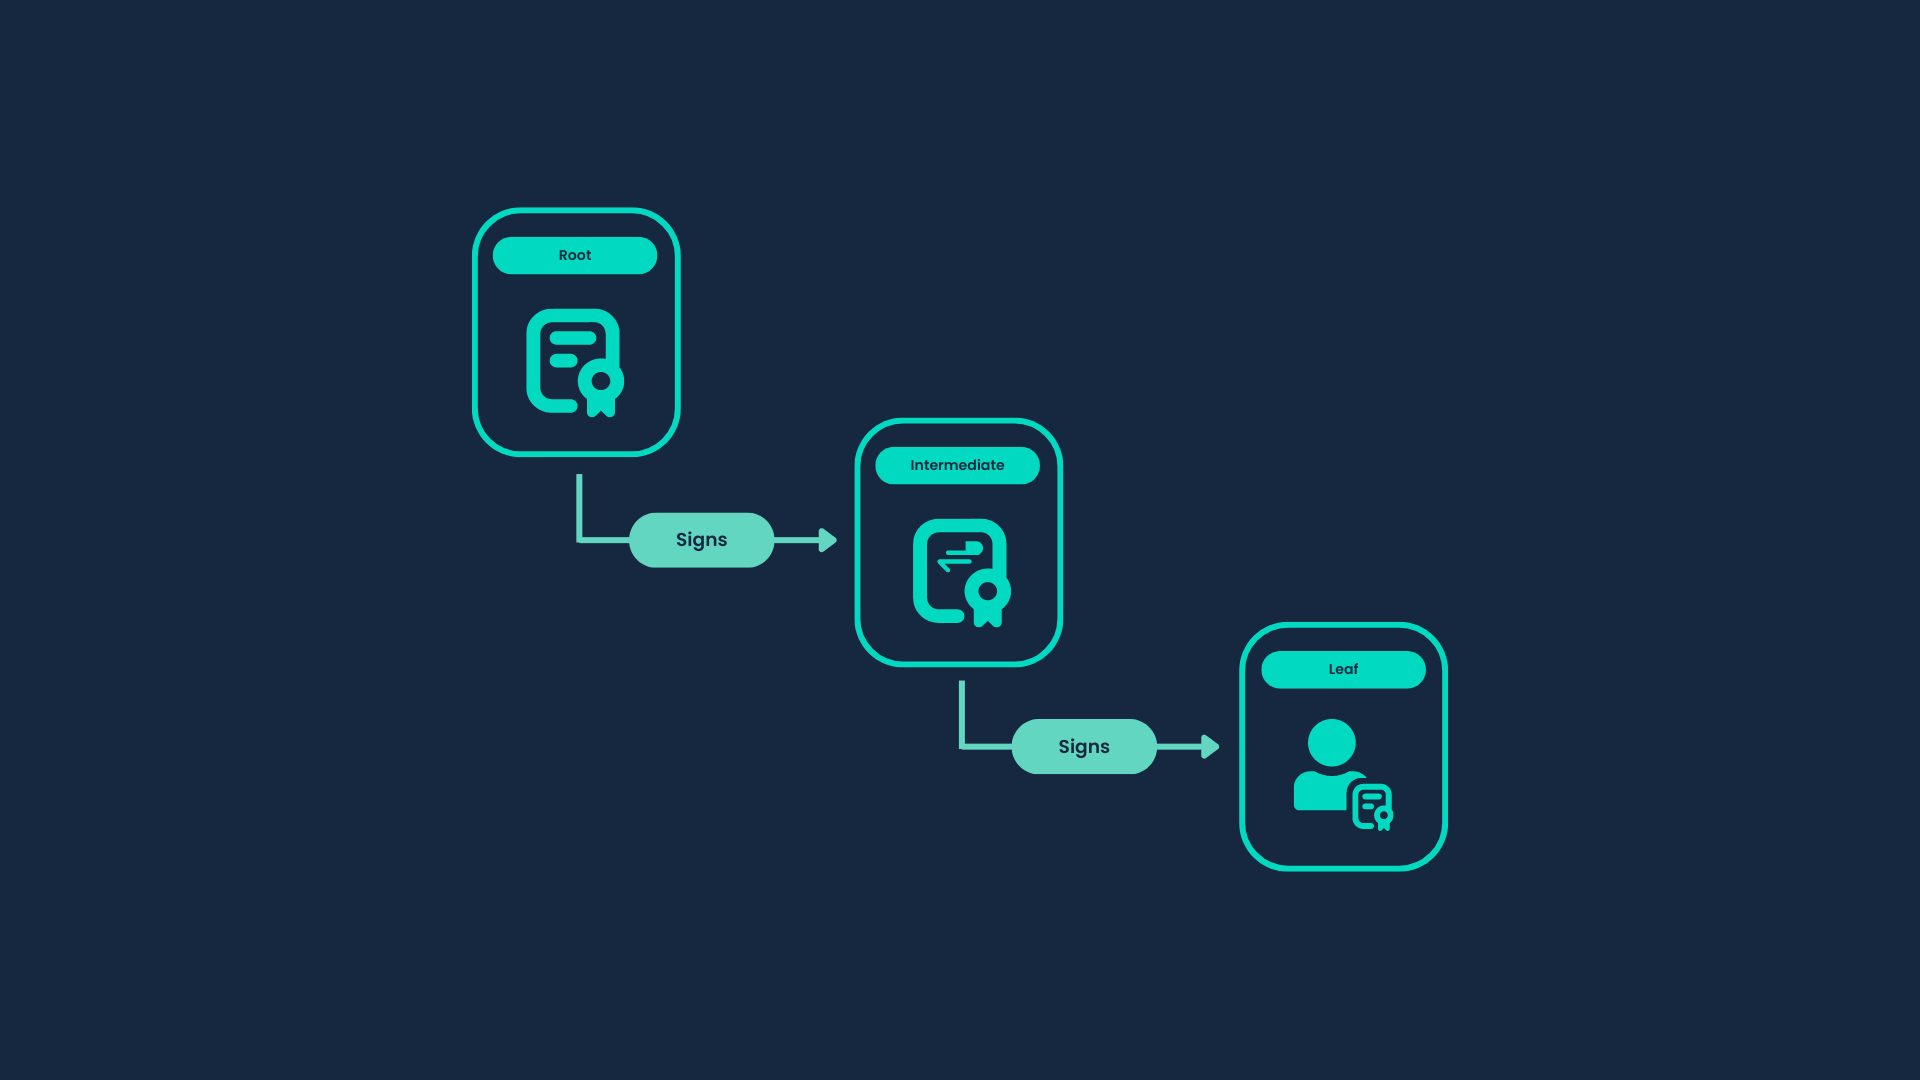
The certificate chain includes the following components:
-
Root CA: The Root CA is an authority responsible for signing Intermediate certificates. In our scenario, it functions as the Certificate Authority and we will use a DFC Key which brings an air-gapped solution out of the box, as your Private key never exists as a single piece.
-
Intermediate CA: Signed by the Root CA, the Intermediate CA is tasked with signing Client certificates. These certificates are trusted by the Root CA, as it has authorized the Intermediate CA.
-
Leaf Certificate: A certificate that is being used by any application.
Creating a Chain of Trust
The whole chain of trust can be generated using one dedicated CLI command, which automatically creates:
-
Root and Intermediate PKI Issuers.
-
Signer key with a signed certificate for each issuer which includes the following parameters:
-
basicConstraints:
critical,CA:TRUE,pathlen:1 -
keyUsage:
critical,cRLSign,digitalSignature,keyCertSign
-
Warning:Automatic creation of a Chain of Trust is not supported if the Item Naming Convention configured in Global Settings contains a literal space character. In this case, follow the manual guide to build the Chain of Trust.
Example for generating a Chain of Trust where the common-name for the Root issuer will be: My-First-Chain root CA and the common-name for the Intermediate issuer will be: My-First-Chain intermediate CA (You can customize the maximum path length by using the --max-path-len flag):
akeyless generate-ca \
--pki-chain-name My-First-Chain \
--allowed-domains example.com \
--extended-key-usage clientauth \
--ttl 10d \
--gateway-url 'https://<Your-Akeyless-GW-URL>:8000'
Where:
-
pki-chain-name: The name of the Root and Intermediate issuers and the main folder contain all of the related objects. -
allowed-domains: Domains that will be allowed by the issuer. -
extended-key-usage[=serverauth,clientauth]: extended key usage for the intermediate (serverauth/clientauth/codesigning). -
ttl: The maximum requested Time To Live for the issued certificate by default in seconds, supported formats ares,m,h,d. -
gateway-url: Akeyless Gateway URL (port8000).
Running the command above will create a Certificate Chain under /My-First-Chain folder, where certificates for example.com domain can be issued with a TTL of 10 days.
Tip:You can change the
pathlenvalue by using the--max-path-lenflag.
You can find the complete list of parameters for this command in the CLI Reference - Certificates section.
Items Structure
The following is the structure of the items related to the newly created CA:
- PKI - A root folder that will contain all Certs, Issuers and Keys.
- Certs - Contains the certificate for both Root and Intermediate issuers.
- Issuers - Contains the both Root and Intermediate issuers.
- Keys - Contains the signer keys for both Root and Intermediate issuers.
Once the certificate is generated, a new folder named certificates will be created, containing the newly generated certificate.
Issuing a Leaf Certificate
Once the chain is created, a certificate can be generated from the Intermediate issuer.
First, Create a Certificate Signing Request:
akeyless generate-csr \
--name <key name> \
--common-name example.com >> example.csr
Where:
-
name: Required, Full path to the key to sign the CSR. -
common-name: Required,common-nameto be included in the CSR certificate. In this case, we useexample.comas this is thecommon-namethat we set in the allowed domains of the issuer.
The next step will be to generate the certificate using the Intermediate issuer:
akeyless get-pki-certificate \
--cert-issuer-name /My-First-Chain/pki/issuers/intermediate/issuer \
--csr-file-path example.csr
Where:
-
cert-issuer-name: The full path for the Intermediate issuer. -
csr-file-path: Path to the CSR that was created earlier.
Running the command above will create a certificate with the example.com Common Name. Clicking View Certificate Details shows the full certificate chain.
Multi-Intermediate PKI Chains
In some compliance environments you may need a deeper PKI hierarchy, for example:
Root CA → Intermediate CA 1 → Intermediate CA 2 → Leaf Certificategenerate-ca creates a single Root → Intermediate chain in one step. To build a deeper chain, repeat the intermediate layer manually:
- Run
generate-cato create the Root CA and the first Intermediate CA (Intermediate 1). - Create an Intermediate 2 signer key and CSR, then sign that CSR using the Intermediate 1 issuer.
- Attach the signed certificate to the Intermediate 2 signer key.
- Use
create-pki-cert-issuerto create a second PKI issuer (Intermediate 2), setting--signer-key-nameto the Intermediate 2 signer key. - Issue leaf certificates from Intermediate 2.
Known Limitation: --allow-subdomains and Other Flags
--allow-subdomains and Other Flagsgenerate-ca does not expose all PKI issuer configuration options. Flags such as --allow-subdomains are not available in generate-ca and cannot be applied to the issuers it creates.
Important:If your intermediate issuer requires
--allow-subdomainsor similar options, you must create it manually usingcreate-pki-cert-issuerand pass the flags directly, rather than relying ongenerate-cato set them automatically.
For example, to create an intermediate issuer that allows subdomains:
# Prerequisite: /My-First-Chain/pki/keys/intermediate-2/key already exists
# and has a certificate signed by /My-First-Chain/pki/issuers/intermediate/issuer.

akeyless create-pki-cert-issuer \
--name /My-First-Chain/pki/issuers/intermediate-2/issuer \
--signer-key-name /My-First-Chain/pki/keys/intermediate-2/key \
--allowed-domains example.com \
--allow-subdomains \
--is-ca true \
--ttl 10d \
--gw-cluster-url 'https://<Your-Akeyless-GW-URL>:8000'
Refer to the CLI Reference — Certificates section for the full list of create-pki-cert-issuer parameters.
Updated 2 months ago